How to Sew a Knot Pillow (QUOE TIPS)

Sometimes in my fiber arts journey, I have a wild idea that I just have to act on. These ideas can have many inceptions and inspirations. For me, inspiration strikes at the most particular times, and often the pieces I am inspired by are not expected.
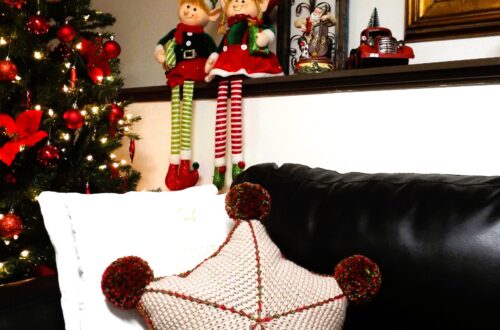
I have based designs off of a wall in a motel, a dish towel, my favorite snack, and most recently, a carved stone necklace. The latter of the aforementioned ideas was the catalyst for this pillow. I stumbled upon a beautiful hand-carved stone necklace that resembled the Celtic knots I am so apt to draw and design. Upon further research, I discovered the closest knot to the piece and decided that I had to turn it into a unique and chic throw pillow. Now, you can too!
Let’s get started.
Supplies:
- Gold Eye Applique Needles (Size 12)- Art. No 497/12
- Desk Needle Threader (Green) – Art. No 4072
- Rotary Cutter (45mm) – Art. No 7500
- Cutting Mat (18″ x 24″) – Art. No 7521
- 5-in-1 Sliding Gauge – Art. No 9506
- 6-in-1 Stick ‘n Stitch Guide – Art. No 9584
- Pen Style Chaco Liner – Art. No 4710-4714
- Wonder Clips – Art. No 3185
- Universal Machine Needles – Art. No 9115
- (Optional) Bodkin or Knitting Needle for turning
- Two Yards of Cotton Fabric
- 50 Weight Thread
- Sewing Machine
- Stuffing
- Ruler
- (Optional) 2 Feet of 2” diameter PVC Pipe for stuffing

Cutting Fabric: To begin, mark exactly 6” running the length of your fabric using ruler and Chaco liner on cutting mat. Then take rotary cutter and cut panel. Once complete, set aside and create identical 6” by 6′ panel.


Sewing: Place stick and stitch guide evenly at exactly 1/2” from machine needle and prepare machine to sew. Take 6” end of both panels and place together with right sides facing. Pin in place with wonderclips. Sew on machine using 1/2 guided seam, being sure to backstitch at start and end. Take off machine and place right sides together lengthwise, repeating the process down the 12′ length of the panel.


Measuring and Turning: Taking the 5 in 1 gauge, measure to make sure you have approximately 2 1/5 from the seam. this will give you a 5” wide tube of fabric that is approximately 12′ long. Now it is time to turn the fabric. Many people have their own technique for turning, do whatever works for you. I prefer snipping a small hole on one end and slipping a knitting needle through it to catch the fabric. then I run the needle through the length of the tube to the other side, where I will pull out the right side of the fabric.


Stuffing: Like turning, everyone has a preferred way of stuffing their projects. I recommend investing in a PVC pipe. I had mine cut at the store to be about 2′ long, and it comes in handy for a lot of DIY projects! For filling the tube, I run the length of the tube onto the pipe, securing the end with a simple knot I can take out later.


Stuffing Continued: I then begin inserting stuffing into the pipe and tamping it down using the knitting needle I used to turn with. I wanted my pillow firm, so I was sure to pack the filling in tight. For a softer pillow, loosely pack stuffing. Fill at least 11′ of the tube with stuffing before moving to the next step. This will be the longest part of the creation process.


Tying the Knot: They grow up so fast! Now is time to create the knot. The knot I used is called a Chinese Button Knot, and you can view a video tutorial over the creation HERE from WhyKnot on YouTube. The same knotting technique on paracord can be translated to this larger scale pattern. It may take a few tries, and you can absolutely try other knots to see what you like best! I have seen many makers creating a Monkey’s Fist knot pillow as well.


Joining: Turn over your pillow to the raw ends after pulling though any unsightly slack in the project. Pinch together the ends of the tube and cut where they intersect leaving about a 1/2 of fabric overlap.


Finishing: To finish, thread an applique needle using the desk needle threader. Make sure to double your 50 weight strand of thread. Secure the 50 weight thread onto either side of the tubing, and whipstitch both sides together using stitches no more than 1/16” apart for a more finished look. Secure thread and clip to finish. Steam or roll pillow to get out any wrinkles made during its creation, and then you are done, with a one of a kind accent pillow to show for your efforts!


Follow what Quayln is up to next on his Blog | Instagram | Facebook | Pinterest | YouTube | Ravelry
Stay connected with Clover on Facebook | Twitter | Instagram | Pinterest | YouTube | Ravelry
[mc4wp_form id=”11289″]


