Visible Mending: Sashiko Jeans Patch
It’s happened to us all; you’re putting on your favorite jeans and notice a hole or tear in the knee. Maybe there’s a tear where the pocket meets the hip…
GAH! And they are your FAVORITE pair. It should be pointed out that the jeans in this video were one of Jason’s favorite pair of jeans. In fact, y’all might recognize them from our Flower Power Patch post for Clover. These jeans were destined for… scratch that… they were actually IN the scrap bin to be cut up for a denim project we are working on. Now, with a few patches and sashiko reinforcements, they are back in regular use and are wearable art! 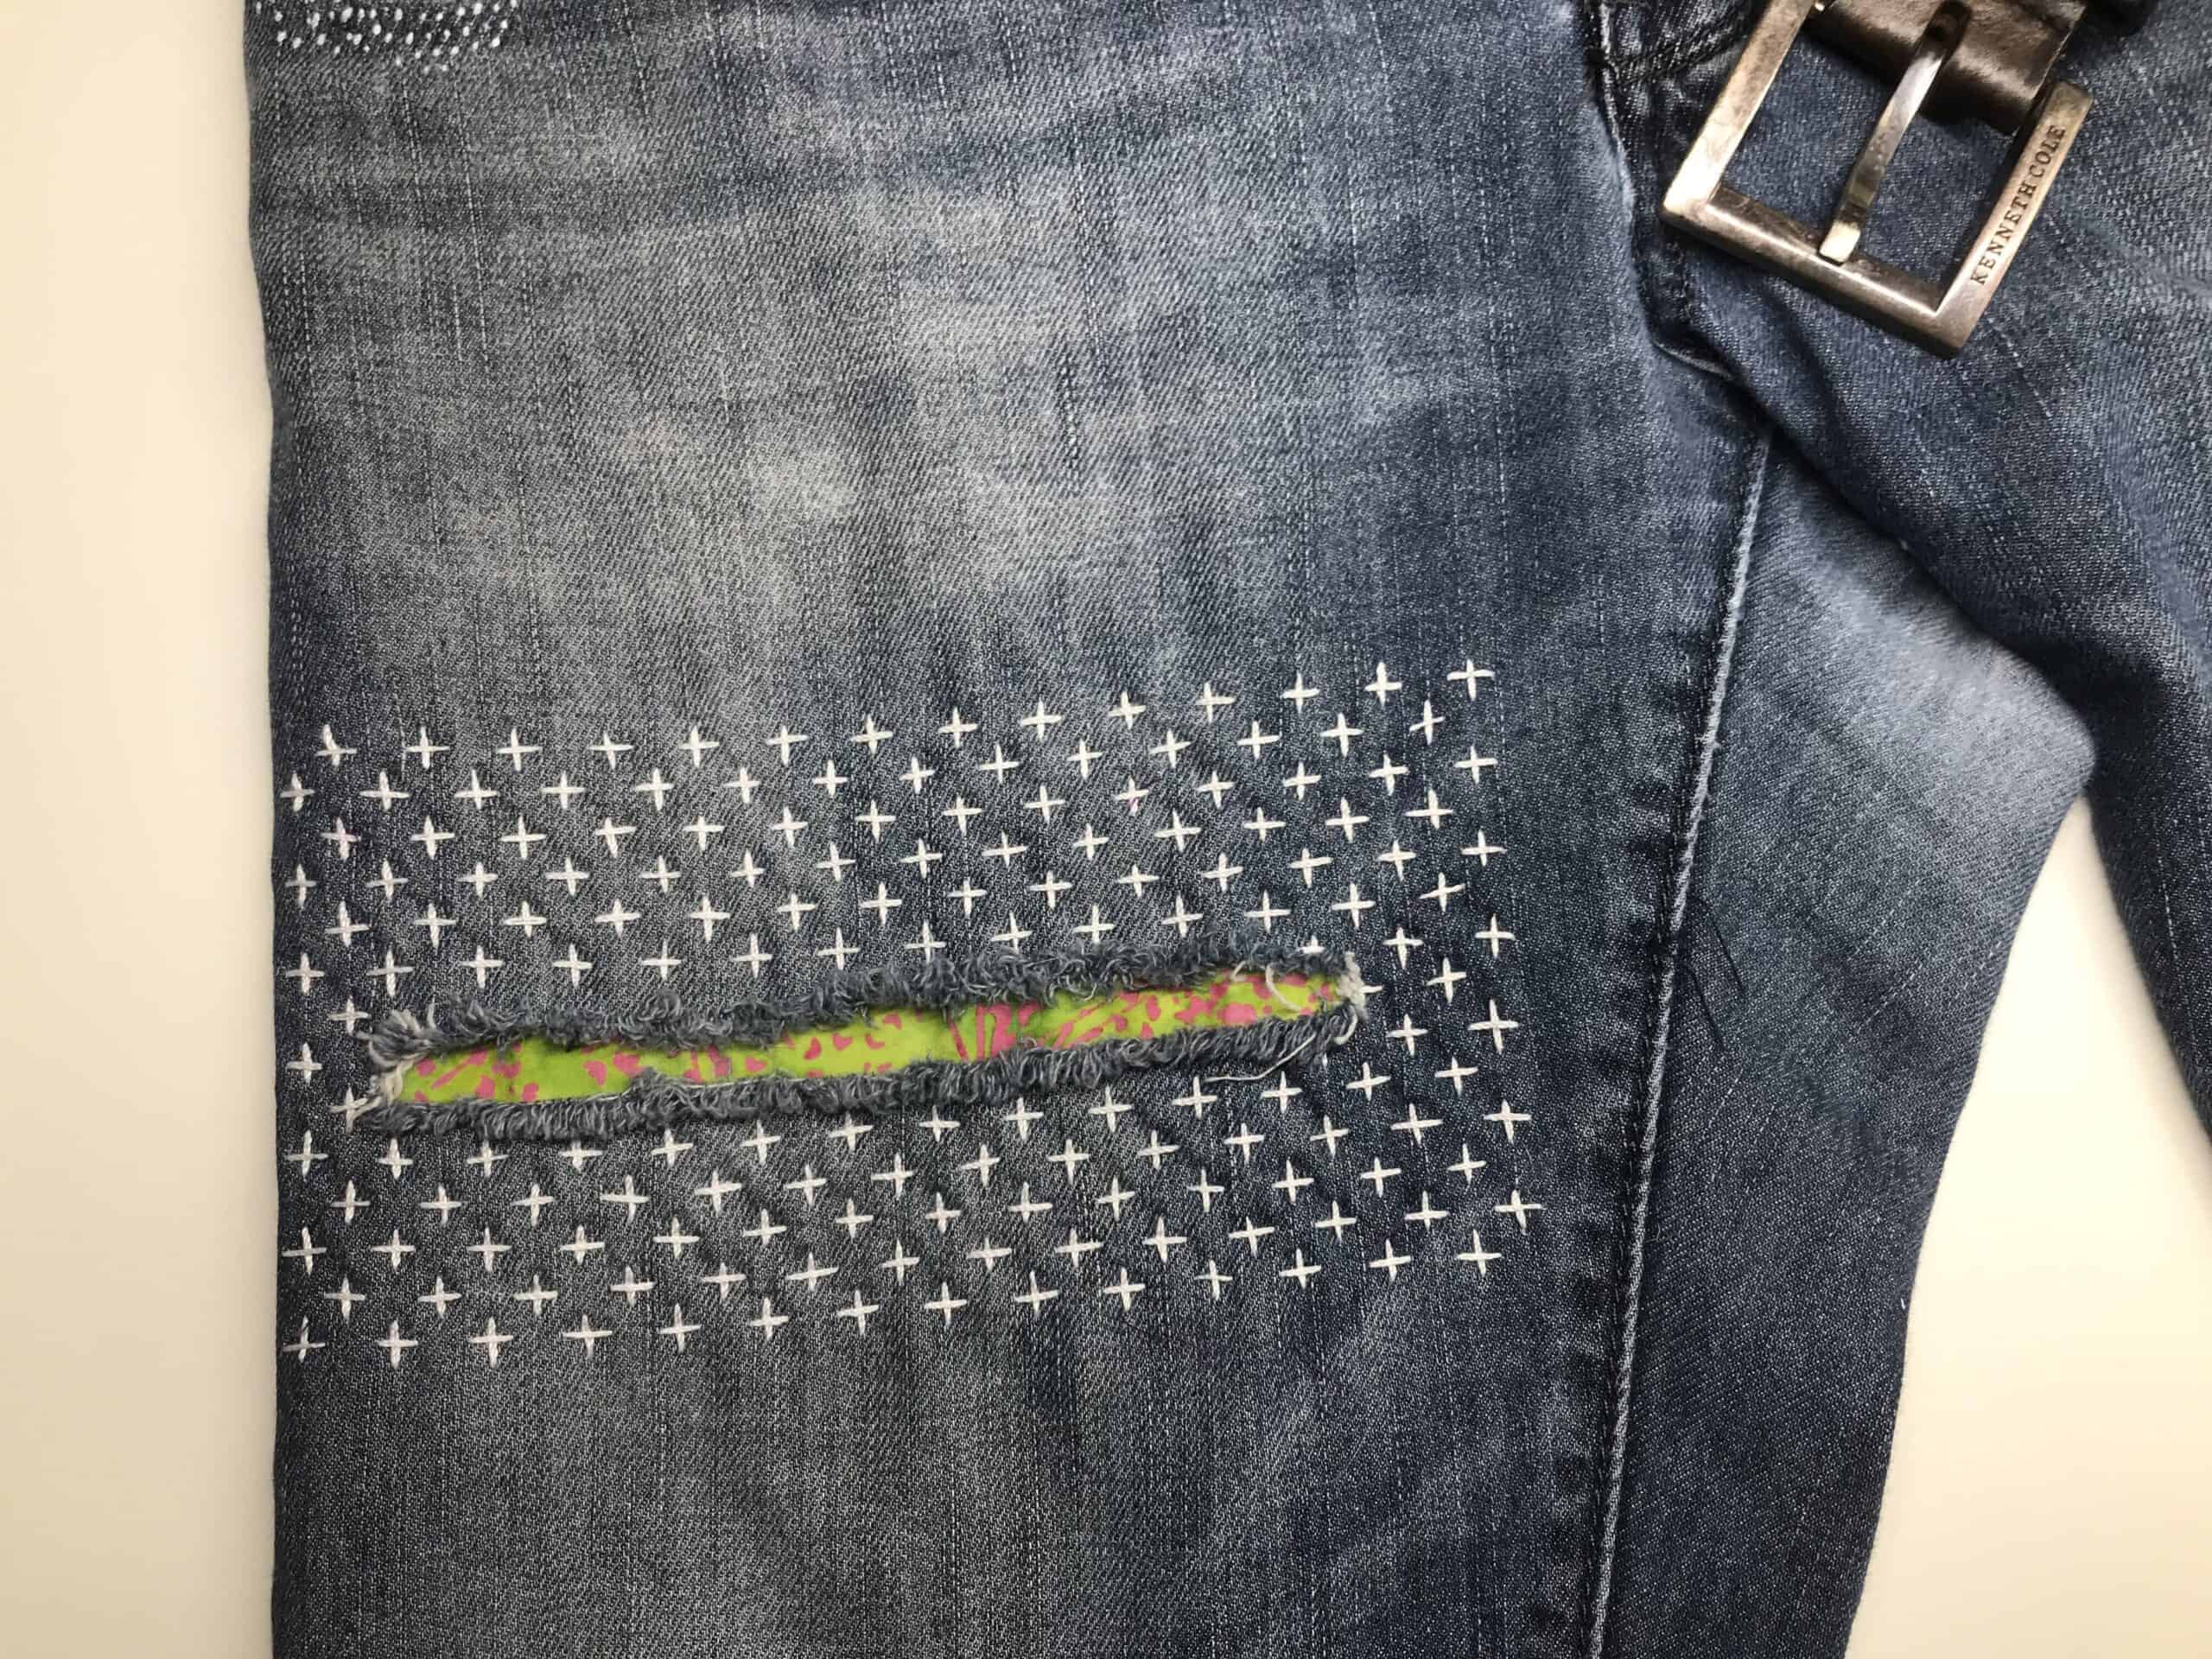
Video Tutorial:
Or scroll down for written instructions.
What you’ll need:
Notions and Tools
- Triangle Tailor’s Chalk (Art. No 432)
- Black Gold Applique/Sharp Needles (Art. No 4670-73)
- Basting Thread – Aurifil 50wt cotton thread
- Glue – Elmer’s Glue Stick
- Fabric Marker – Air Erasable Marker Purple – Thick (Art. No 5031)
- Desk Needle Threader (Art. No 4072)
- Long Type Sashiko Needles (Art. No 2009)
- Adjustable Ring Thimble with Plate (Art. No 611)
- 12 weight Aurifil thread, Shibaguyz Fab Sashiko Essentials Thread Collection
- Patchwork Scissors (Art. No 493/L)
Materials
Torn Jeans
NOTE: For this project, we patch a pair of jeans, but this same technique works on any worn or torn fabric.
Fabric
Any fabric scrap that is 2-3” larger than the hole being patched
Instructions
Choose Your Patching Fabric
Select fabric that will peek out of the hole once your stitching is complete. This is totally up to you and your taste. Play with different colors, patterns and textures.
Cut the Patch
Turn the jeans inside out and lay your fabric on top of the hole.
Cut the fabric patch so it is at least 2-3” larger than the hole.
Check the placement on the front so that you like any patterns that peek out.

Glue and Baste the Patch
Using a fabric-friendly glue stick like Elmer’s School Glue Stick, glue around the hole on the wrong side of the jeans. This will hold the patch in place as we baste and sashiko the patch in place.
Using a Clover Black Gold #9 Applique/Sharp needle and regular sewing thread, baste the edges of the patch to the jeans being careful to not sew through the entire leg… just the one side please. (Why do we tell you things like this that seem obvious? Because we might have done it ourselves… just sayin’…)
Remove Excess Thread
Turn the jeans right side out and remove any excess threads or fraying around the hole. It is up to you how much to remove but remember, a little fraying looks good on a patch like this. The edges will continue to fray over time with washing and wear.
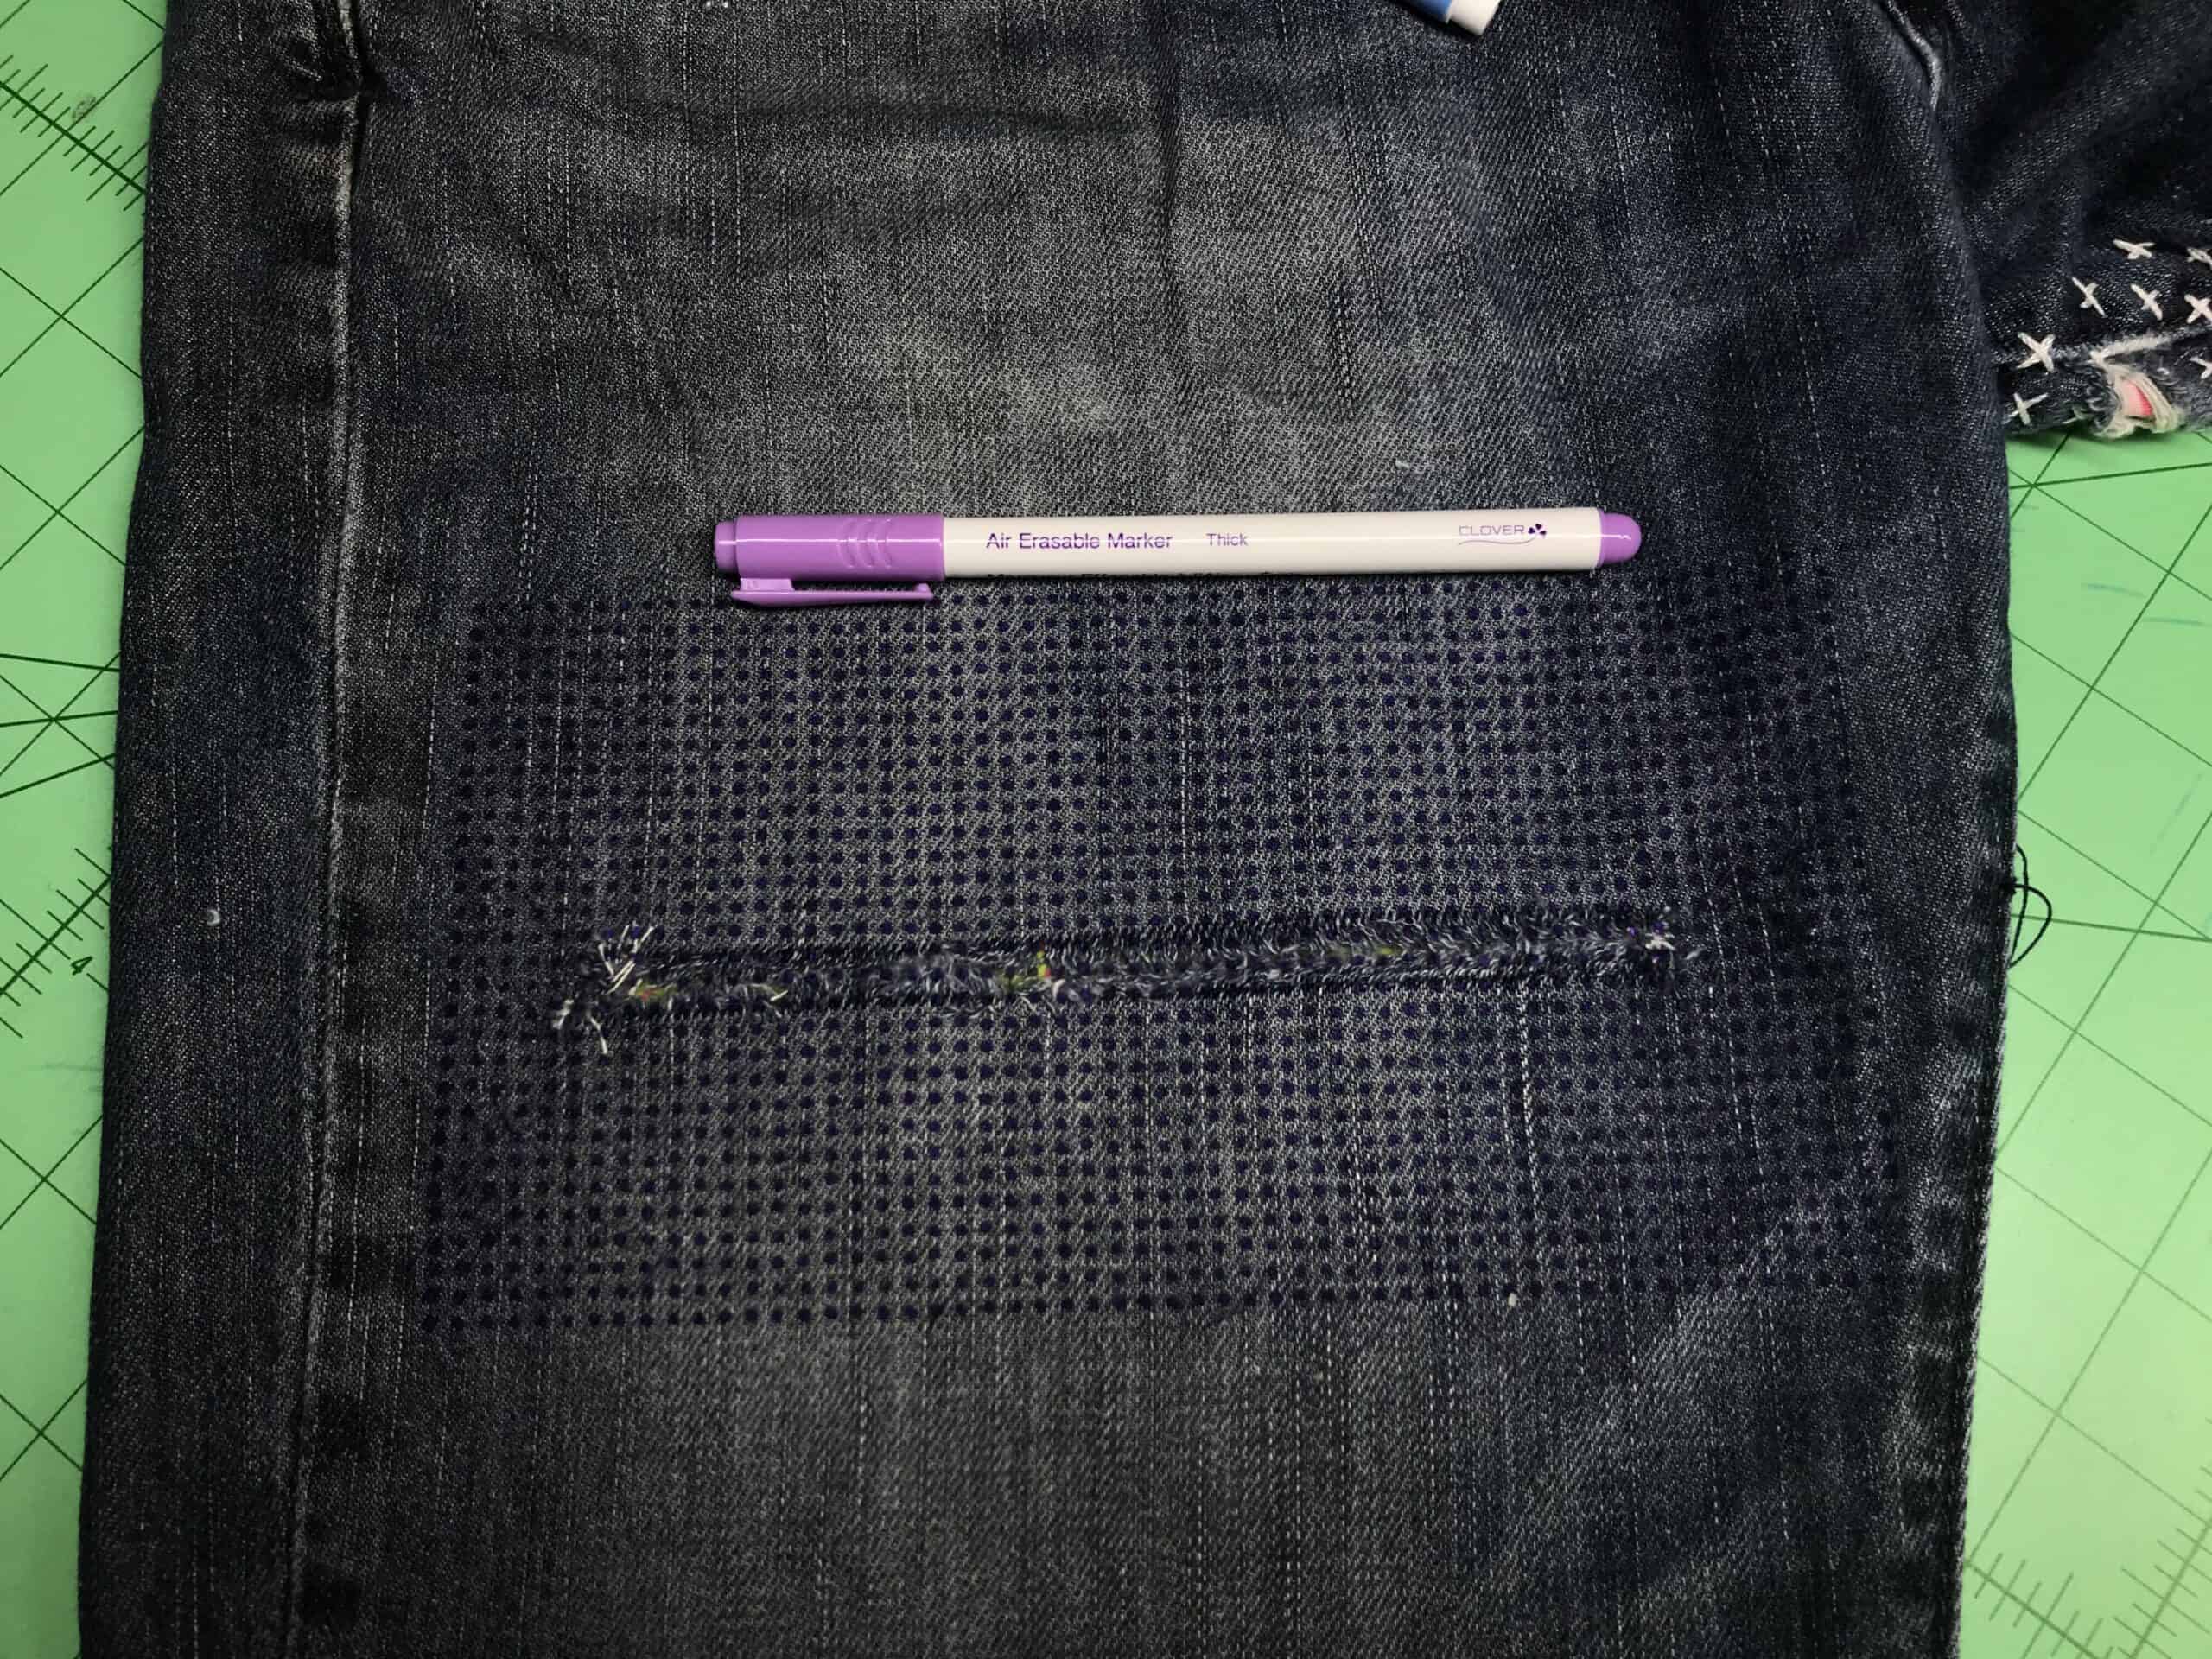
Make a Grid
Make a grid that is at least 1/4” between lines. You can use a quilting ruler but we prefer to use plastic canvas grid to keep all of our lines nice and neat.
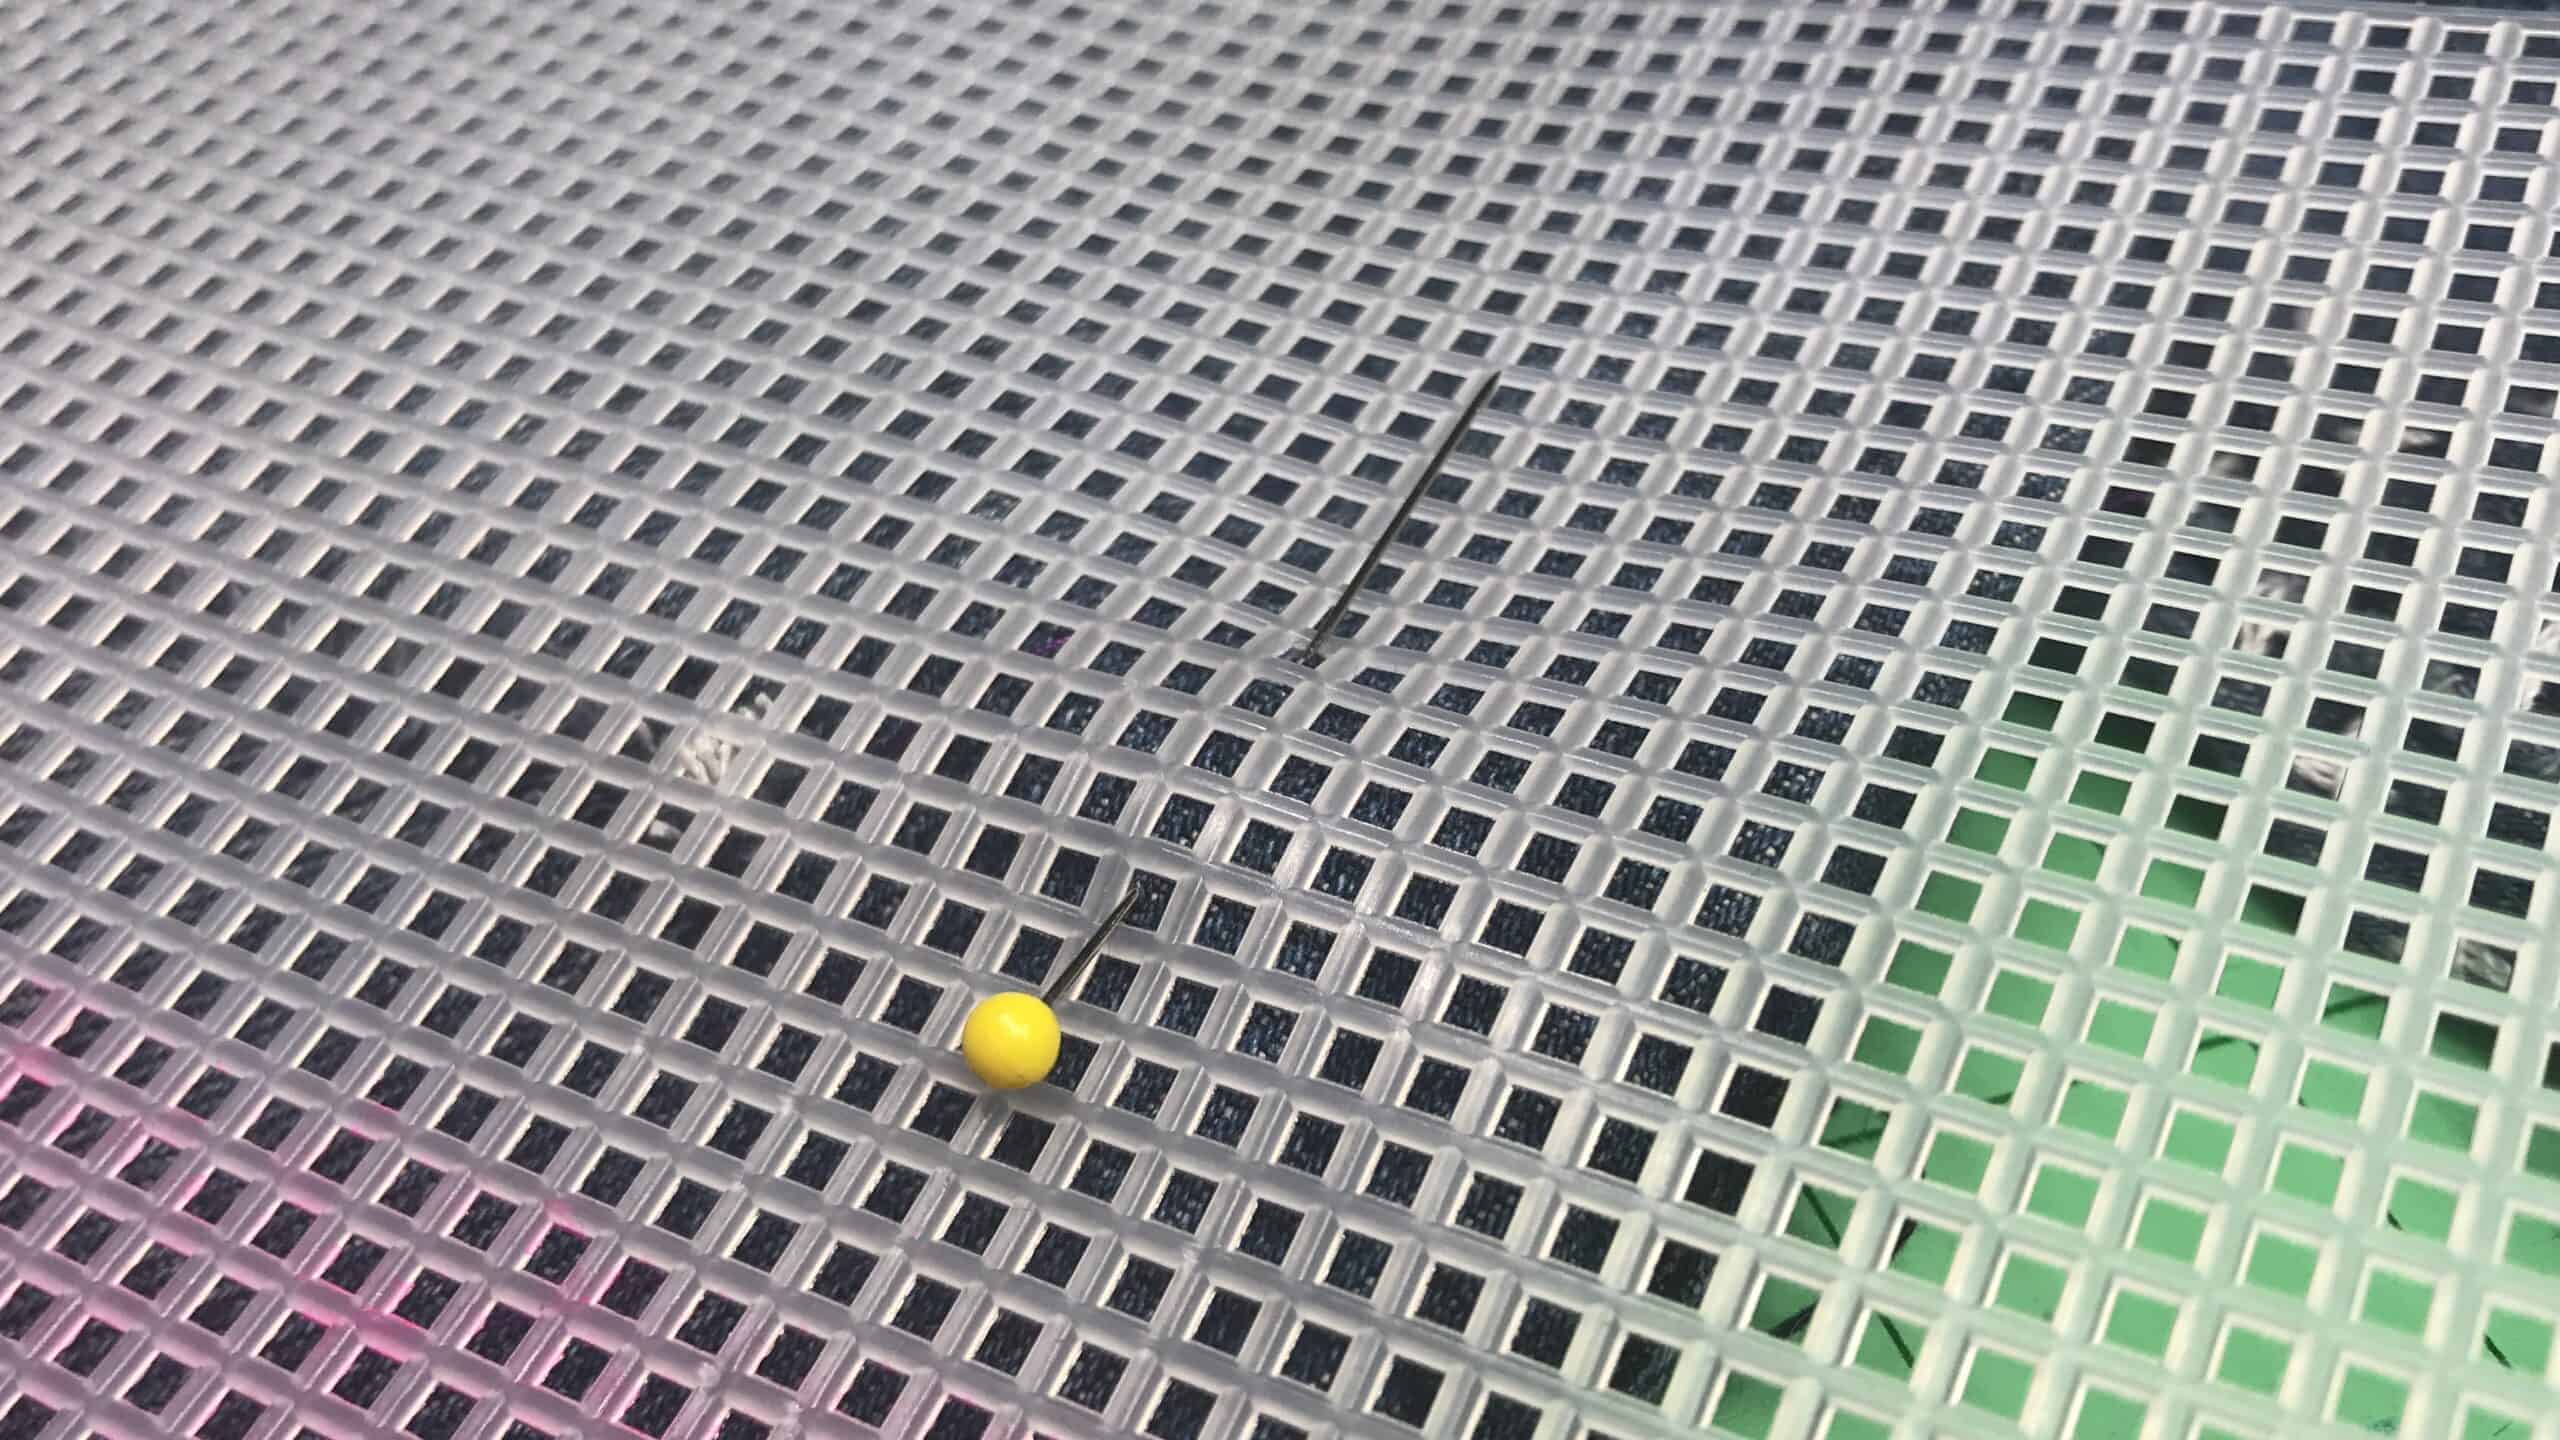
Tip: We love using plastic grid from craft and art supply stores for making grids.
- Lay the plastic grid on your jeans overlapping the hole at least 3” on all sides.
- Pin the plastic grid into place.
- Use a fabric marking pen to poke into each hole of the plastic grid, making a dot on the fabric.
- TADAAAA perfect grids in no time!
Sashiko Stitch the Patch in Place
Put on your Adjustable Ring Thimble with Plate and thread up a Long Type Sashiko Needle with heavy weight thread (we recommend using Aurifil 12 weight thread), remember to double your thread by getting a long length of thread and fold it in half, then thread the fold through the eye.
NOTE: For an introduction to sashiko, check out our video on our blog at Shibaguyz.com/tutorials
We’re including a handy diagram of how to stitch Offset Crosses here for you to use.
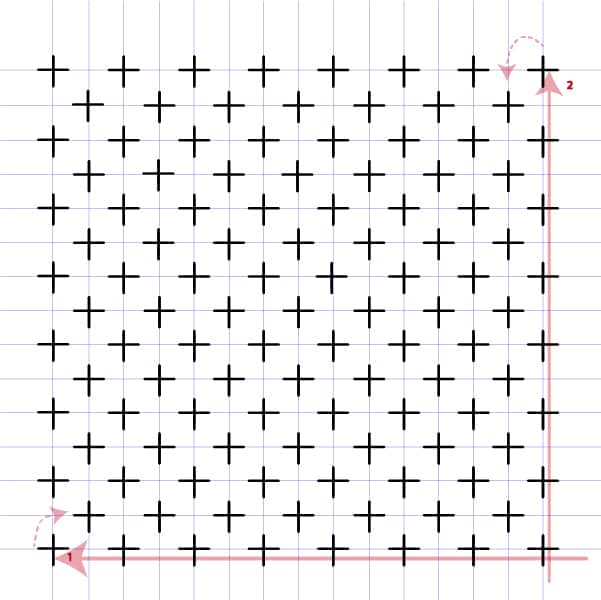
- Stitch all of the Vertical rows first.
- Remember to look at the previous rows and offset the stitches of the following row. i.e. stitch where there is a space on the previous row and leave a space where there was a stitch on the previous row.


- Stitch all of the Horizontal rows
- These are easy since all you are doing is crossing the vertical stitches!

As you stitch, remember to stitch through both the denim and the patch fabric below. You’ll turn the jeans 180 degrees with each row you stitch.
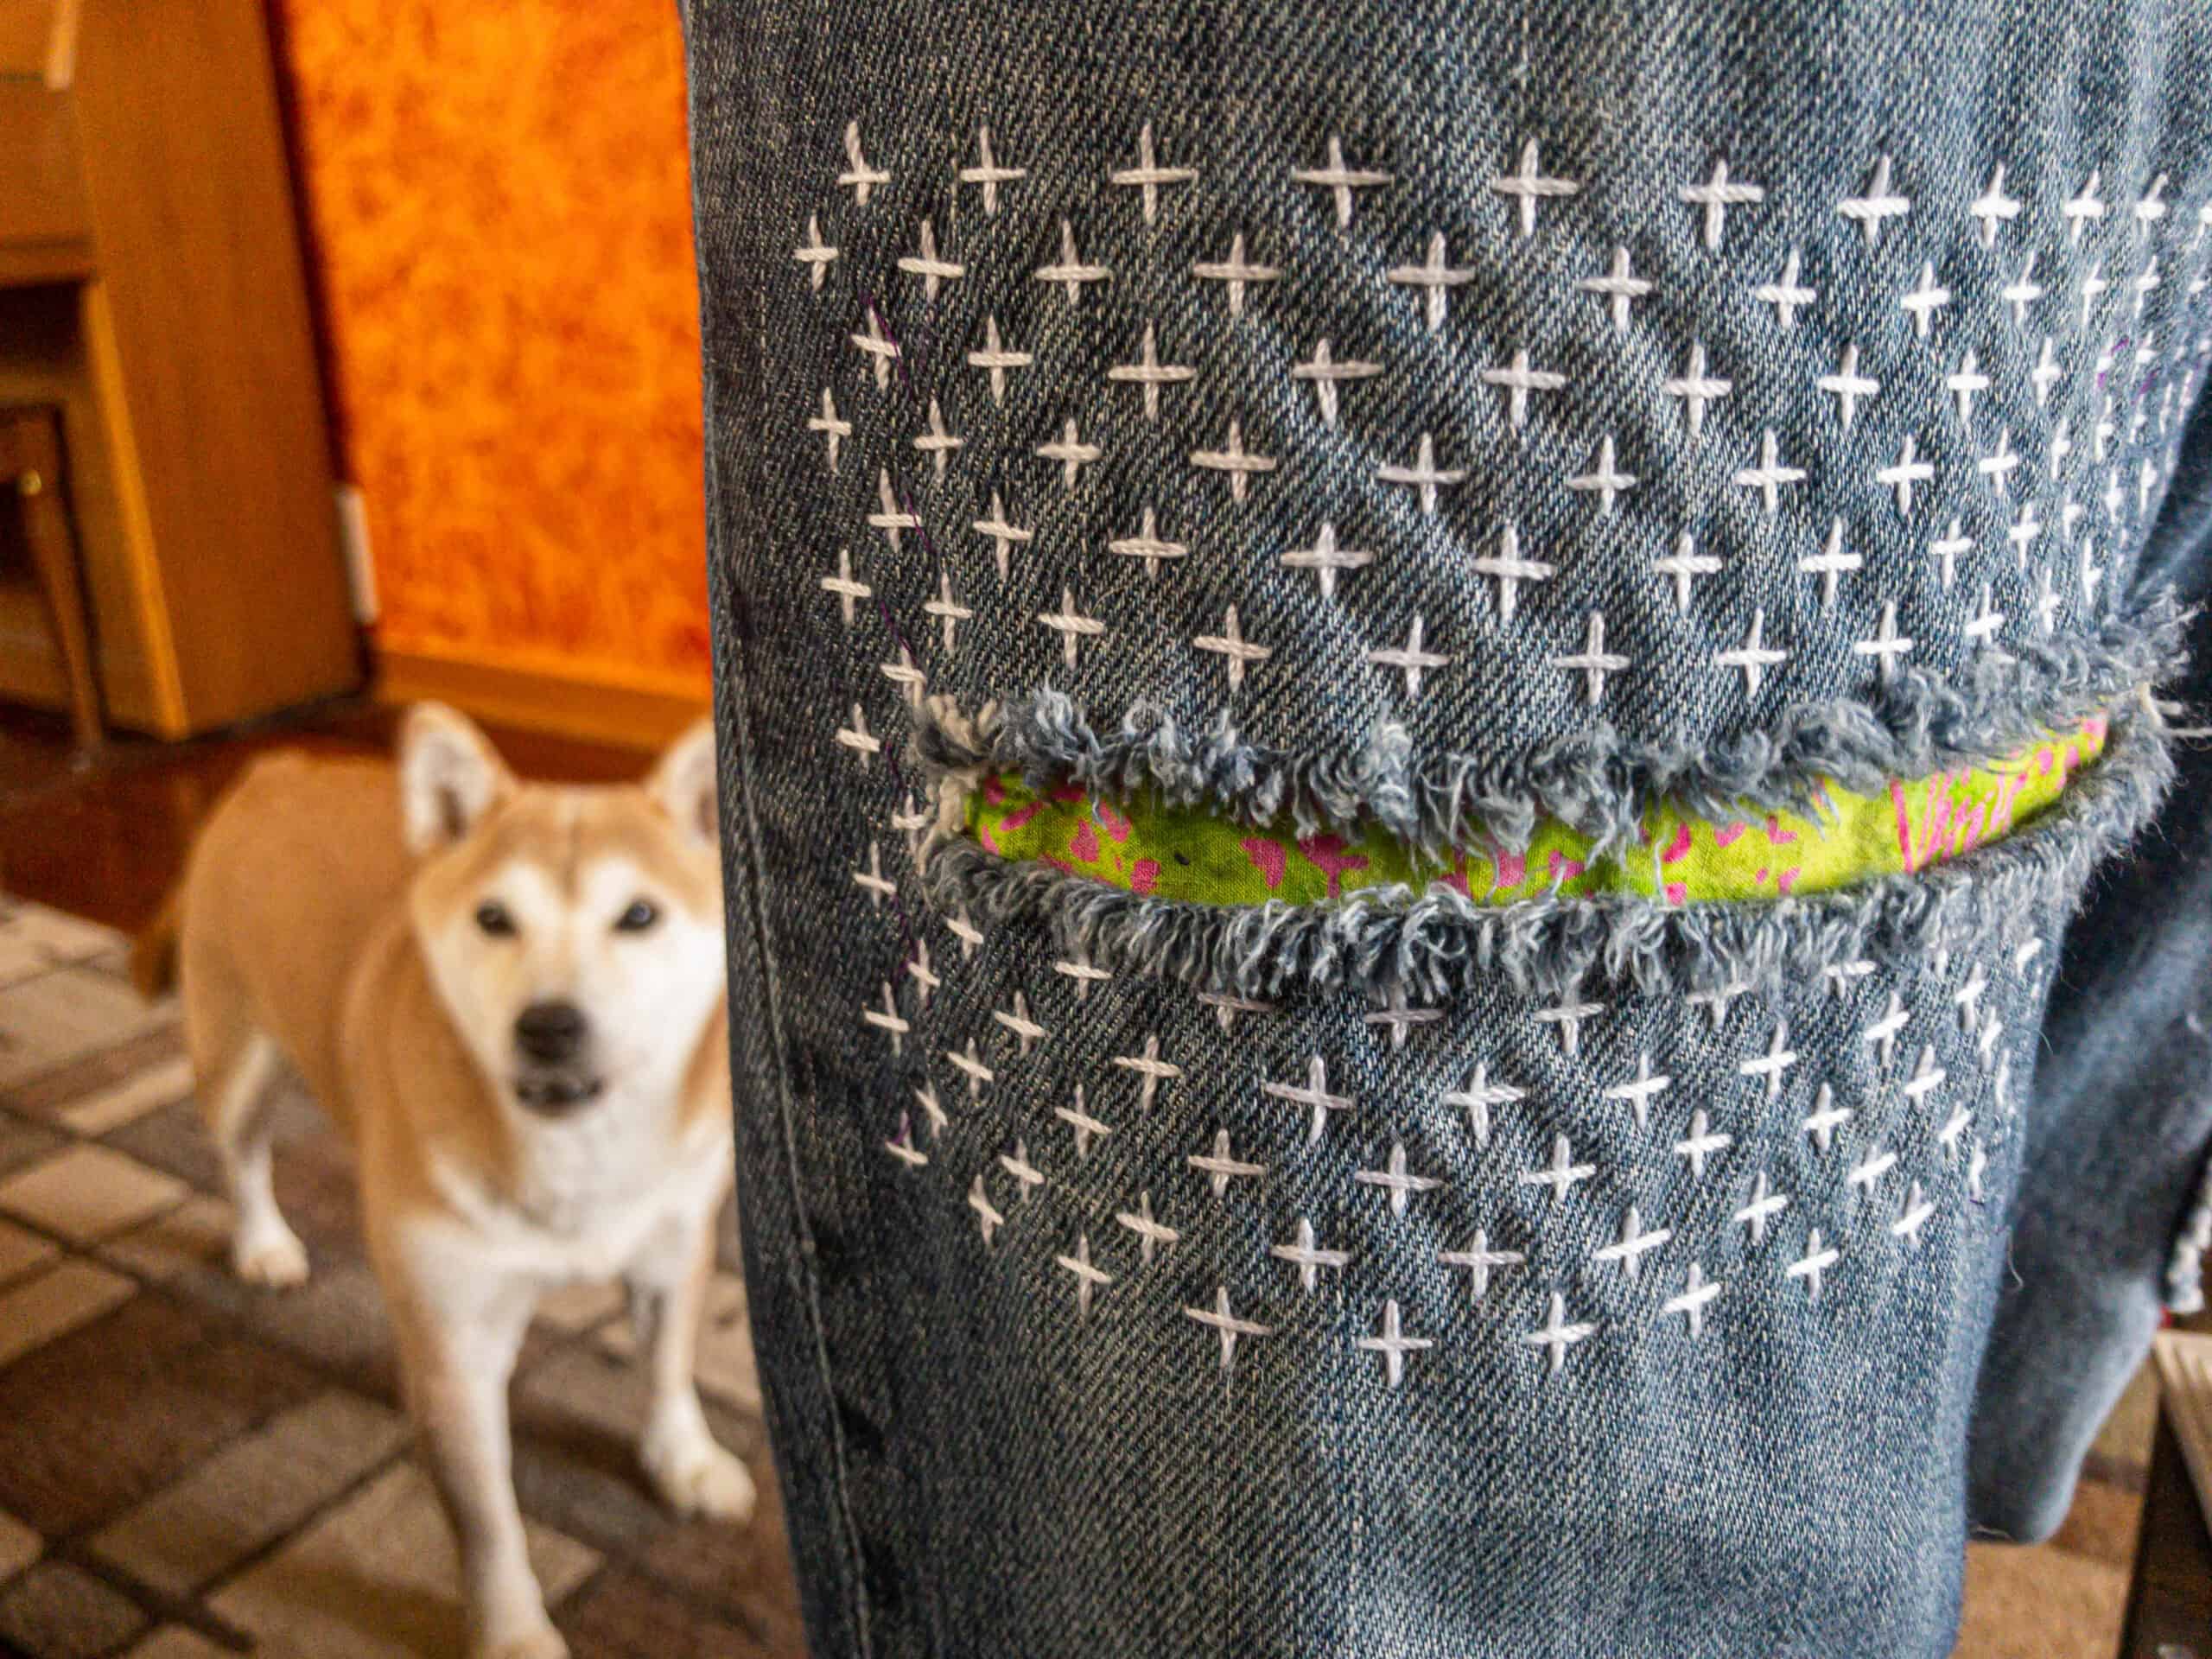
Finishing
When your stitches are all crossed, remove the basting thread then wash and dry your jeans to remove the dots.
Now, put on your FAB jeans that you saved from the scrap bag and wear them with pride. Maybe think about “accidentally” tearing them in another spot so you can make them look even better… you’re on a slippery slope. Enjoy it!
STITCH ON!
Watch the video tutorial here:
Find the Shibaguyz on Facebook | Twitter | Instagram | Pinterest
Stay connected with Clover on Facebook | Twitter | Instagram | Pinterest | YouTube | Ravelry
[mc4wp_form id=”11289″]