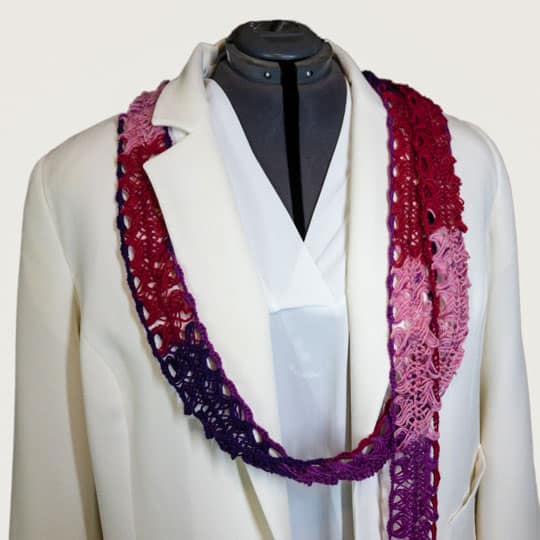
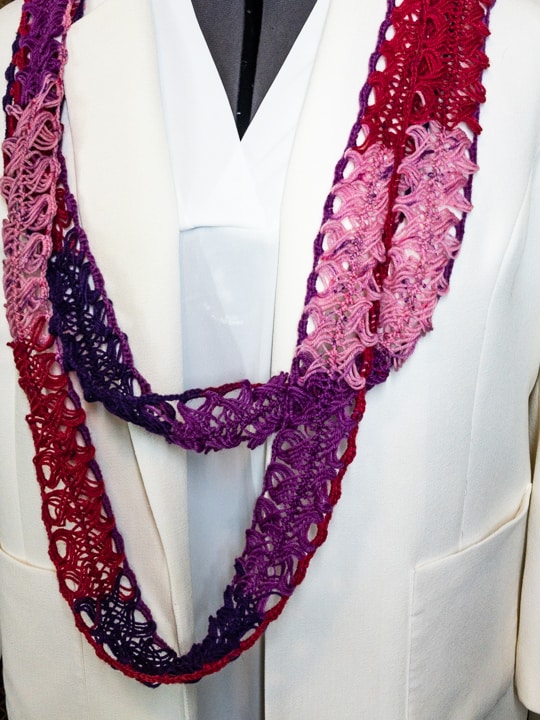
Hairpin Lace Skinny Scarf
Hairpin lace is a technique where you put single strands of hairpin lace together to make something unique. In this tutorial, you will learn how to take one strand of hairpin lace to the next level.
What you’ll need:
- Clover Hairpin Lace Tool (Art. No 3104)
- Clover Amour Crochet Hook – D/3.25mm (Art. No 1042/D)
- Mini Patchwork Scissors (Art. No 493/CW)
- Yarn of your choice – we used fingering weight yarn
- Thread – we used Aurifil 12wt cotton thread
What you’ll need to know (Abbreviations):
- Chain stitch (ch)
- Single crochet (sc)
- Yarn Over (yo)
- Hairpin Lace Tool (see Tool School Extra Credit Video)
Dimensions
Finished length: 128”/ 325 cm
Finished width: 2”/ 5 cm
Stitch Guide
Non-Stick Lace: insert hook into next 5 loops, yo and draw up a loop through all 5 loops (2 loops on hook), yo and draw through remaining 2 loops on hook (first sc made), sc 4 more times in center of loops.
Turning a Corner: work just as you would for regular Non-Stick Lace but work a total of 10 sc stitches along the top and side of the 5 loops on your hook.
Instructions:
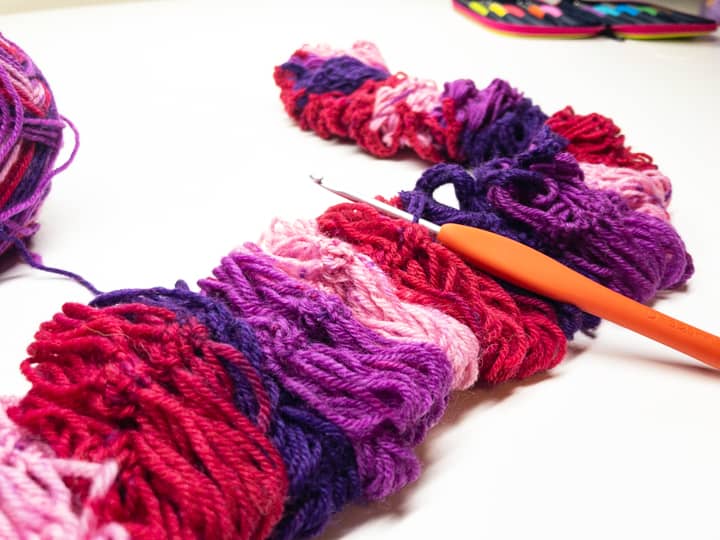
Make a length of hairpin lace according to the instructions in the Hairpin Lace Tool or Tool School Extra Credit Video.
You can make your Non-Stick Lace Skinny Scarf to any length, just be sure you have loops in a multiple of five (e.g. 105, 150, 250, 325, etc…). For our super long 128”/325 cm scarf, we made 600 loops. Don’t worry… it goes really fast once you get the hang of it.
After removing the loops from the Hairpin Lace Tool and securing the threads as seen in the video, begin your Non-Stick Lace border.
Non-Stick Lace is our take on broomstick lace without the stick… get it? Non-Stick… because there isn’t a stick… see what we di… never mind. You get it. The thread will hold hairpin lace loops securely and prevent them from twisting and tangling. For this project, we made our loops in multiples of five and that is how we will work them together as groups of five.
First, insert your hook into the live loop and turn the work so you are working across the end of your strip of hairpin lace.
First Side: Insert your hook through the first 5 loops, work Turning a Corner (see Stitch Guide), *ch 3, work Non-Stick Lace (see Stitch Guide); repeat from * to last 5 loops, ch 3, work Turning a Corner in last 5 loops.
Bridge the Gap: Sc by inserting hook under two loops of the “knot” in the center of the two rows of hairpin lace loops.
Second Side: Insert your hook through the first 5 loops of the second side and work Turning a Corner, *ch 3, work Non-Stick Lace; repeat from * to last 5 loops, ch 3, work Turning Corner in last 5 loops.
Bridge the Gap: Sc by inserting hook under two loops of the “knot” in the center of the two rows of hairpin lace loops.
Join with Duplicate Stitch
Cut tail and draw last loop still on hook all the way through the last stitch made until the tail passes through that stitch.
Skip the next stitch (first stitch of round). Insert hook under both loops of next stitch and pull yarn tail through.
Insert hook from back to front through where the tail originally came from (the last stitch made) and pull yarn tail through.
Finishing
Block to finished dimensions
Weave in ends.
Watch the video tutorial here:
Still have some questions about the Hairpin Lace Tool? Tune in to our Facebook Live Friday, May 1st at 1:30pm PST with the Shibaguyz for a tutorial and live Q&A!
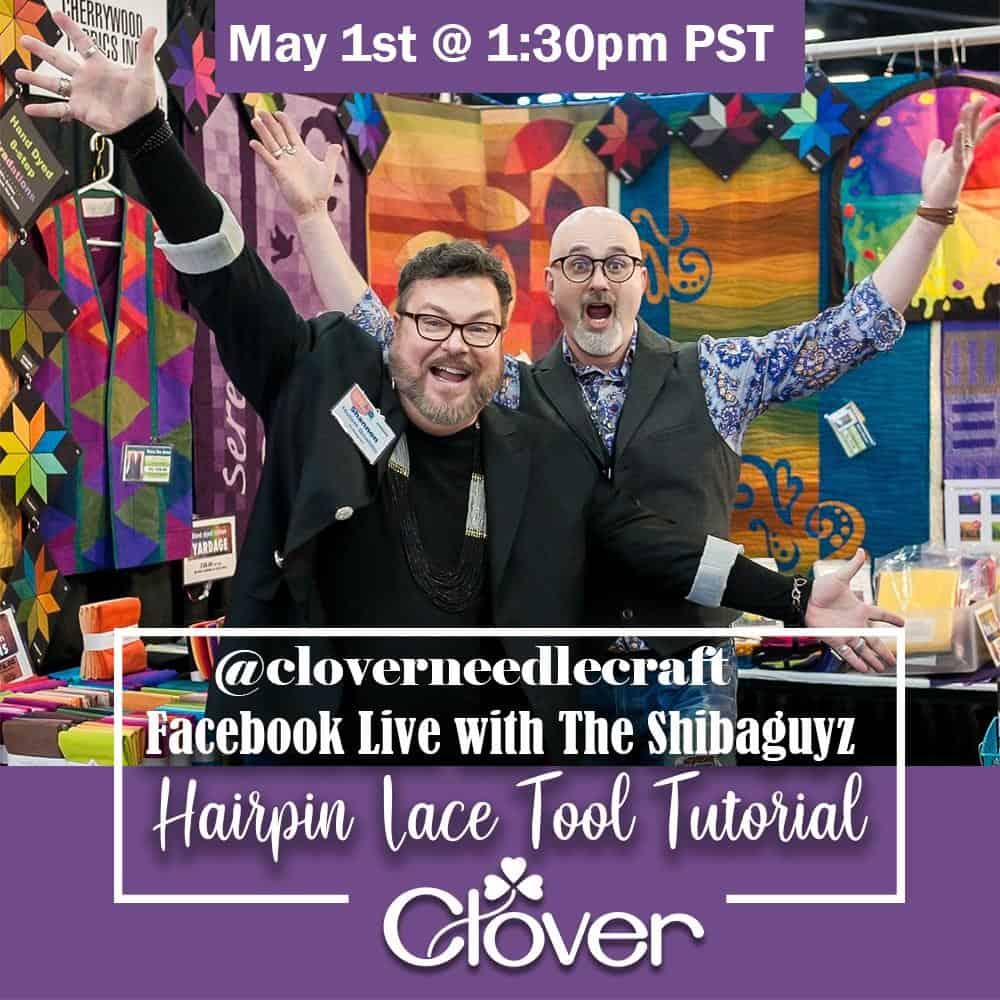
Find the Shibaguyz on Facebook | Twitter | Instagram | Pinterest
Stay connected with Clover on Facebook | Twitter | Instagram | Pinterest | YouTube | Ravelry
[mc4wp_form id=”11289″]