Snag Repair Needles Tutorial and Review with Jessie At Home
By Jessie Rayot | Jessie At Home
Hello again! Jessie from Jessie At Home here. Clover has asked me to share their Snag Repair Needles with you, and I’m happy to do so. These needles are very useful for more then just snags on your clothing. So I’m going to show you how to fix a snag with them, and talk a bit about their many uses. Plus, you can enter to win a set of your own over HERE on my blog.
When I was getting ready to take photos for this post, I grabbed some things I wanted to fix with the needles. One of those items was my winter coat. If you pop over to my post with the giveaway you can read harrowing story of how my coat got snagged!
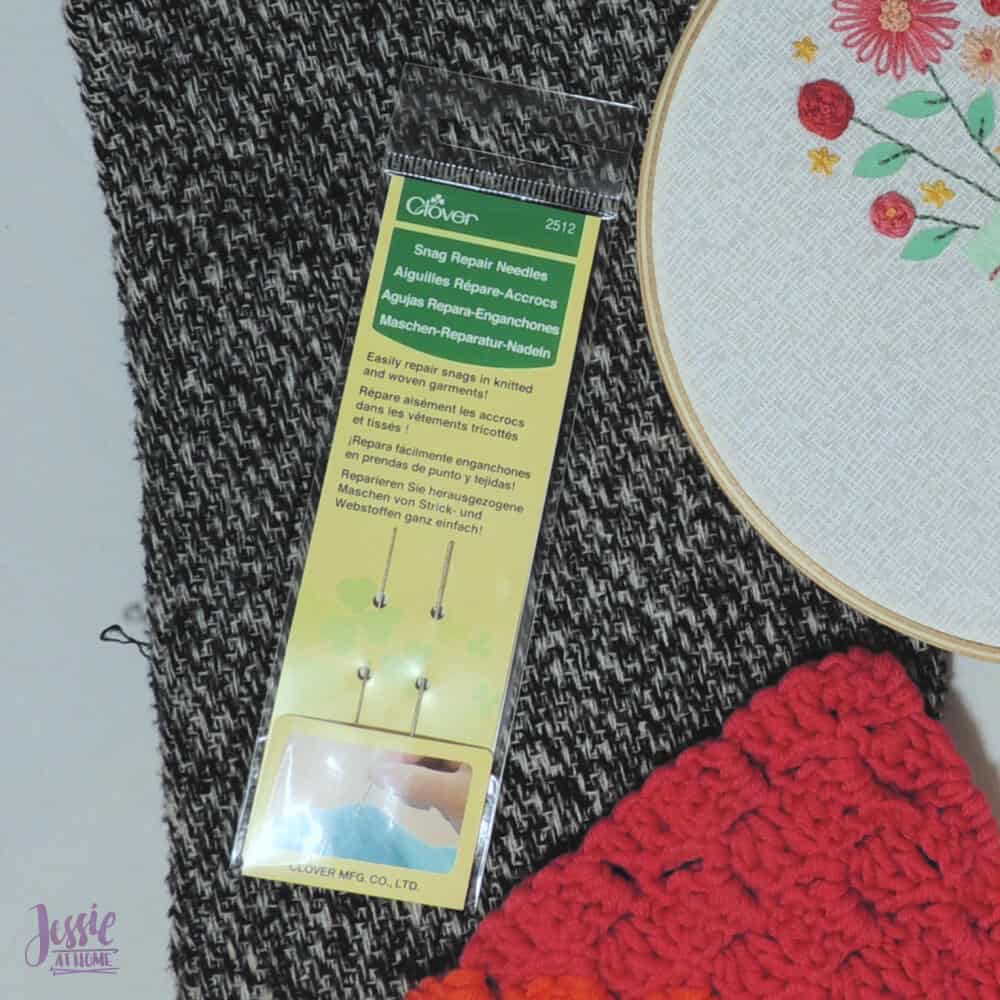
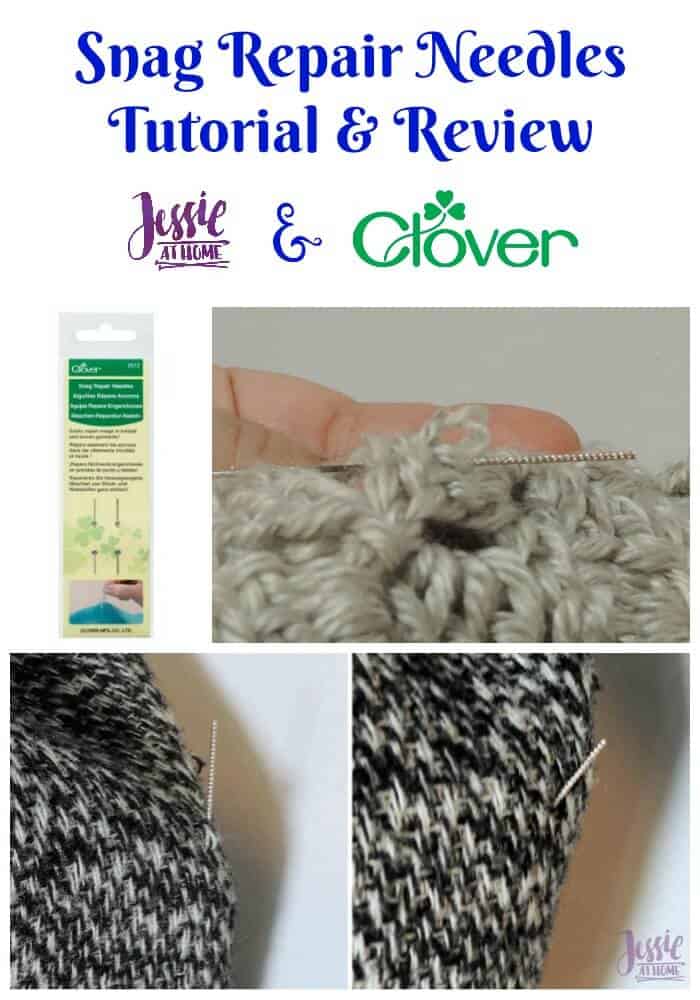
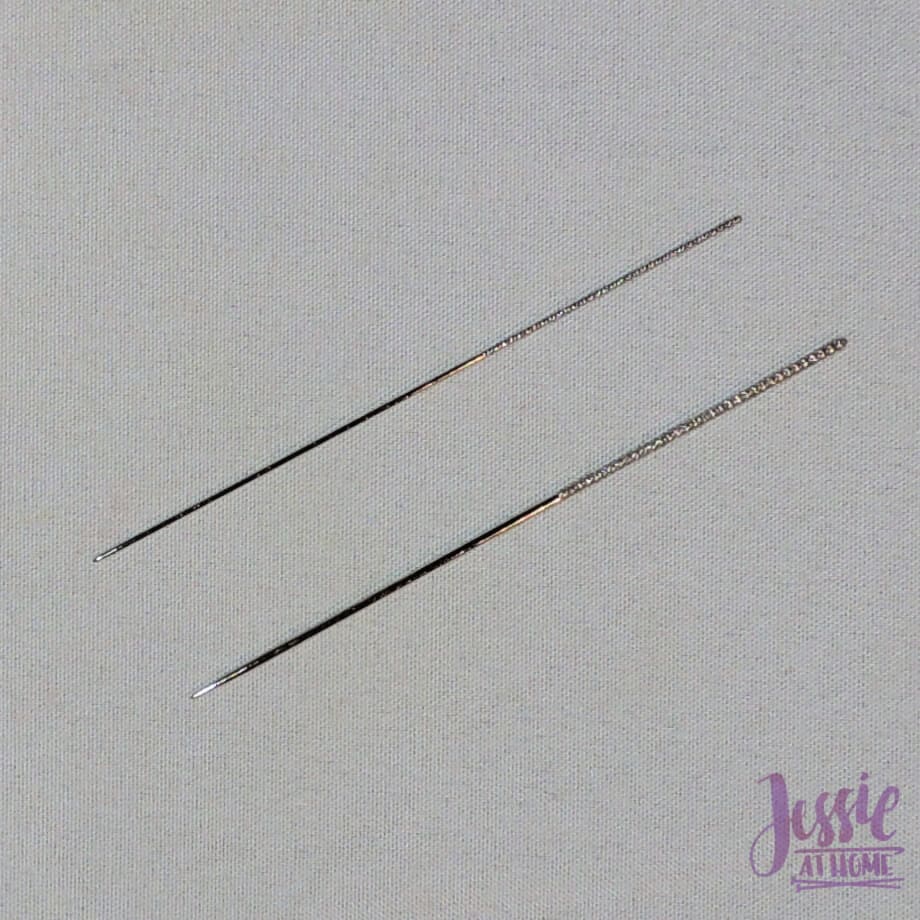
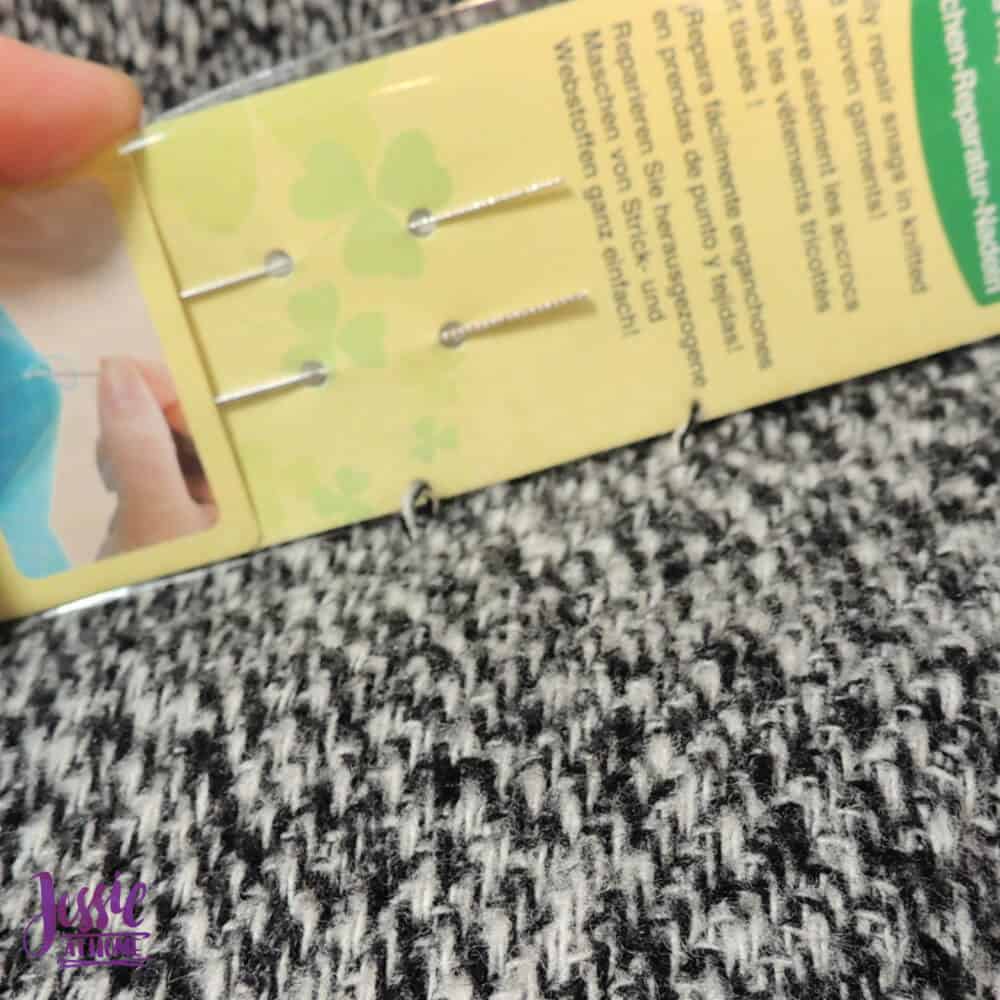
The Snag Repair Needles set includes two needles of different thicknesses. This way you can choose which one works best for the fabric you are repairing. As you can see below, the bottom is like a “normal” sewing needle, and the top is textured, sort of like a metal nail file.
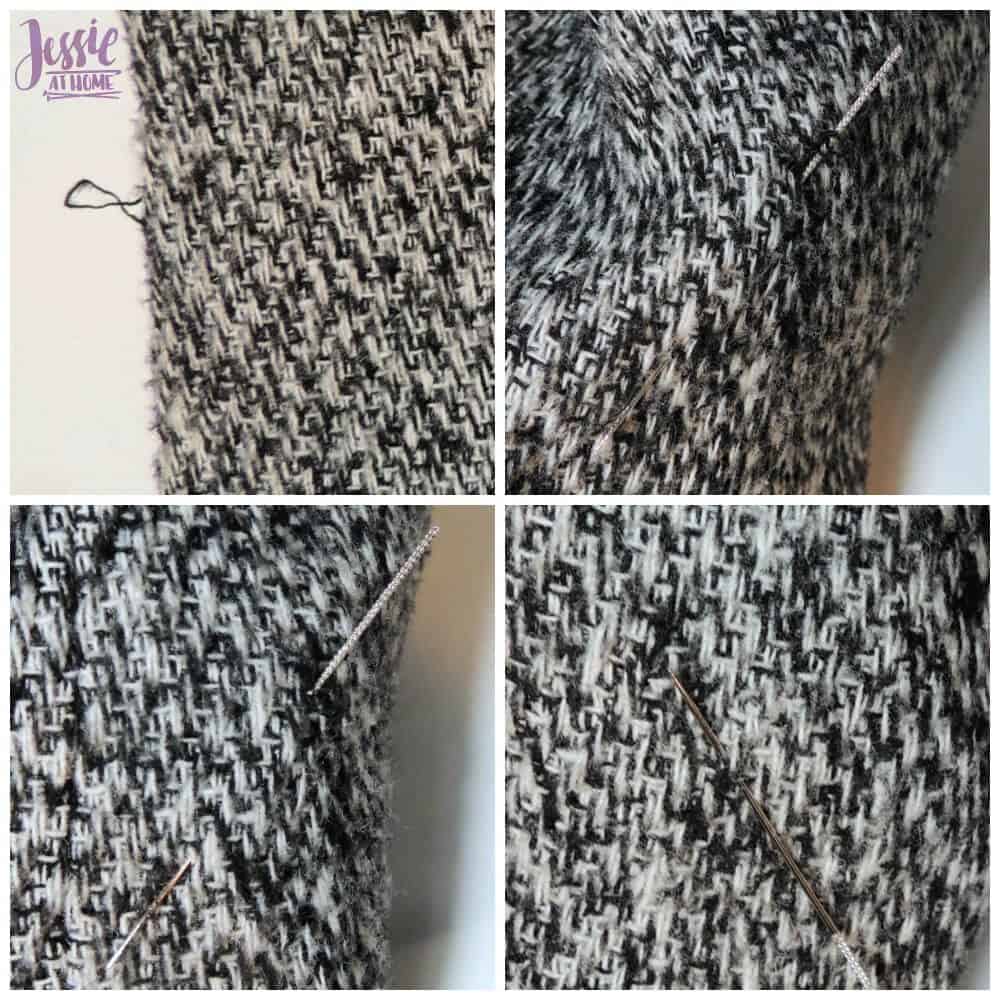
Here are two of the snags on my coat that needed repair. I had not used the snag repair needles before, so this was going to be my first try.
For the first snag, I put one hand in the sleeve (where the snags were) and inserted the larger snag repair needle in the sleeve at the base of the snag. It’s important to get the needle in the spot where the snagged thread goes into the fabric. I then pulled the needle through the sleeve. As you can see from the second photo below, I had barely pulled the textured section in before the snag was already gone!
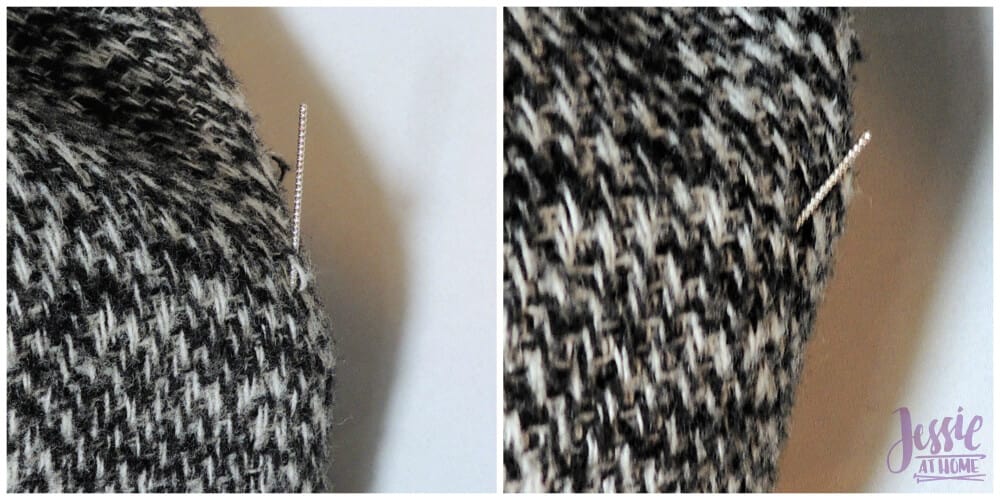
When I pulled the needle all the way through, the snag was gone, but it messed up the lining fabric a bit. It wasn’t a big deal, I mean who sees the sleeve lining? Still, I new there had to be a better way. So for the second little snag, I tried inserting the needle at the base of the snag, and then pulling it out about an inch below as you can see in the picture below. This way I did not run the needle through the lining at all. It worked perfectly! The snag was repaired, the lining was fine, and there was not a new snag were the needle came out.
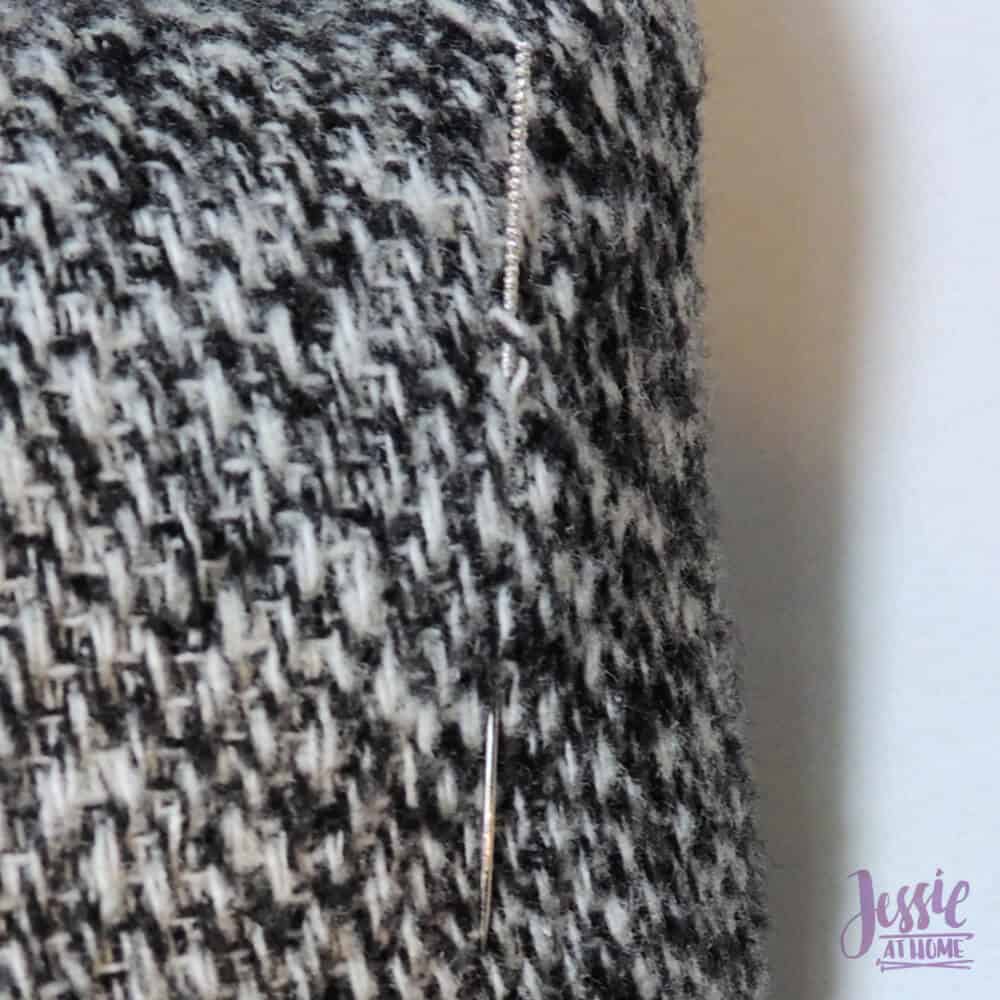
Now there was still the much longer snag to deal with. This time I pulled the needle through just to the textured section, then pressed the snag into the textured section to be sure it caught. When I pulled it through, it got rid of most of the snag, but not all of it. So I ran the needle through again. You can see the black thread where the needle is going through in the bottom left picture, that’s what was left of the snag after the first run through. The needle in the bottom right photo is pointing to where the snag had been. The second run through fixed it perfectly. I’m such a happy camper!
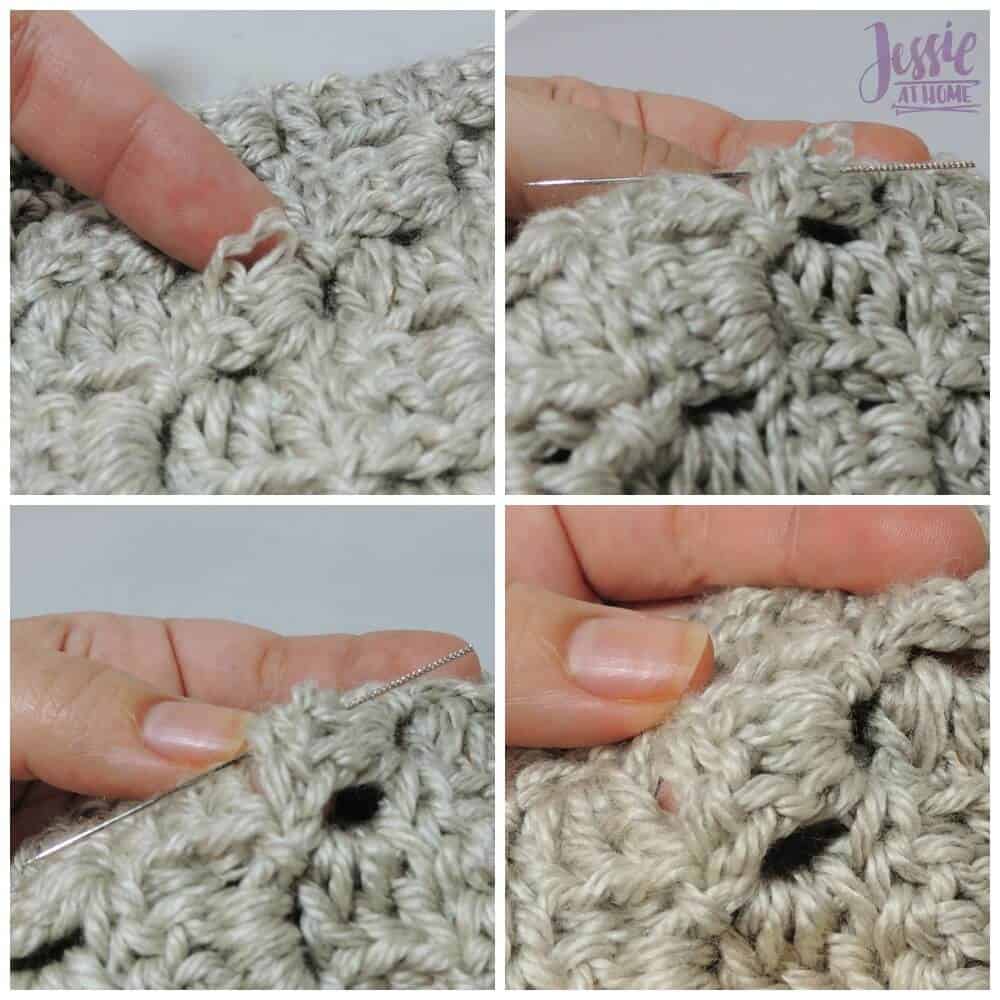
At this point I wanted to show how the snag repair needles can be used with knit or crochet. You may have noticed the crochet piece in the second image of this post is pink, and the one below is gray. Well, the pink wasn’t photographing well, so I switched it.
I used the larger of the needles for this crochet piece. I can’t tell you how many times I have snagged my knit or crochet items and just some of the plies of the yarn gets pulled. It’s so hard to fix that! I ran the snag repair needle through and the snag was almost totally gone the first time. I ran it through a second time and the crochet looked like new. Take a look at the bottom right photo. The snag was right in the middle of the photo, and it’s gone. I’m putting a set of these snag repair needles in a needle case in my purse so I always have them with me!
The Snag Repair Needles are amazing! They do just what they are supposed to. I love that they come in two thicknesses. In addition to what I’ve shown, they would also be great for needlework/cross stitch. If one of your ends starts to poke out the front, you could use the smaller needle to pull it to the back. So cool!
I would suggest everyone keep a set of these with them for fashion emergencies, and crafters should grab another set or two for their project bag and work area. I am in love! You can find the needles HERE. You can enter to win a set and read about how my coat got snagged in the first place HERE.
Happy Crafting!