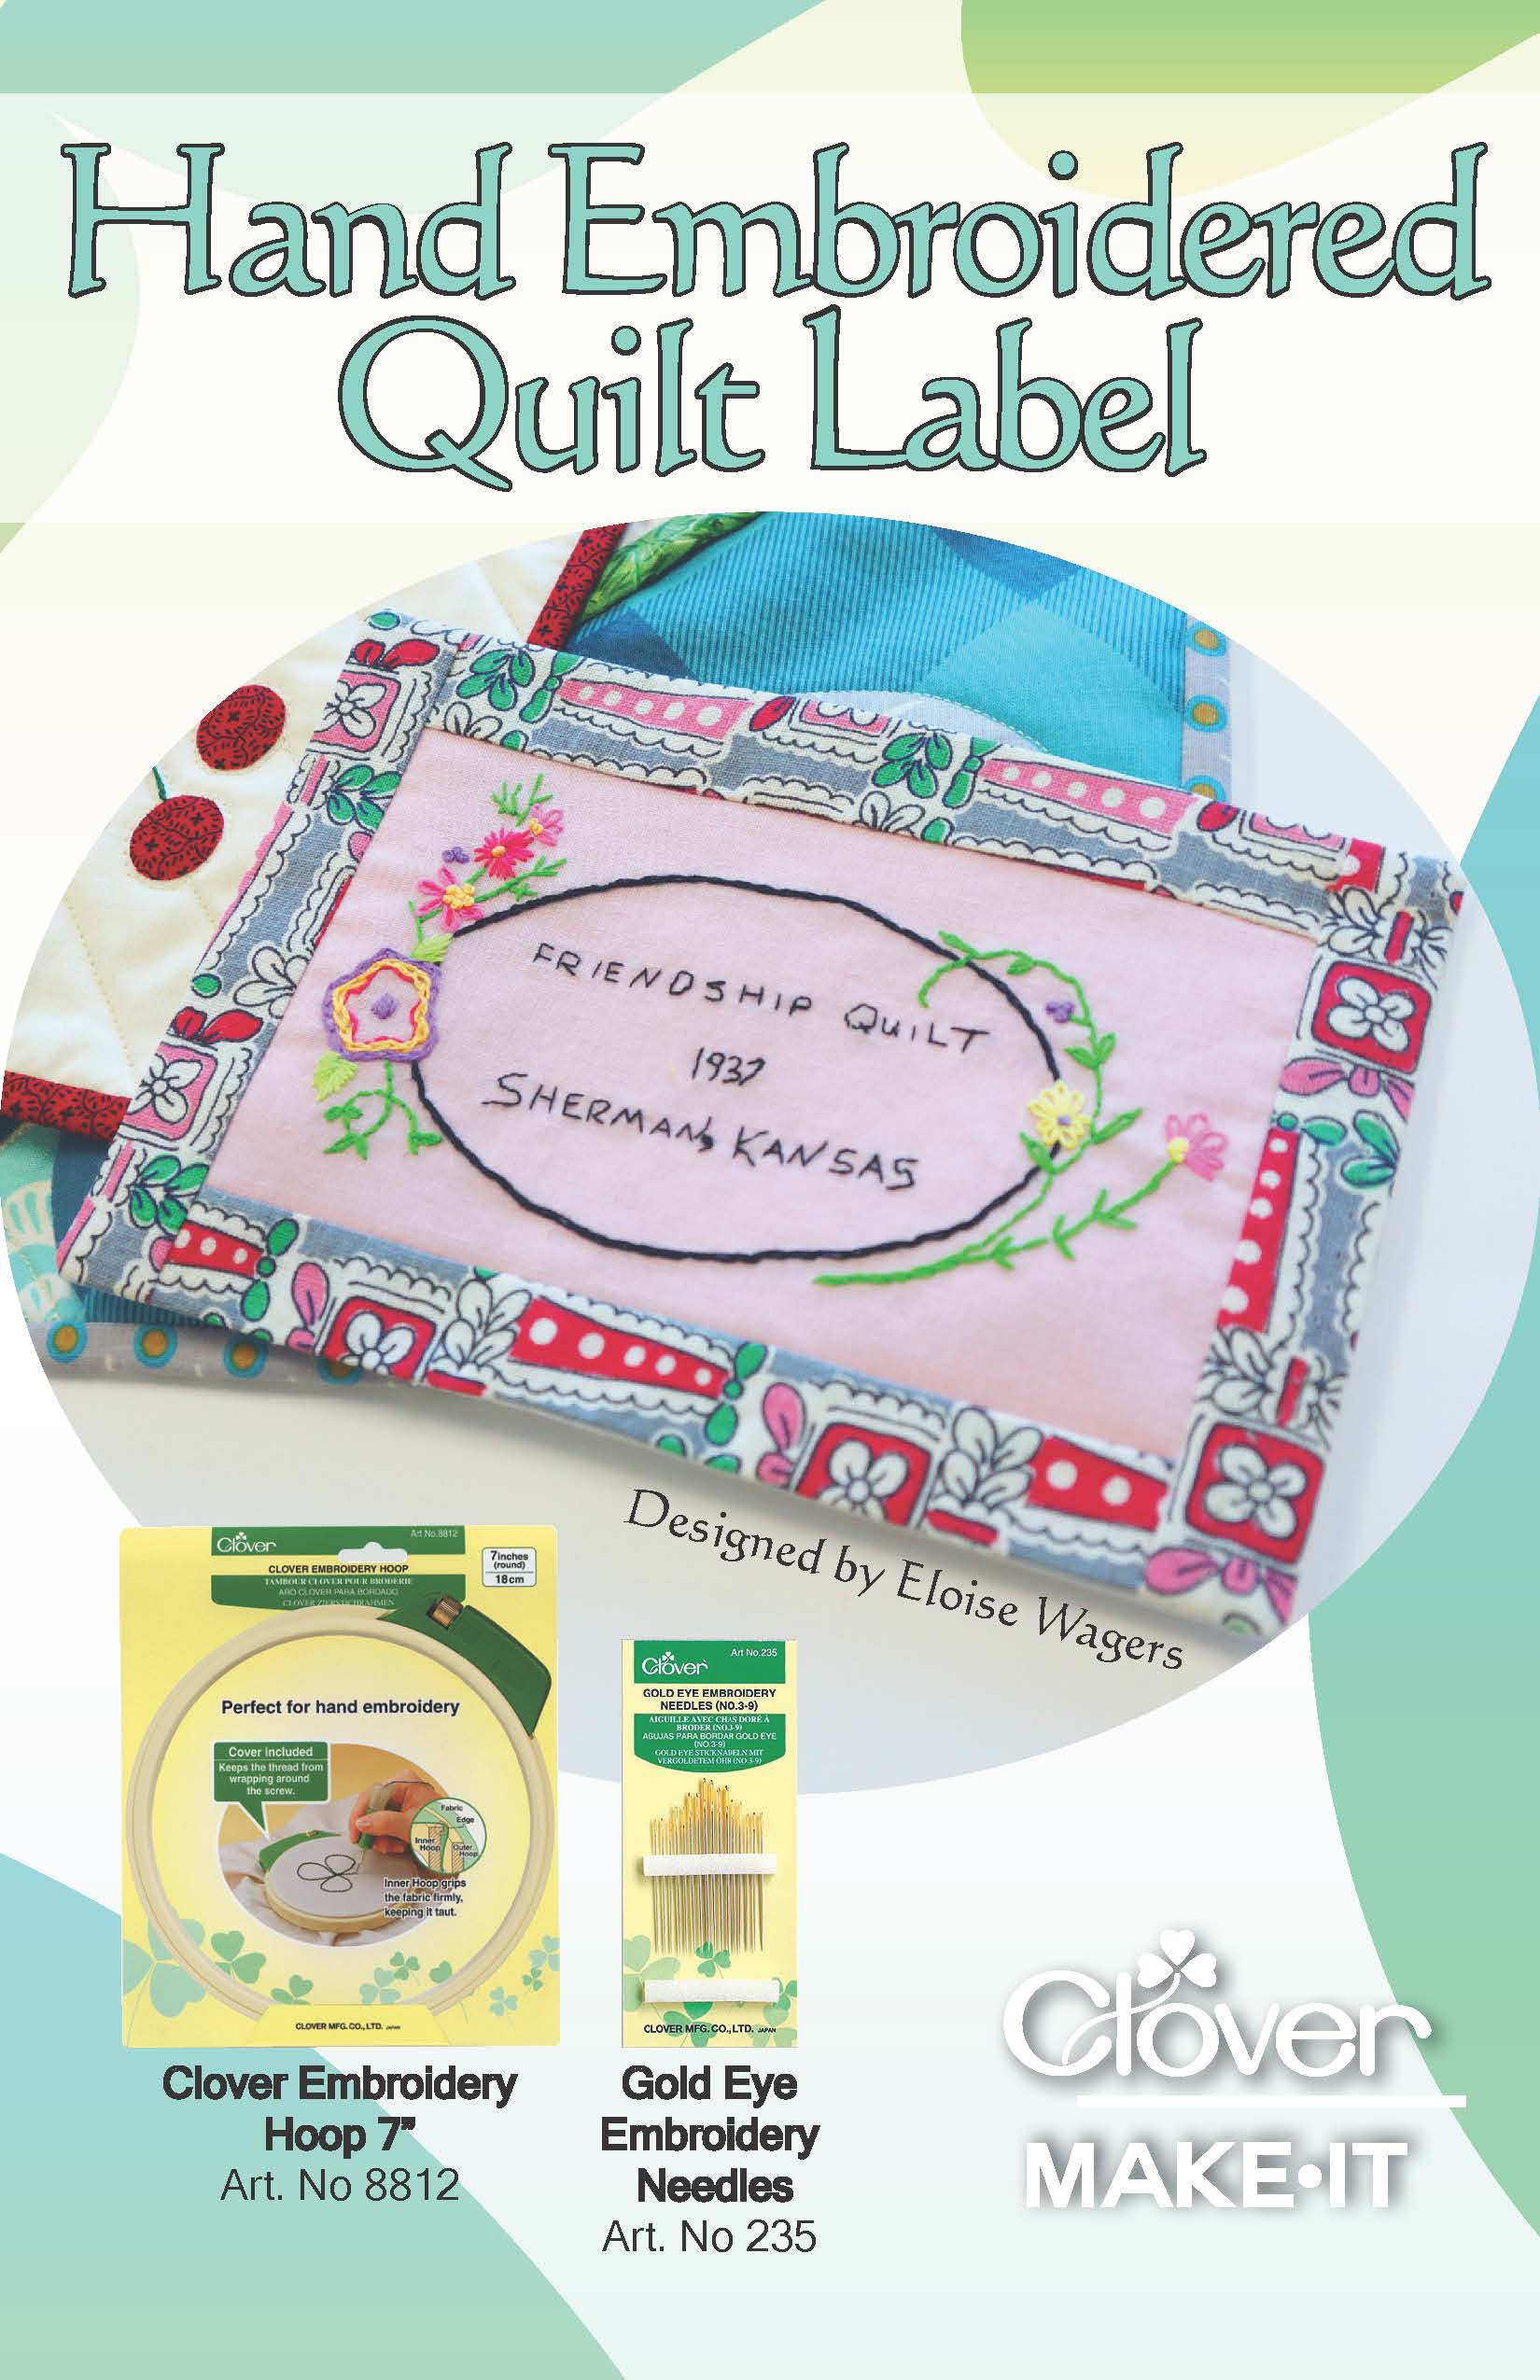
Hand-Embroidered Quilt Label

By Eloise Wagers
It is important to make a personalized quilt label to document the maker and the story of the quilt.
Hand embroidery is the most durable way to make a quilt label last for future generations to know the quilts’ story…a gift for a birth announcement, graduation, wedding, anniversary, etc.
Materials:
- Clover Embroidery Hoop (Art. No 8812)
- Gold Eye Embroidery Needles-No. 3-9 (Art. No 235)
- Embroidery Threader (Art. No 8611)
- Tracing Paper “Clover Chacopy” (Art. No 434)
- Water or Air Erasable Markers
- Optional: Eraser Pen (Art. No 518)
- Mini Wonder Clips (Art. No 3188)
- Embroidery Floss
- Fabric (10×10″, cotton, solid color)
- Optional: Patterned fabric for trim
- Backing
- Scissors
Instructions
PREPARE FABRIC
- Start with a 10 x 10 inch square of fabric
- Cotton best in a solid color
- Hand wash to remove fabric sizing and soften
- Press when slightly damp with iron
TRANSFER DESIGN TO FABRIC
- Start with right side of fabric facing up
- Select tracing paper color to show on fabric…test on corner
- Place color side of tracing paper to right side of fabric
- Lay design on wrong side of tracing paper and center
- Secure a couple corners with clips or straight pins to prevent layers shifting
- Trace design lines slowly with ball point pen…to darken go over lines twice
PERSONALIZE INFORMATION
- Remove design and tracing paper
- Use your own script to write out your story information using Clover water or air erasable pen…fine point or regular (water if it will be a while before finishing)
- Or use computer to print out lettering and trace in center
- Can also use erasable pen to retrace design for visibility
BEGIN STITCHING
- Center fabric in 7” Clover Hoop (has cover to keep thread from wrapping around the tightening screw)
- Decide on number of embroidery threads, color, and stitch to start
- Use embroidery needles No. 3-9 with extra large eyes
- Cut a six strand length from floss hank about a yard long and pull out one strand at a time to prevent tangles
- Most stitches are best using two strands…three strands for thicker look
- Use one strand for script…back stitch best for lettering
- Embroidery Threader helpful in threading multiple threads through needle eye
- Knot end or leave a long tail to weave in later
- Take project out of hoop if not finishing and store to prevent permanent creases
FINISHING
- Remove from hoop
- Rinse in cool water until all marking are gone
- Let dry and press on a soft surface
- Center the motif and trim to desired size leaving a ¼” seam allowance
- If desired, add 1-1/2”sashing strips, binding, piping or turn edges under and press
- For backing, cut another piece of fabric the same size as finished piece
- Place backing on front with right sides together and stitch a ¼” seam around leaving in 3” opening
- Round off corners or trim close to stitching
- Turn inside out, press and sew opening closed
- Attach by hand to right hand lower corner of quilt