Standing Oval Loom Sock and Hand Warmers
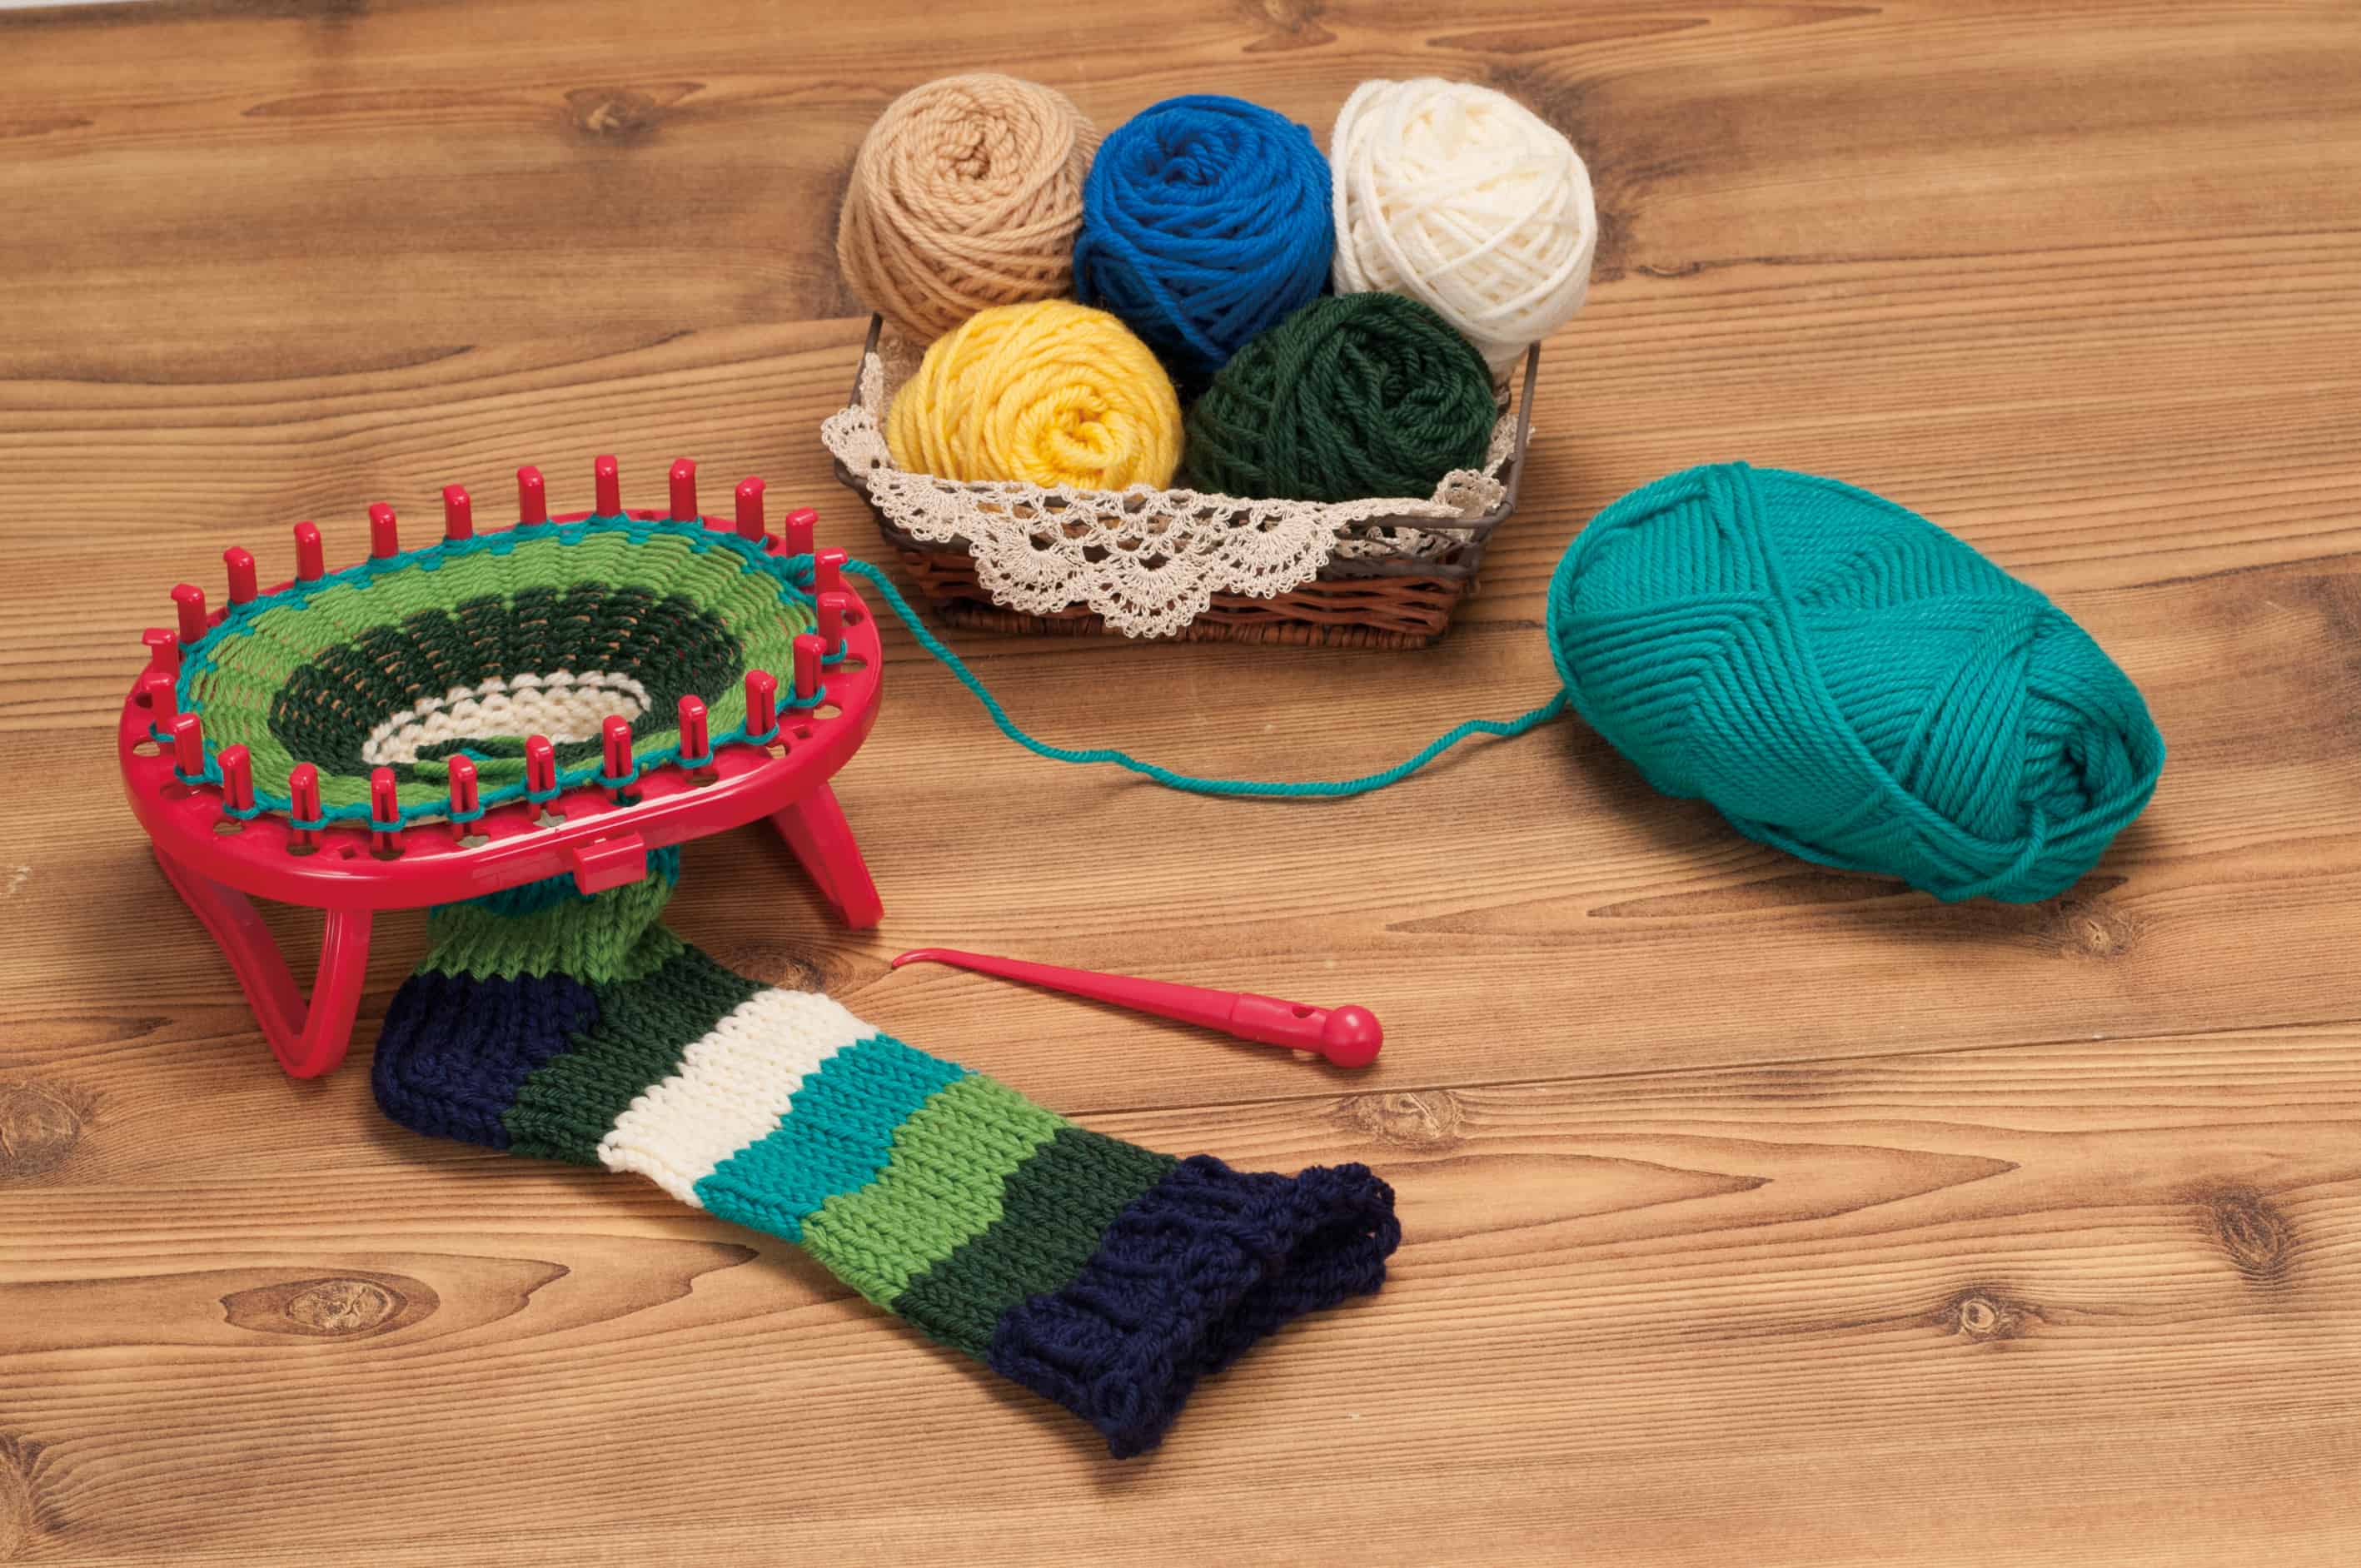
Knit beautiful designs with a loom and hook. Easily knit scarves, socks, hand warmers and more with Clover’s Standing Oval Knitting Loom. The arch on the oval shape makes knitting heel and toe portions for socks a breeze. Collapsible stand for easy storage, fold out legs to view your design as you knit.
Take a look at some free projects to get you started.
Socks
Materials Needed:
*Clover Standing Oval Knitting Loom Art No. 3178
*Worsted Weight Yarn (per sock approx. 1.3 oz (36g))
*Scissors
*Ruler
(option: Stitch Markers)
Instructions:
- Create the Cast-On around all 24 pegs. See Basic Instructions included in your Standing Oval Knitting Loom package
- Knit Cuff Section:
- Knit stitch in the round from peg 1-24; this is Row 1.
- Knit Stitch a total of 8 rows.
- Unravel the yarn end from the anchor peg and insert it into the inside of the loom base.
- Ribbing:
- Knit 1, Purl 1 alternately from peg 1-24.
- Rib Stitch for 8 rows.
- Knit for 35 rows.
- Heel: Knit on peg 1-12 only.
- Decrease stitches:
- Decrease one stitch on each side of peg 1 and peg 12.
- Simply bring the working yarn loosely across the front of peg 1 (no loop), then knit from peg 2-11.
- Without knitting peg 12, bring the strand around the peg from back to front, and across the front of peg 11. Remove as well.
- Change knitting direction and proceed counter-clockwise. Knit Stitch peg 11-3.
- Without knitting peg 2, bring the strand around the peg from back to front, and across the front of peg 3. Remove as well. Change knitting direction and Knit Stitch from peg 3-10.
- Without knitting peg 11, bring the strand around the peg from back to front and across the front of peg 10. (same method of Step 7). Change knitting direction and stitch from peg 10-4.
- Continue decreasing in this manner on both sides until you decrease peg 9. Knit Stitch peg 8-5 to complete the decreases.
- Increase stitches. Firmly wrap the working yarn around peg 4 from front to back, use the hook to scoop up 2 strands from the peg and Knit Stitch both loops together. (”Knit Two Together”)
- Change knitting direction, wrap the working yarn around peg 4 clockwise, and then knit stitch. Next stitch from peg 5-8.
- Firmly wrap the working yarn around peg 9 from front to back, use the hook to scoop up 2 strands from the peg and knit stitch both loops together.
Change knitting direction, wrap the working yarn around peg 9 clockwise, and then Knit Stitch. Next, Knit Stitch from peg 8-4.- Increase both sides, as described above, with the Knit Two Together and knit stitches. Knit from peg 1-12. After stitching one each of the knit two together and knit stitches on peg 12, change directions, and knit back to peg 1 to complete the increases.
- From this point, Knit Stitch from peg 1-24 for 10 rows. (For worsted weight yarn, use 1 strand)
- Calculate number of rows for foot section.
- Subtract 10 rows from the number of foot rows, and knit stitch the remaining rows.
- Toe: As with the heel, when using worsted weight yarn to knit the toe section, use 2 strands (knit according to Steps 6-11). When knitting is complete, cut the working yarn leaving a 2-3/8” end.
- Grafting the toe and foot section.
- See “Kitchener Stitch” in
- Basic Instructions.
- For peg 1-12, bring the needle under each loop from bottom to top.
- For peg 13-24, bring the needle over each loop from top to bottom.
- After the scrap yarn has been threaded through all loop, remove the knitted piece from the loom. Tie the two scrap yarn ends and graft the toe and foot sections.
- Bring any ends remaining on the right side back to the wrong side using a darning needle. Neatly weave ends through several stitches on the wrong side, making sure the weaving does not affect the right side.
Hand Warmers
 Materials Needed:
*Clover Standing Oval Knitting Loom Art No. 3178
*Worsted Weight Yarn (one hand: approx 0.7 oz.)
*Scissors
*Option: Stitch Markers
- Follow Steps 1-3 for socks.
- Next, knit stitch for 18 rows.
- After knitting one row up to peg 24, bring working yarn across the front of peg 24 counterclockwise, and continue to knit stitch. Change knitting direction and Knit Stitch from peg 23-1.
- Next, bring working yarn across the front of peg 1 clockwise and knit stitch. Change knitting direction and continue clockwise, knitting from peg 2-24.
- Knit in this manner of reversing direction for a total of 7 rows.
- Bring working yarn across the front of peg 1 clockwise and knit. Continue to knit stitch for a total of 17 rows.
- Cut the strand wrapped around peg 24 after leaving approximately, 60” in length. Use the darning needle to weave in the strand. Complete the binding and remove the project from the loom. See Package Instructions.
- Slowly pull the end remaining from the first sewn bind off in Step 6. Adjust the knitting by gradually reducing the size of the last row of stitches.
- Bring any ends remaining on the right side back to the wrong side using a darning needle. Neatly weave ends on the wrong side, making sure the weaving does not affect the right side.
**Note: The Standing Oval Knitting Loom is not yet available for purchase. It is available for pre-order and will be in stock in early March.
See all our free project sheets at www.clover-usa.com
Share your projects with us on Facebook | Twitter | Instagram | Pinterest.