The Gloria Headband Crochet Pattern
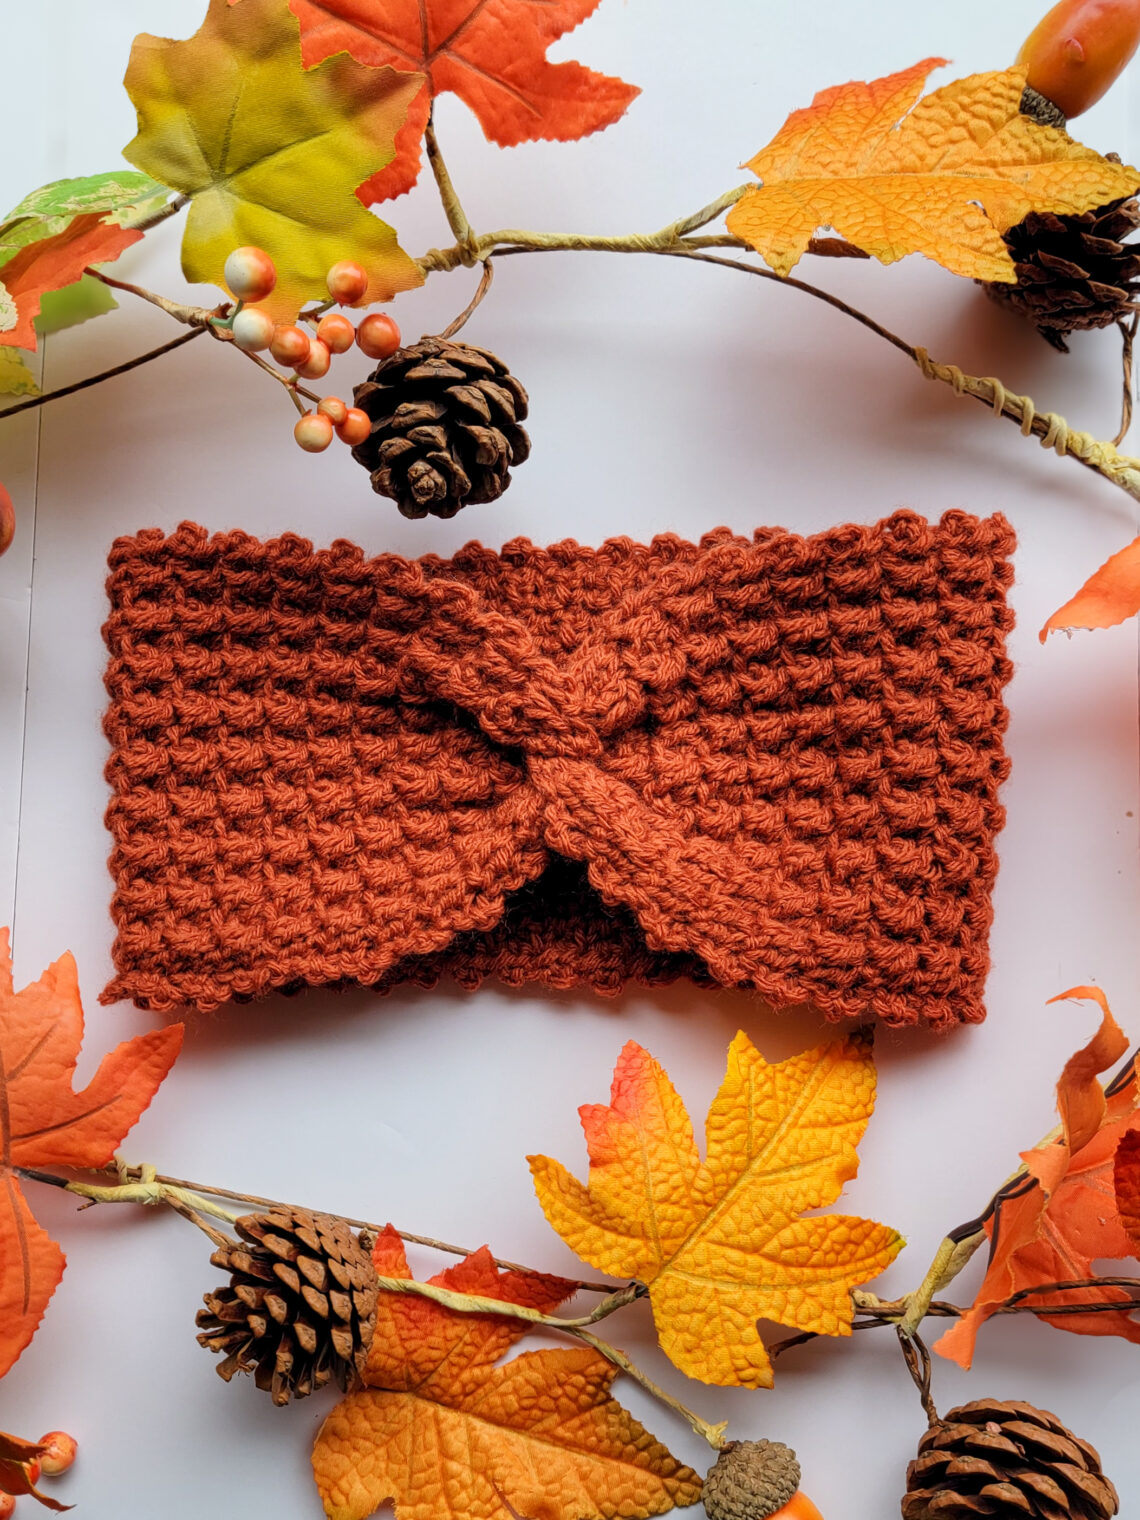
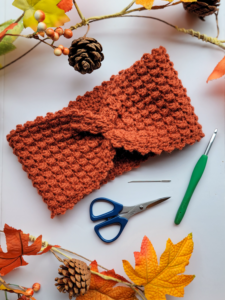
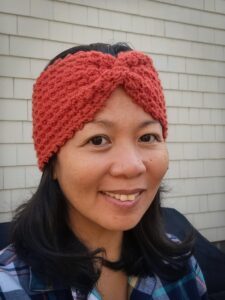
It’s time for another fun Fall and Winter crochet project, and I’m pretty sure you’ll love making this one! Meet the Gloria Headband! This cozy and stylish crochet accessory was inspired by the Gloria Beanie, which I designed last year for the Cancer Crochet Challenge hosted by Christine Naugle of Sweet Potato 3.
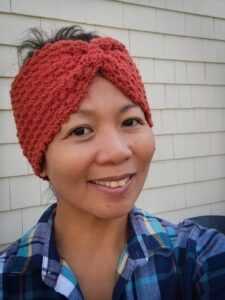
The Gloria Headband works up quickly and is a joy to make. It features a beautiful textured stitch pattern and a charming X-shaped closure at the front, giving it a unique handmade touch. It’s perfect for keeping your ears warm on chilly days, adding a cozy touch to your Fall and Winter outfits, or making as a thoughtful gift for someone special. Grab your favorite yarn and crochet hook, and let’s make a Gloria Headband together!
MATERIALS:
- Clover Amour Crochet Hook I (5.5 mm) or size to obtain gauge
- Clover Darning Needle
- Clover Patchwork Mini Scissors
- tape measure
- worsted weight (4) yarn: I used Lion Brand Pound of Love in Pumpkin Spice
NOTES:
- read the pattern carefully before starting.
- the headband is worked flat in rows using an easy two-row repeat pattern. Sew the short ends together using the X closure method.
- * * repeat instructions between asterisks as many times as directed or repeat at specified locations.
- the numbers at the end of the round indicate the number of stitches in each round.
- gauge: 16 sts x 16 rows = 4”
- skill level: advanced beginner to intermediate
- finished measurement: about 5” width x 19.5” circumference, unblocked
- resizing tip: Adjust the starting chain in multiples of 2 to change the headband’s width and the stitch pattern repeats every 2 rows for the length.
ABBREVIATIONS:
- ch(s) – chain(s)
- dc – double crochet
- flo – front loop only
- rep – repeat
- sc – single crochet
- st(s) – stitch(es)
THE GLORIA HEADBAND CROCHET PATTERN:
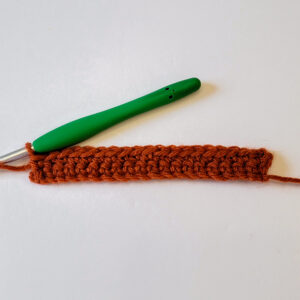
- Row 1: Ch 20, 1 sc in 2nd ch from the hook and in each ch across. Ch 3 (does not count as a st, but serves as a decorative edging, here and throughout) and turn. 19 sts
- Row 2: 1 sc in 1st st, 1 sc through the flo in each st to the last st, 1 sc in last st. Ch 3 nd turn. 19 sts
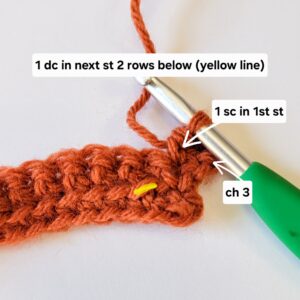
- Row 3: 1 sc in 1st st, *1 dc in next st 2 rows below, 1 sc in next st*; Rep from * to * across. Ch 3 nd turn. 19 sts
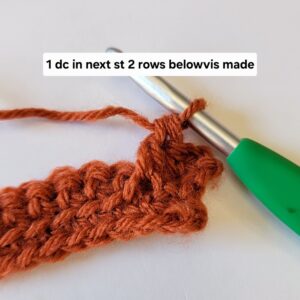
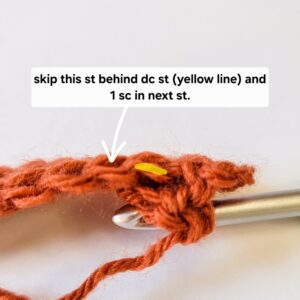
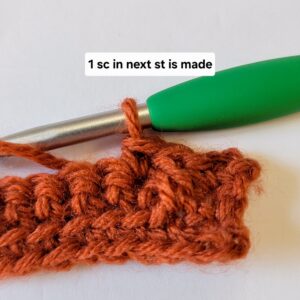
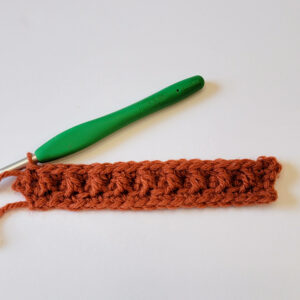
- Rep Rows 2 and 3 until your piece measures 19 inches. Then, for the final row, do not ch 3 at the end. Work 1 sc in each st across. Fasten off, leaving a long yarn tail for sewing.
Headband Assembly:
- Follow the pictures below for a step-by-step guide to the X Closure Headband Method.
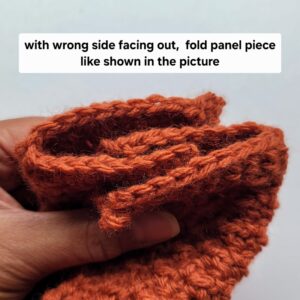
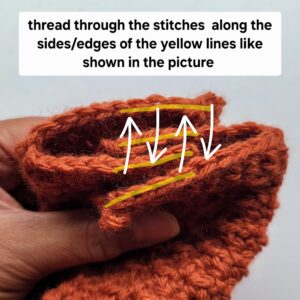
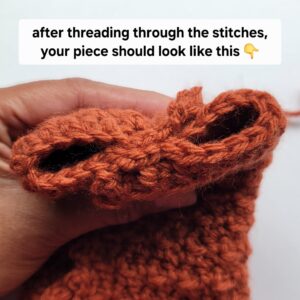
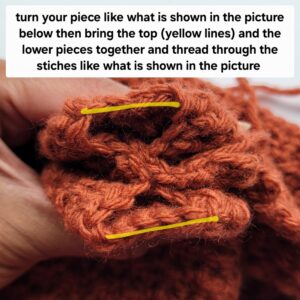
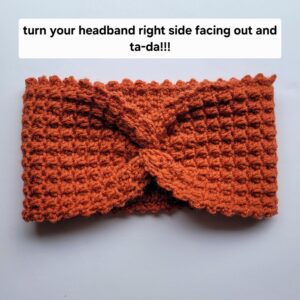
I first learned about this method from Angie and Britt’s Knitting Headband video, and I’d like to give them full credit for their wonderful tutorial! You can watch their video here.
Happy crocheting! I hope you love this pattern today!
Please don’t hesitate to contact me with questions regarding this pattern. You may also reach out to me on Instagram (@stringsandcuddles)!
If you want to keep up with me, Elisa, on social media for other fun projects, follow me on social media: Instagram | Pinterest | Facebook | Blog | Ravelry
If you want to keep up with all things Clover, follow us on: Facebook | Twitter | Instagram | Pinterest | YouTube | Ravelry