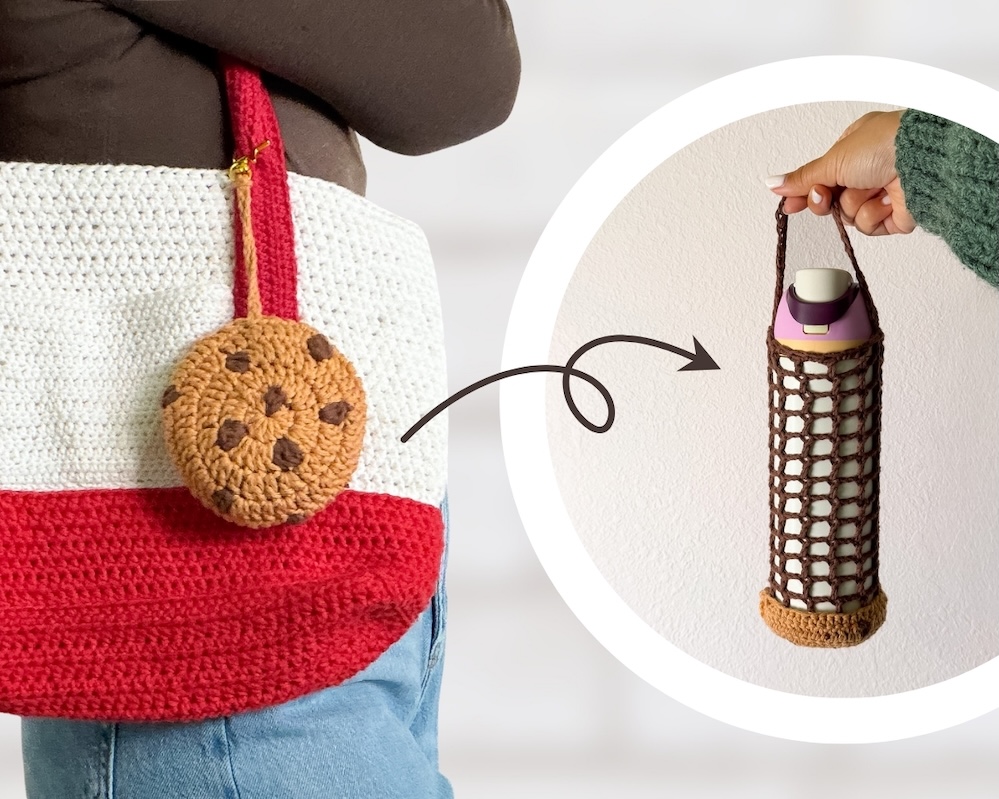
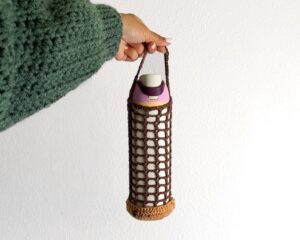
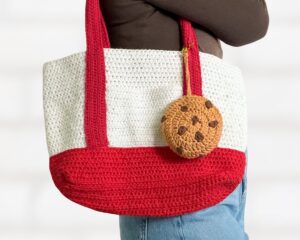
Reversible Cookie Pouch *crochet pattern*
This chocolate chip cookie bag charm conveniently unfolds into a handy pouch to hold your water bottle. Now, you can be on the go, hands-free!
– Amy (@curiouspapaya)

MATERIALS:
- Clover Amour Hook (3.5 mm)
- Clover Patchwork Scissors (small)
- Clover Stitch Markers
- Clover Yarn Needle
- #3 light worsted cotton yarn
- 1 skein of light brown – 20 g
- 1 skein of dark brown – 22 g
- ruler
- optional: key clasp
- I used a gold, star-shaped one to make it easier to clip onto my bag. You can also secure the Cookie pouch onto your bag with the hanging loop. Just be sure to modify it to be longer.
NOTES:
- Please do not copy/redistribute any part of this pattern as your own. This includes reposting/translating without permission. Feel free to sell your finished products in small quantities as long as you give credit to help support my work. Tag your creations with @curiouspapaya so I can feature you!
- This pattern is written in US terminology.
- The pattern is worked in joined rounds. Follow the pattern in the order that it is written.
- Yarn over for this pattern.
- This pattern is made to carry standard water bottles up to 24 oz.
- Difficulty: intermediate-beginner+
- Techniques used: magic circle, invisible finish, carrying color changes
- Measurements: Diameter of bottom panel = 3.5 in. [~9 cm]. Height of mesh bag (including the handle) = 11.5 in. [~29 cm]
- A note on gauge: The mesh bag before use will not be as large as what’s indicated above. It is expected to stretch by ~2 in. [~5 cm] since it’ll be carrying a water bottle up to 24 oz. Be sure to account for the stretch if modifying the pattern.
- Time: ~2 hrs
ABBREVIATIONS:
- cc: contrast color
- ch: chain
- ch-sp: chain space
- dc: double crochet
- dc-inc: double crochet increase
- hdc: half double crochet
- mc: main color
- rs: right side
- sc: single crochet
- sk: skip
- slst: slip stitch
- st(s): stitch(es)
- ws: wrong side
- [#]: stitch count
- (…) x#: repeat instructions the number of times
SPECIAL STITCHES:
- bo4: Bobble stitch – Yarn over, insert hook into stitch, yarn over, draw loop back through stitch, yarn over and pull through 2 loops. Repeat this 2 more times until you have 4 loops on your hook. Yarn over and pull through all 4 loops.
- bo5: Bobble stitch – Yarn over, insert hook into stitch, yarn over, draw loop back through stitch, yarn over and pull through 2 loops. Repeat this 3 more times until you have 5 loops on your hook. Yarn over and pull through all 5 loops.
COOKIE PATTERN:
BACK PANEL:
In light brown (mc) yarn and with a 3.5 mm Clover Amour Hook:
Note: Crochet over the yarn tails for all parts of the pattern. The ch at the beginning does not count as a st. This will help fill in the gap that derives from working in joined rounds.
* = slst into the first st to join the round
- Round 1: make a magic circle, ch 2, (does not count as first st), (dc) x12, * [12]
- Round 2: ch 2, (dc-inc) x12, * [24]
- Round 3: ch 2, (dc-inc, dc) x12, * [36]
Note: In the next round, we will make the hanging loop. Modify the length as needed.
- Round 4: ch 2, (dc-inc, 2 dc) x11, ch 30 (this is the hanging loop – modify this to be longer if you are not using a key clasp), slst into the base of the st, dc-inc, dc into the next 2 sts, * in (cc) [48]
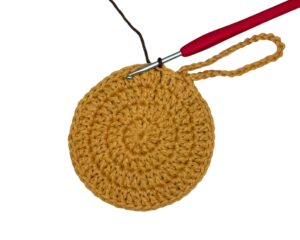
Measure the diameter of the panel before beginning the next step. Because everyone’s tension and yarn choice may be slightly different, modify accordingly so that the base can support your bottle. Mine measured 3.5 in. [~9 cm].
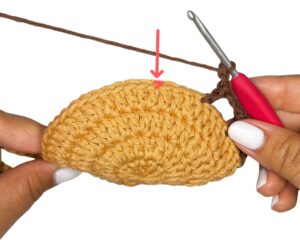
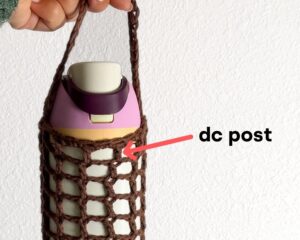
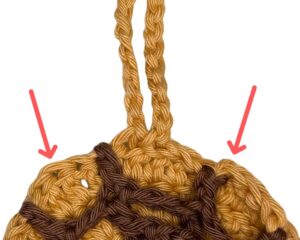
Next, we will make the netting of the pouch. We will keep it light and airy with the mesh stitch. There will be 12 total dc posts, counting the post made by the initial ch 5. We will break down Round 5 into steps for ease.
- Round 5:
- Step 1: (cc) ch 5, sk 3 sts, dc into the next st
- Step 2: (ch 2, sk 3 sts, dc into the next st) x10
-
- Step 3: ch 2, sk 3 sts, slst into the third ch of the starting ch
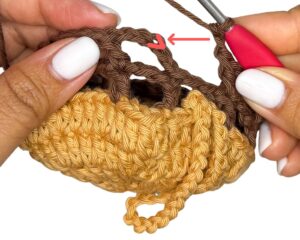
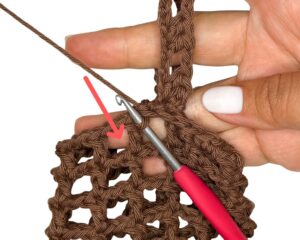
- Rounds 6-17 (12 rounds total): ch 5, dc into the dc post, (ch 2, dc into the top of the next dc post) x10, ch 2, slst into the third ch of the starting ch [12 dc posts total]
Next, we will make the strap. We will work in a row and there will be 6 “rectangles” visible.
- Step 1: ch 30, count 6 dc posts and slst into the top of it (you should be on the opposite side).
- Step 2: slst into the next 2 sts, turn the piece.
- Step 3: sk the 2 slsts, work into the strap, (flo) (2 hdc, ch 3, sk 3) x6
- Step 4: Make sure the strap isn’t twisted before the next step.
- Step 5: slst into the next 2 sts of the previous round.
Next, we will make the brim. Place the straps behind the hook when you cross them.
- Round 18: 2 sc into each ch-sp around (NOT into the sts) [24]
Use the invisible finish and leave a 6 in. [~15 cm] yarn tail for weaving in. Use the Clover Yarn Needle and secure the yarn with several knots as you weave it into the border.
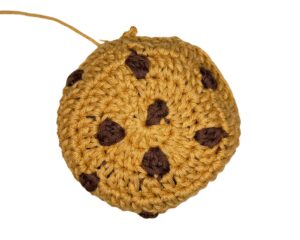
FRONT PANEL:
Start in light brown (mc) yarn and with a 3.5 mm Clover Amour Hook:
Note: Again, be sure to crochet over the yarn tails! The ws of the pieces will be visible.
* = slst into the first st to join the round
- Round 1: (mc) make a magic circle, ch 2, (does not count as first st), (dc) x9, (cc) bo4, (mc) 2 dc, * [12]
- Round 2: (mc) ch 2, 2 dc-inc, (cc) bo5, (mc) dc in the same st, 2 dc-inc, (cc) bo5, (mc) dc into the same st, 6 dc-inc * [24]
- Round 3: (mc) ch 2, (dc-inc, dc) x7, dc-inc, (cc) bo4, (mc) (dc-inc, dc) x3, dc-inc, (cc) bo5, * in (mc) [36]
- Round 4: (mc) ch 2, (dc-inc, 2 dc) x3, dc-inc, dc, (cc) bo4, (mc) (dc-inc, 2 dc) x3, dc-inc, (cc) bo5, (mc) dc, (dc-inc, 2 dc) x2, * [48]
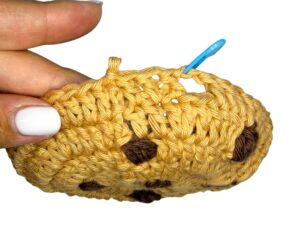
- Round 5: (mc) ch 2, 5 dc, (cc) bo4, (mc) 15 dc, (cc) bo5, (mc) 19 dc, ch 2, sk 2 (eyelet), 5 dc, * [46 sts + 2 ch]
Do not fasten off.
Mark the eyelet with a Clover Stitch Marker.
Continue onto assembly.
ASSEMBLY:
Note: You will join the panels around the outer edge, leaving the marked 9-st gap unworked. This opening allows the hanging loop to feed through the eyelet and close the pouch.
- Step 1: On the back panel, use two Clover Stitch Markers to mark a 9 st gap, centering it with the hanging loop.
- Step 2: Position the panels with the rs on both facing each other as shown in the img. The ws of the front panel should be visible to you. Be sure to align the current loop of the front panel with the left stitch marker on the back panel.
- Step 3: Insert the hook through both loops of the back panel.
- Step 4: Pull the loop through and ch 1 (counts as the first sc).

- Step 5:Going through both loops of both panels, sc around the edge until you reach the second stitch marker, leaving the marked 9-st gap unworked.
Fasten off and leave a 6 in. [~15 cm] yarn tail for weaving in. Use the Clover Yarn Needle and secure the yarn with several knots as you weave it into the border.
Flip the pouch right side out and tuck the mesh bag in. Feed the hanging loop through opening on the front panel to close.
Optional: Attach the key clasp to the hanging loop.
You’re finished! Tag your creations with @cloverusa and @curiouspapaya to share your makes 🙂
If you want to keep up with me, Amy, on social media for other fun projects, follow me on: Instagram
If you want to keep up with all things Clover, follow us on: Facebook | Twitter | Instagram | Pinterest | YouTube | Ravelry