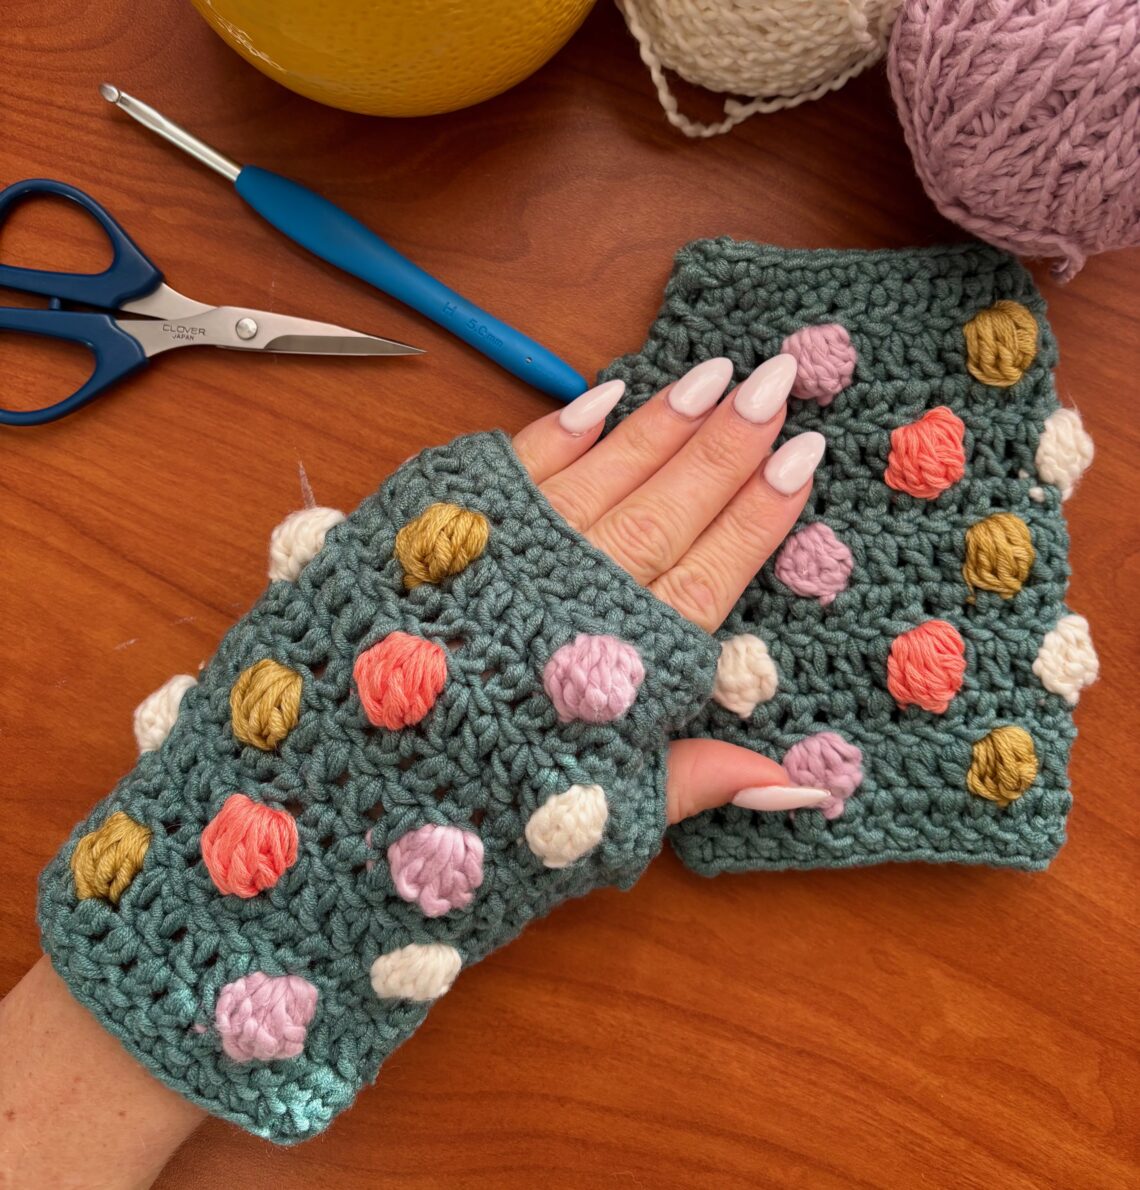
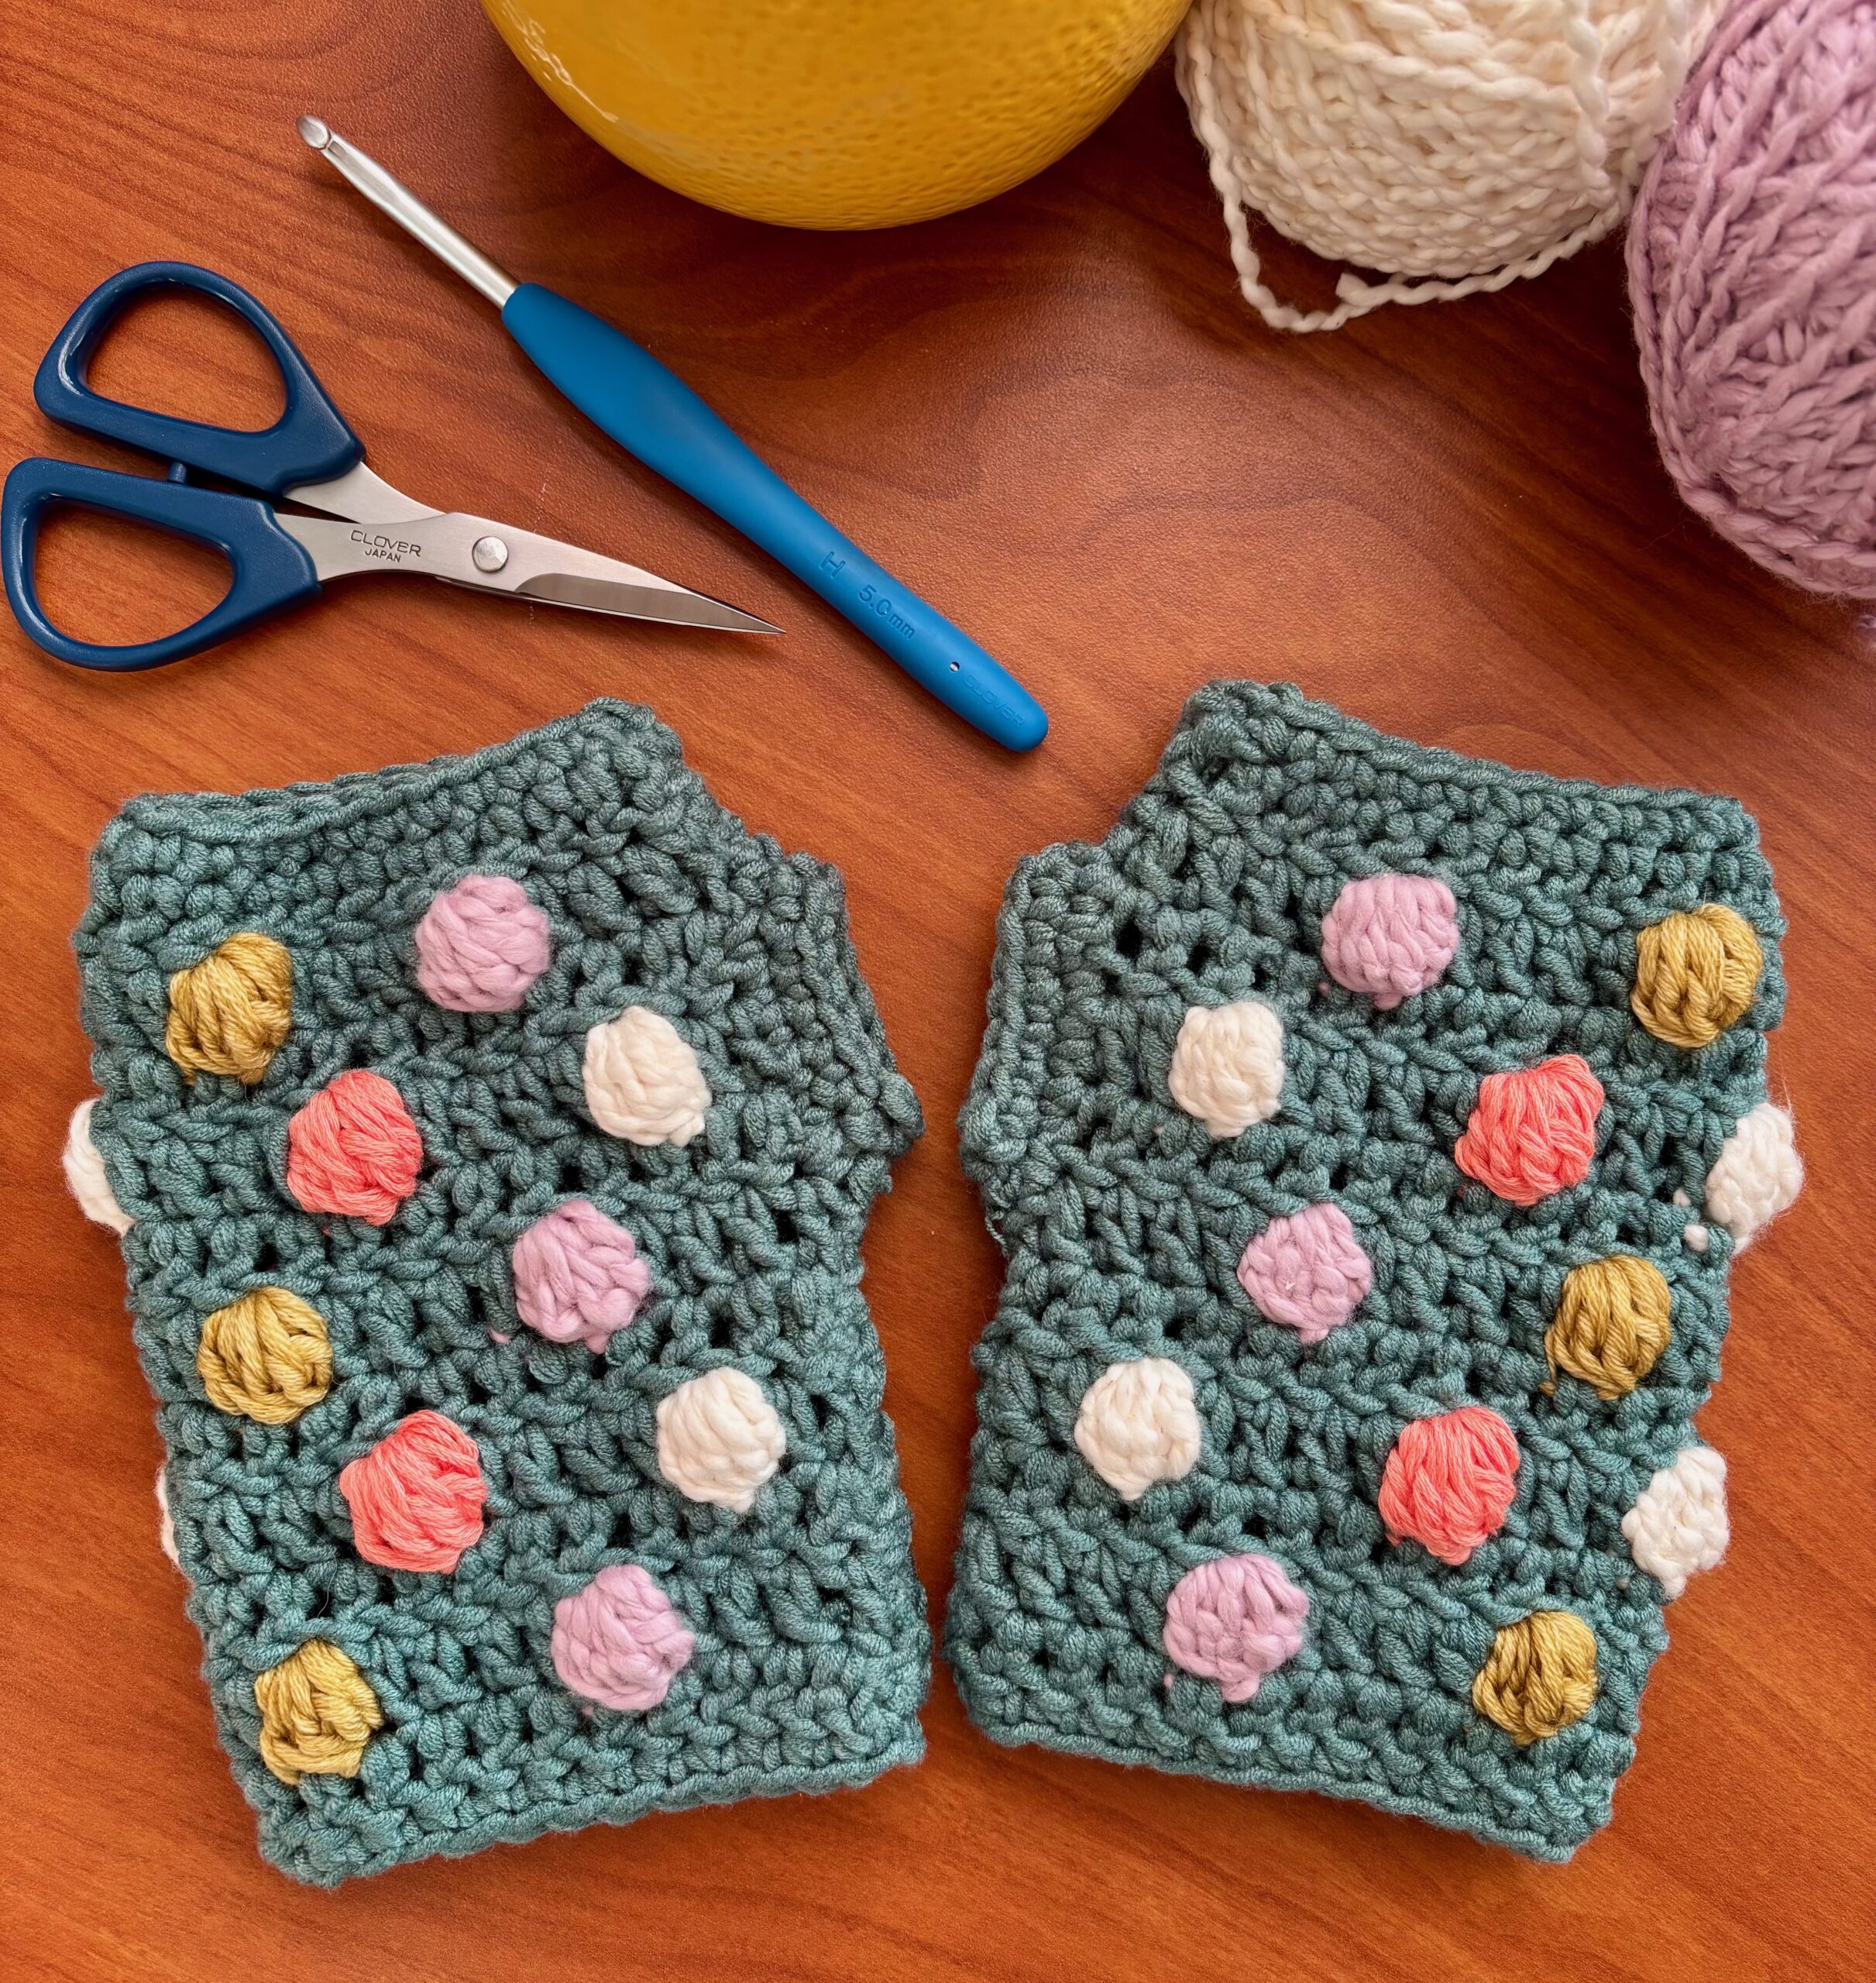
Cloud Puff Wrist Warmers
The Cloud Puff Wrist Warmers are a cozy, modern winter accessory featuring a soft bobble texture that adds beautiful dimension without bulk. Designed to be comfortable, wearable, and quick to make, this pattern is perfect for chilly days, thoughtful gifts, or adding a handmade touch to your winter wardrobe, with a full step by step video tutorial available on YouTube to crochet along with the written instructions. Click the link HERE to follow along with the video too!
MATERIALS:
- Clover Amour Hook H (5.0mm)
- Patchwork Scissors (mini)
- 3 oz worsted weight yarn in colors of choice
- yarn needle
NOTES:
- Special stitch:
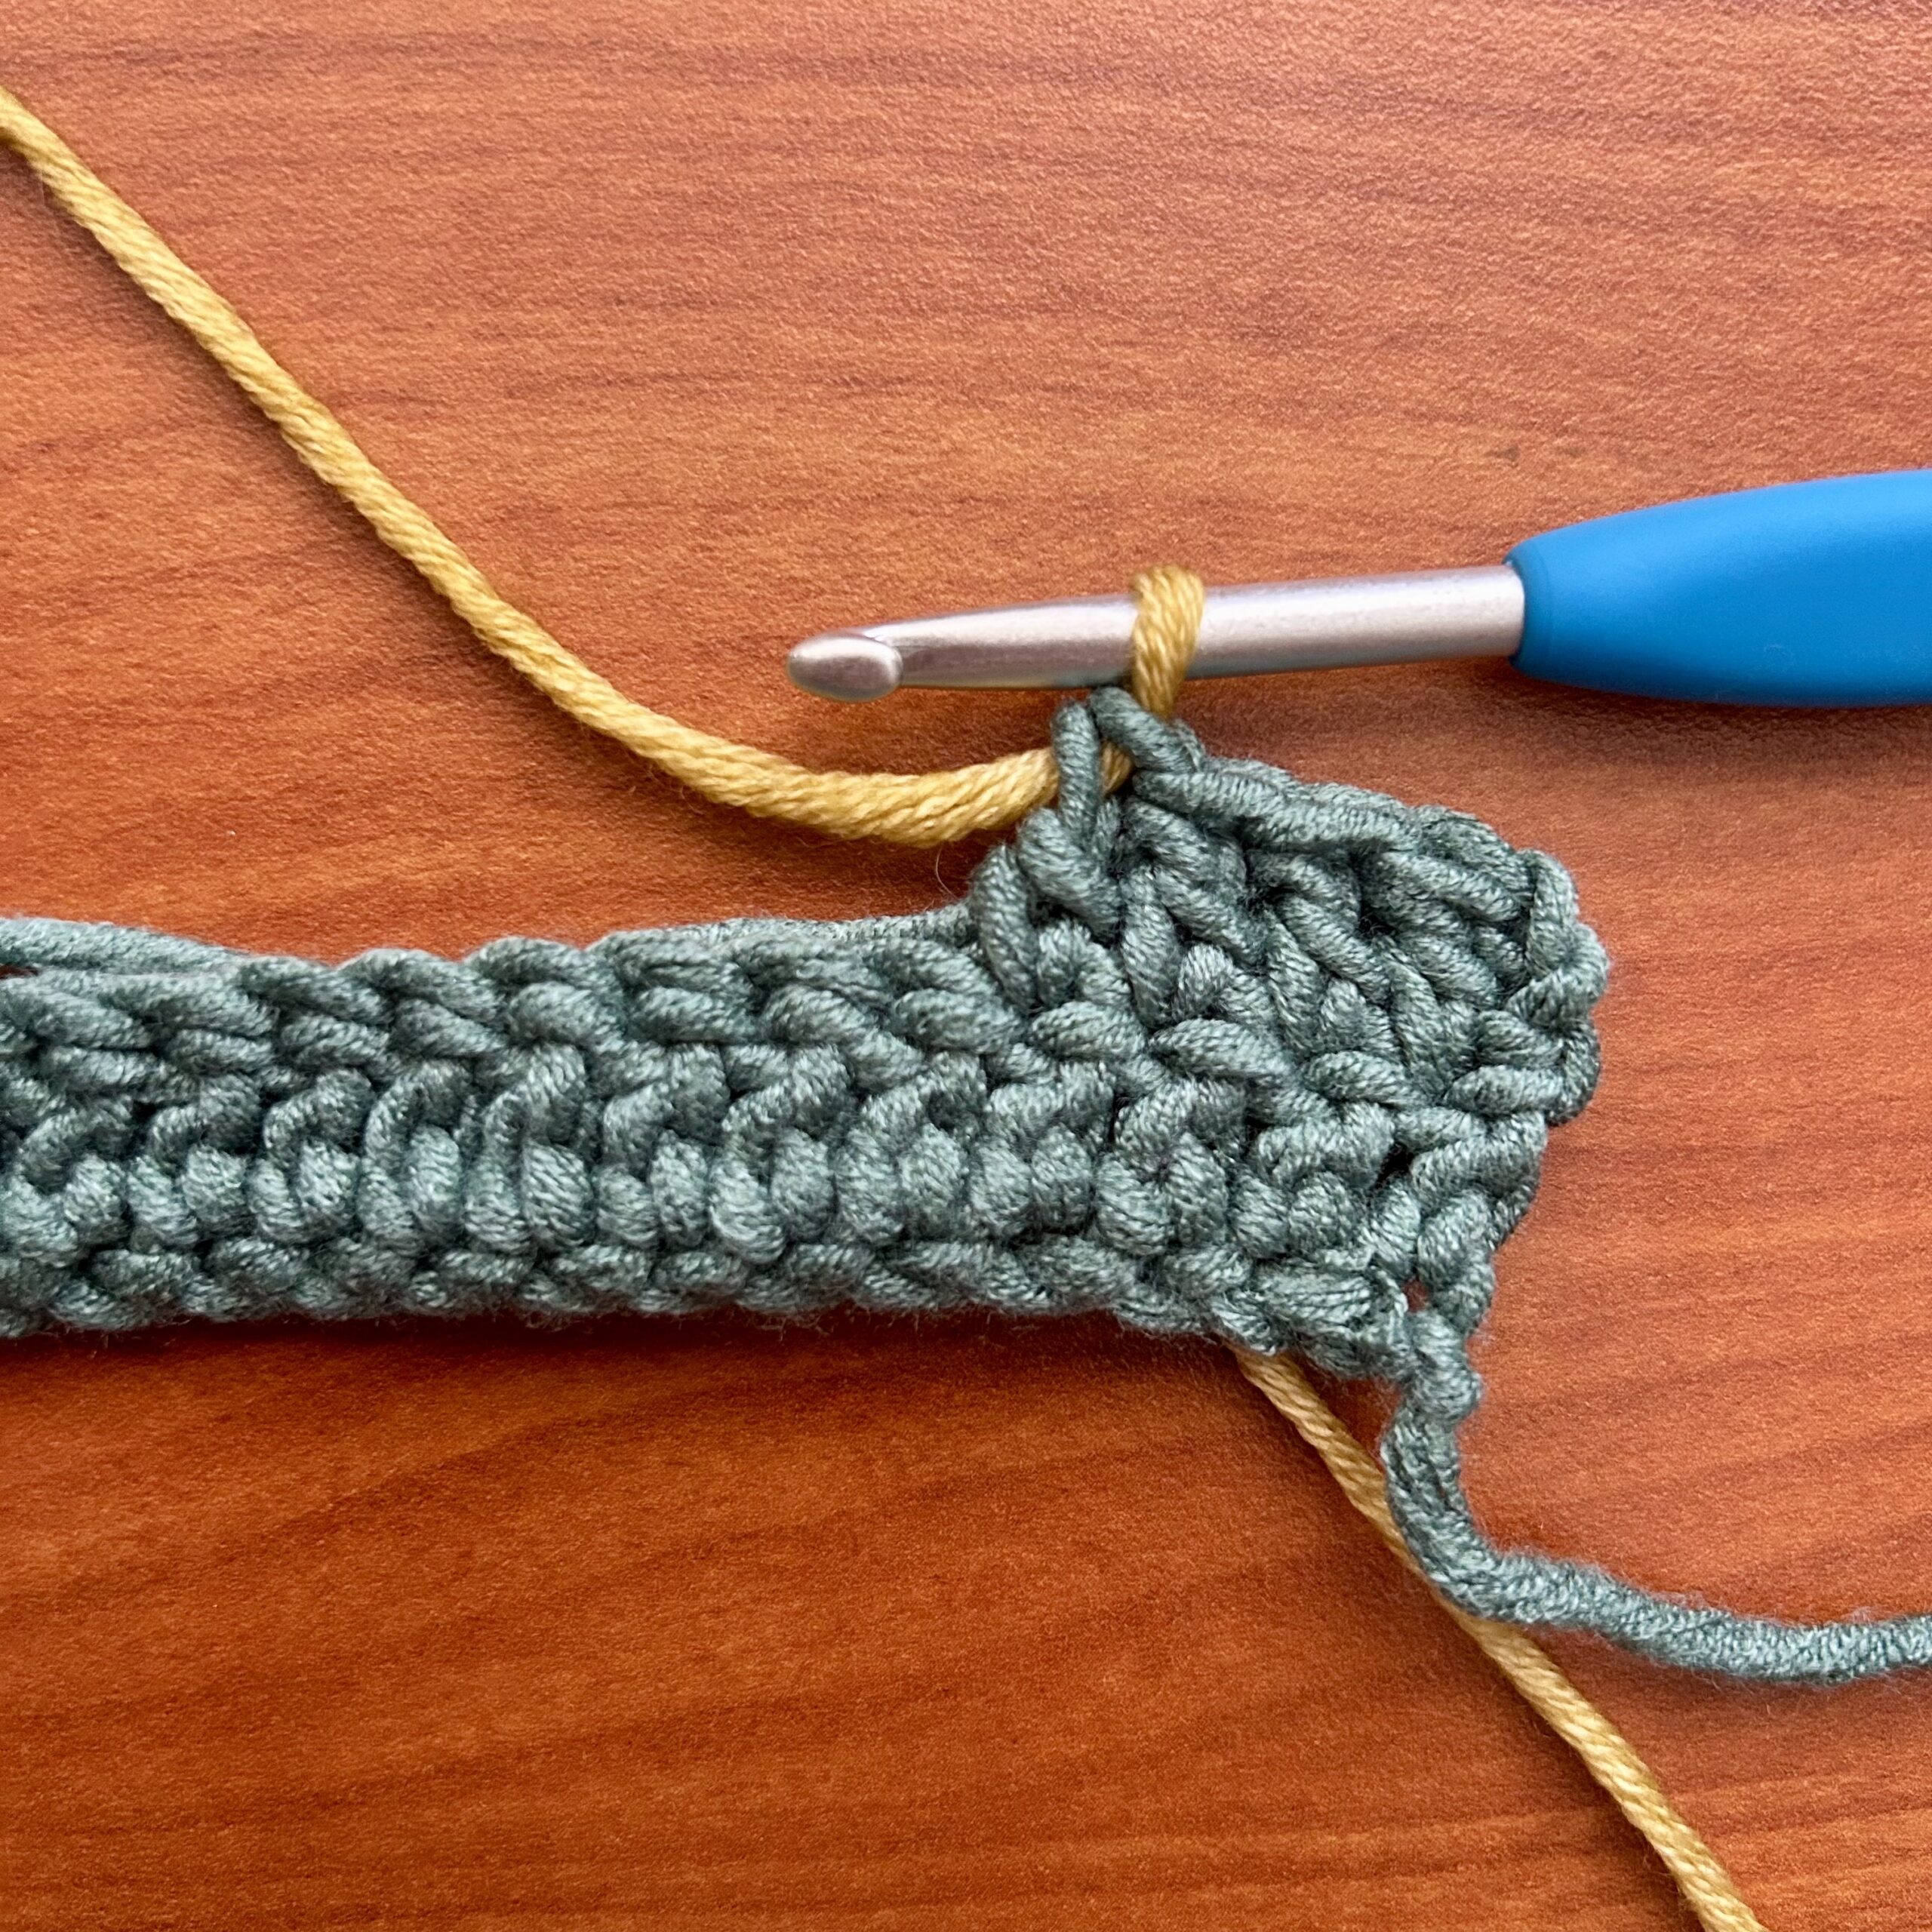
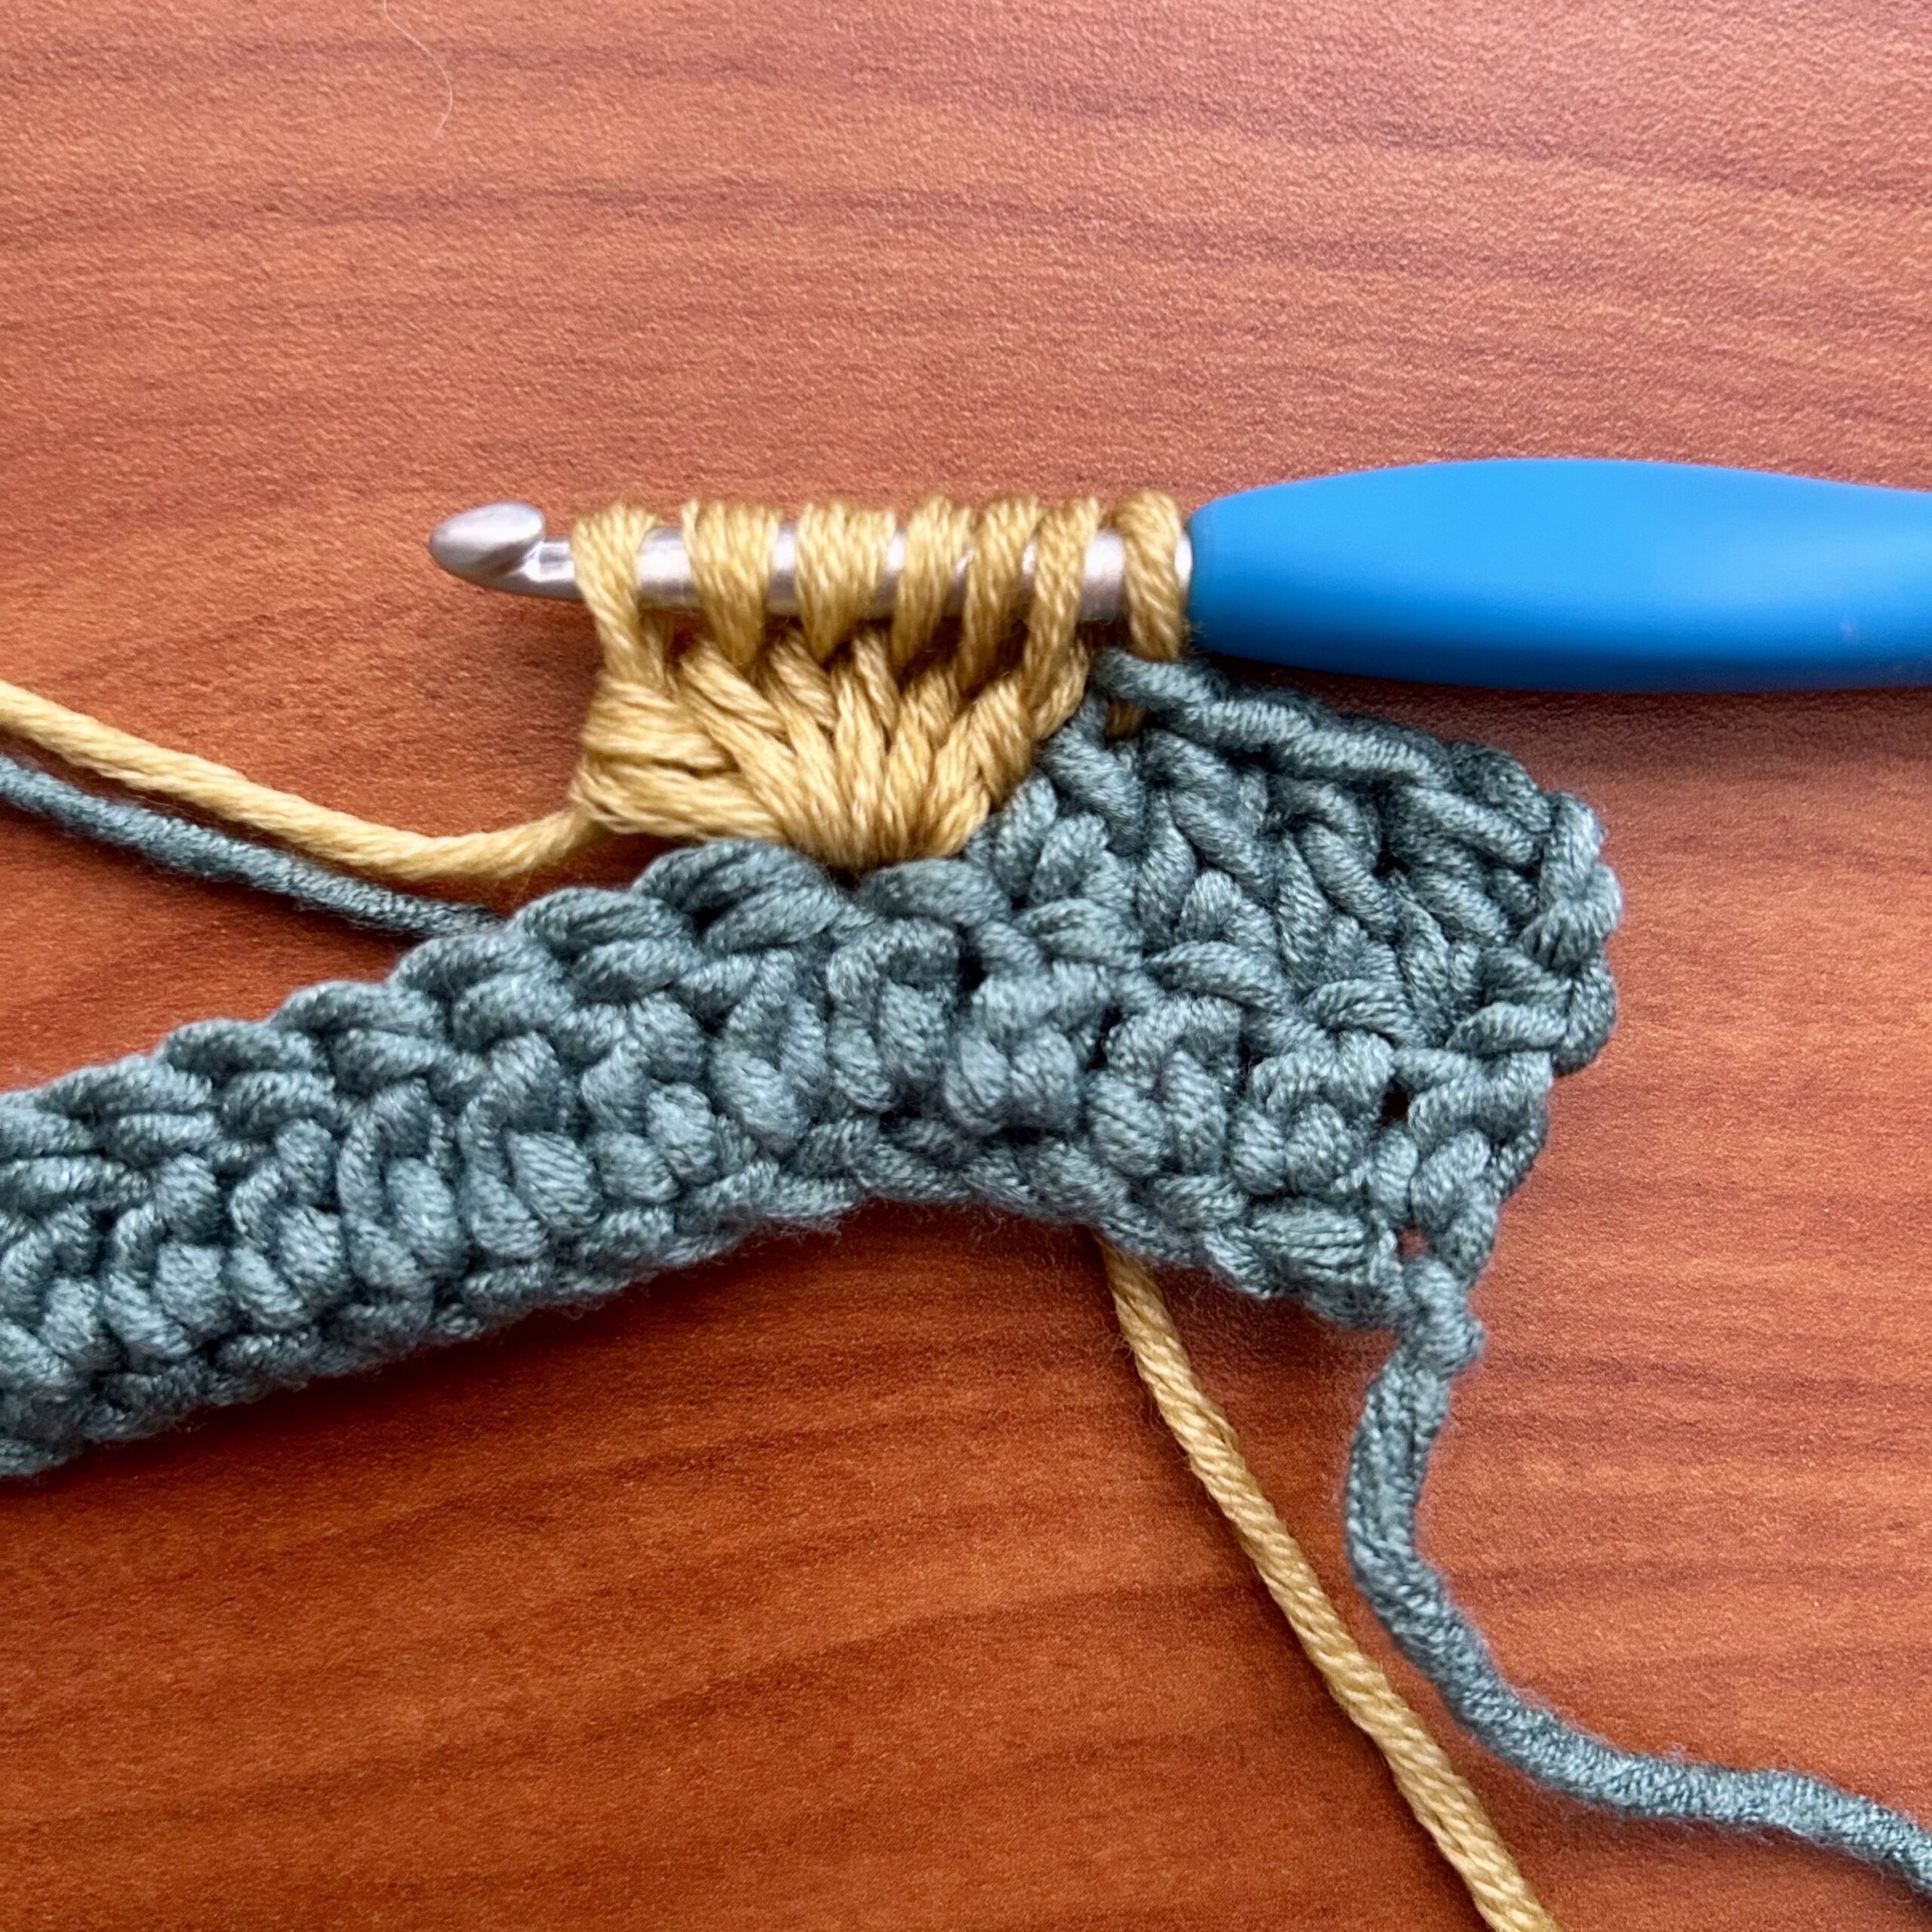
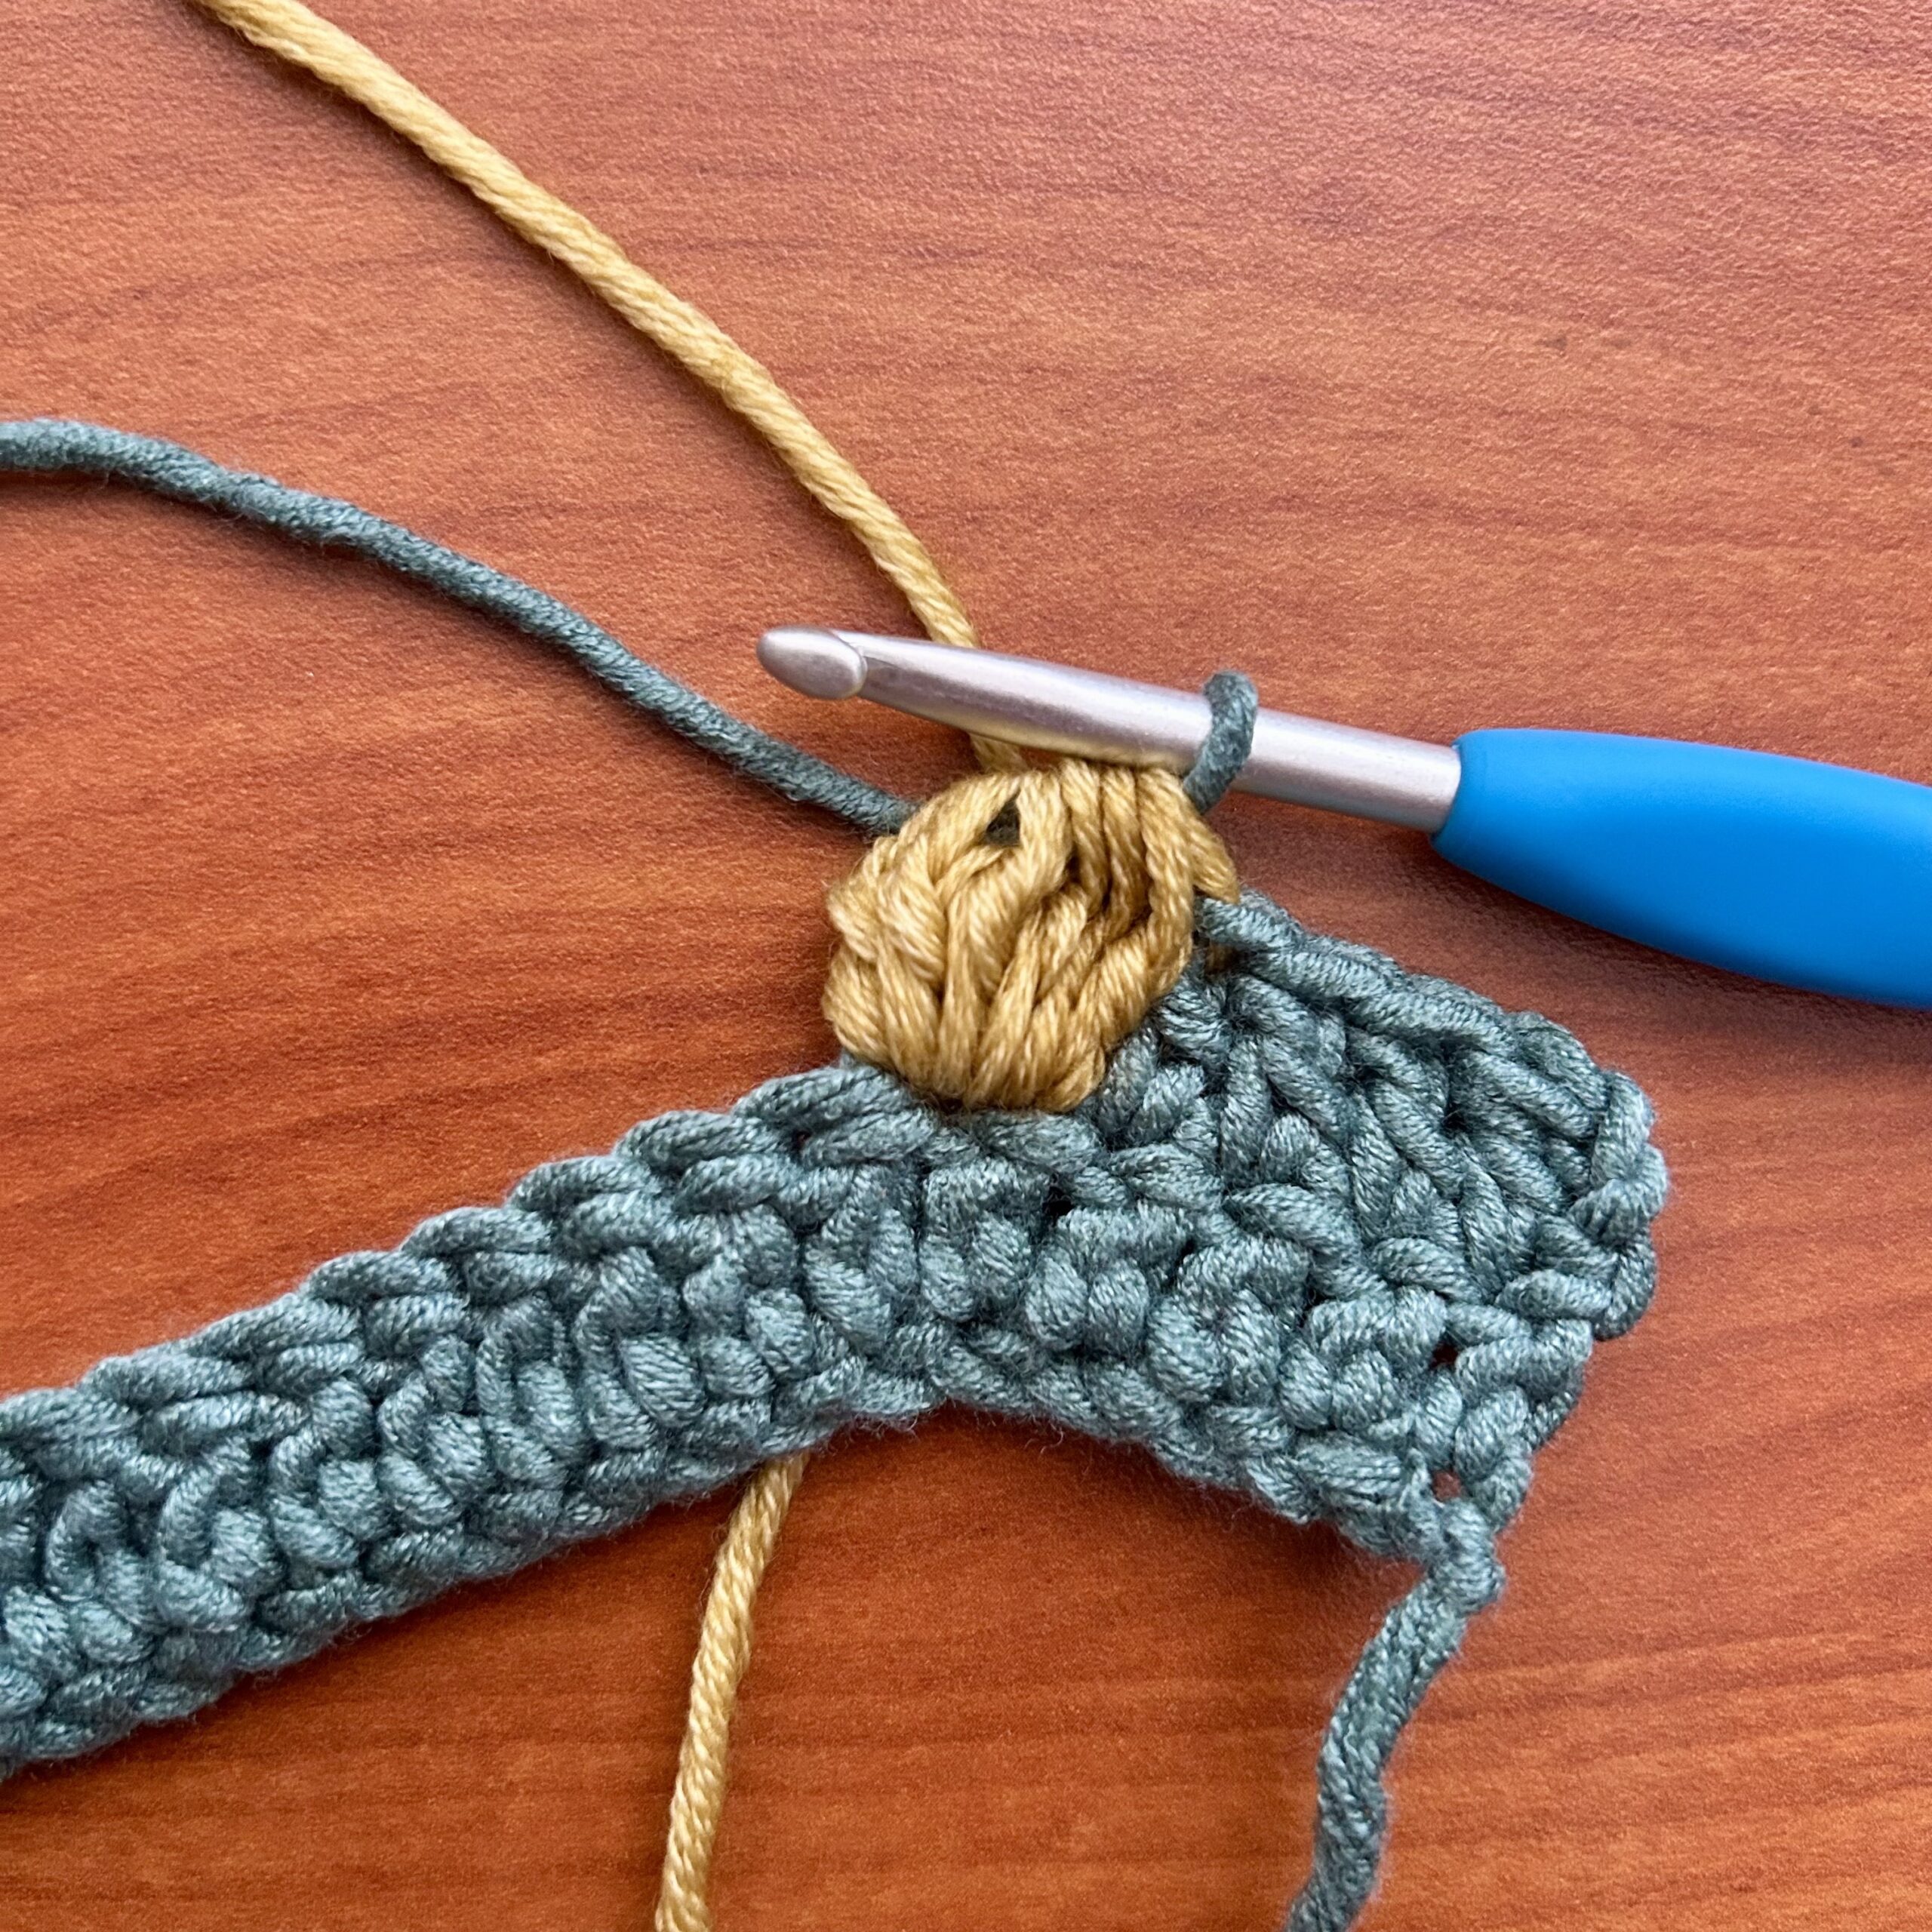
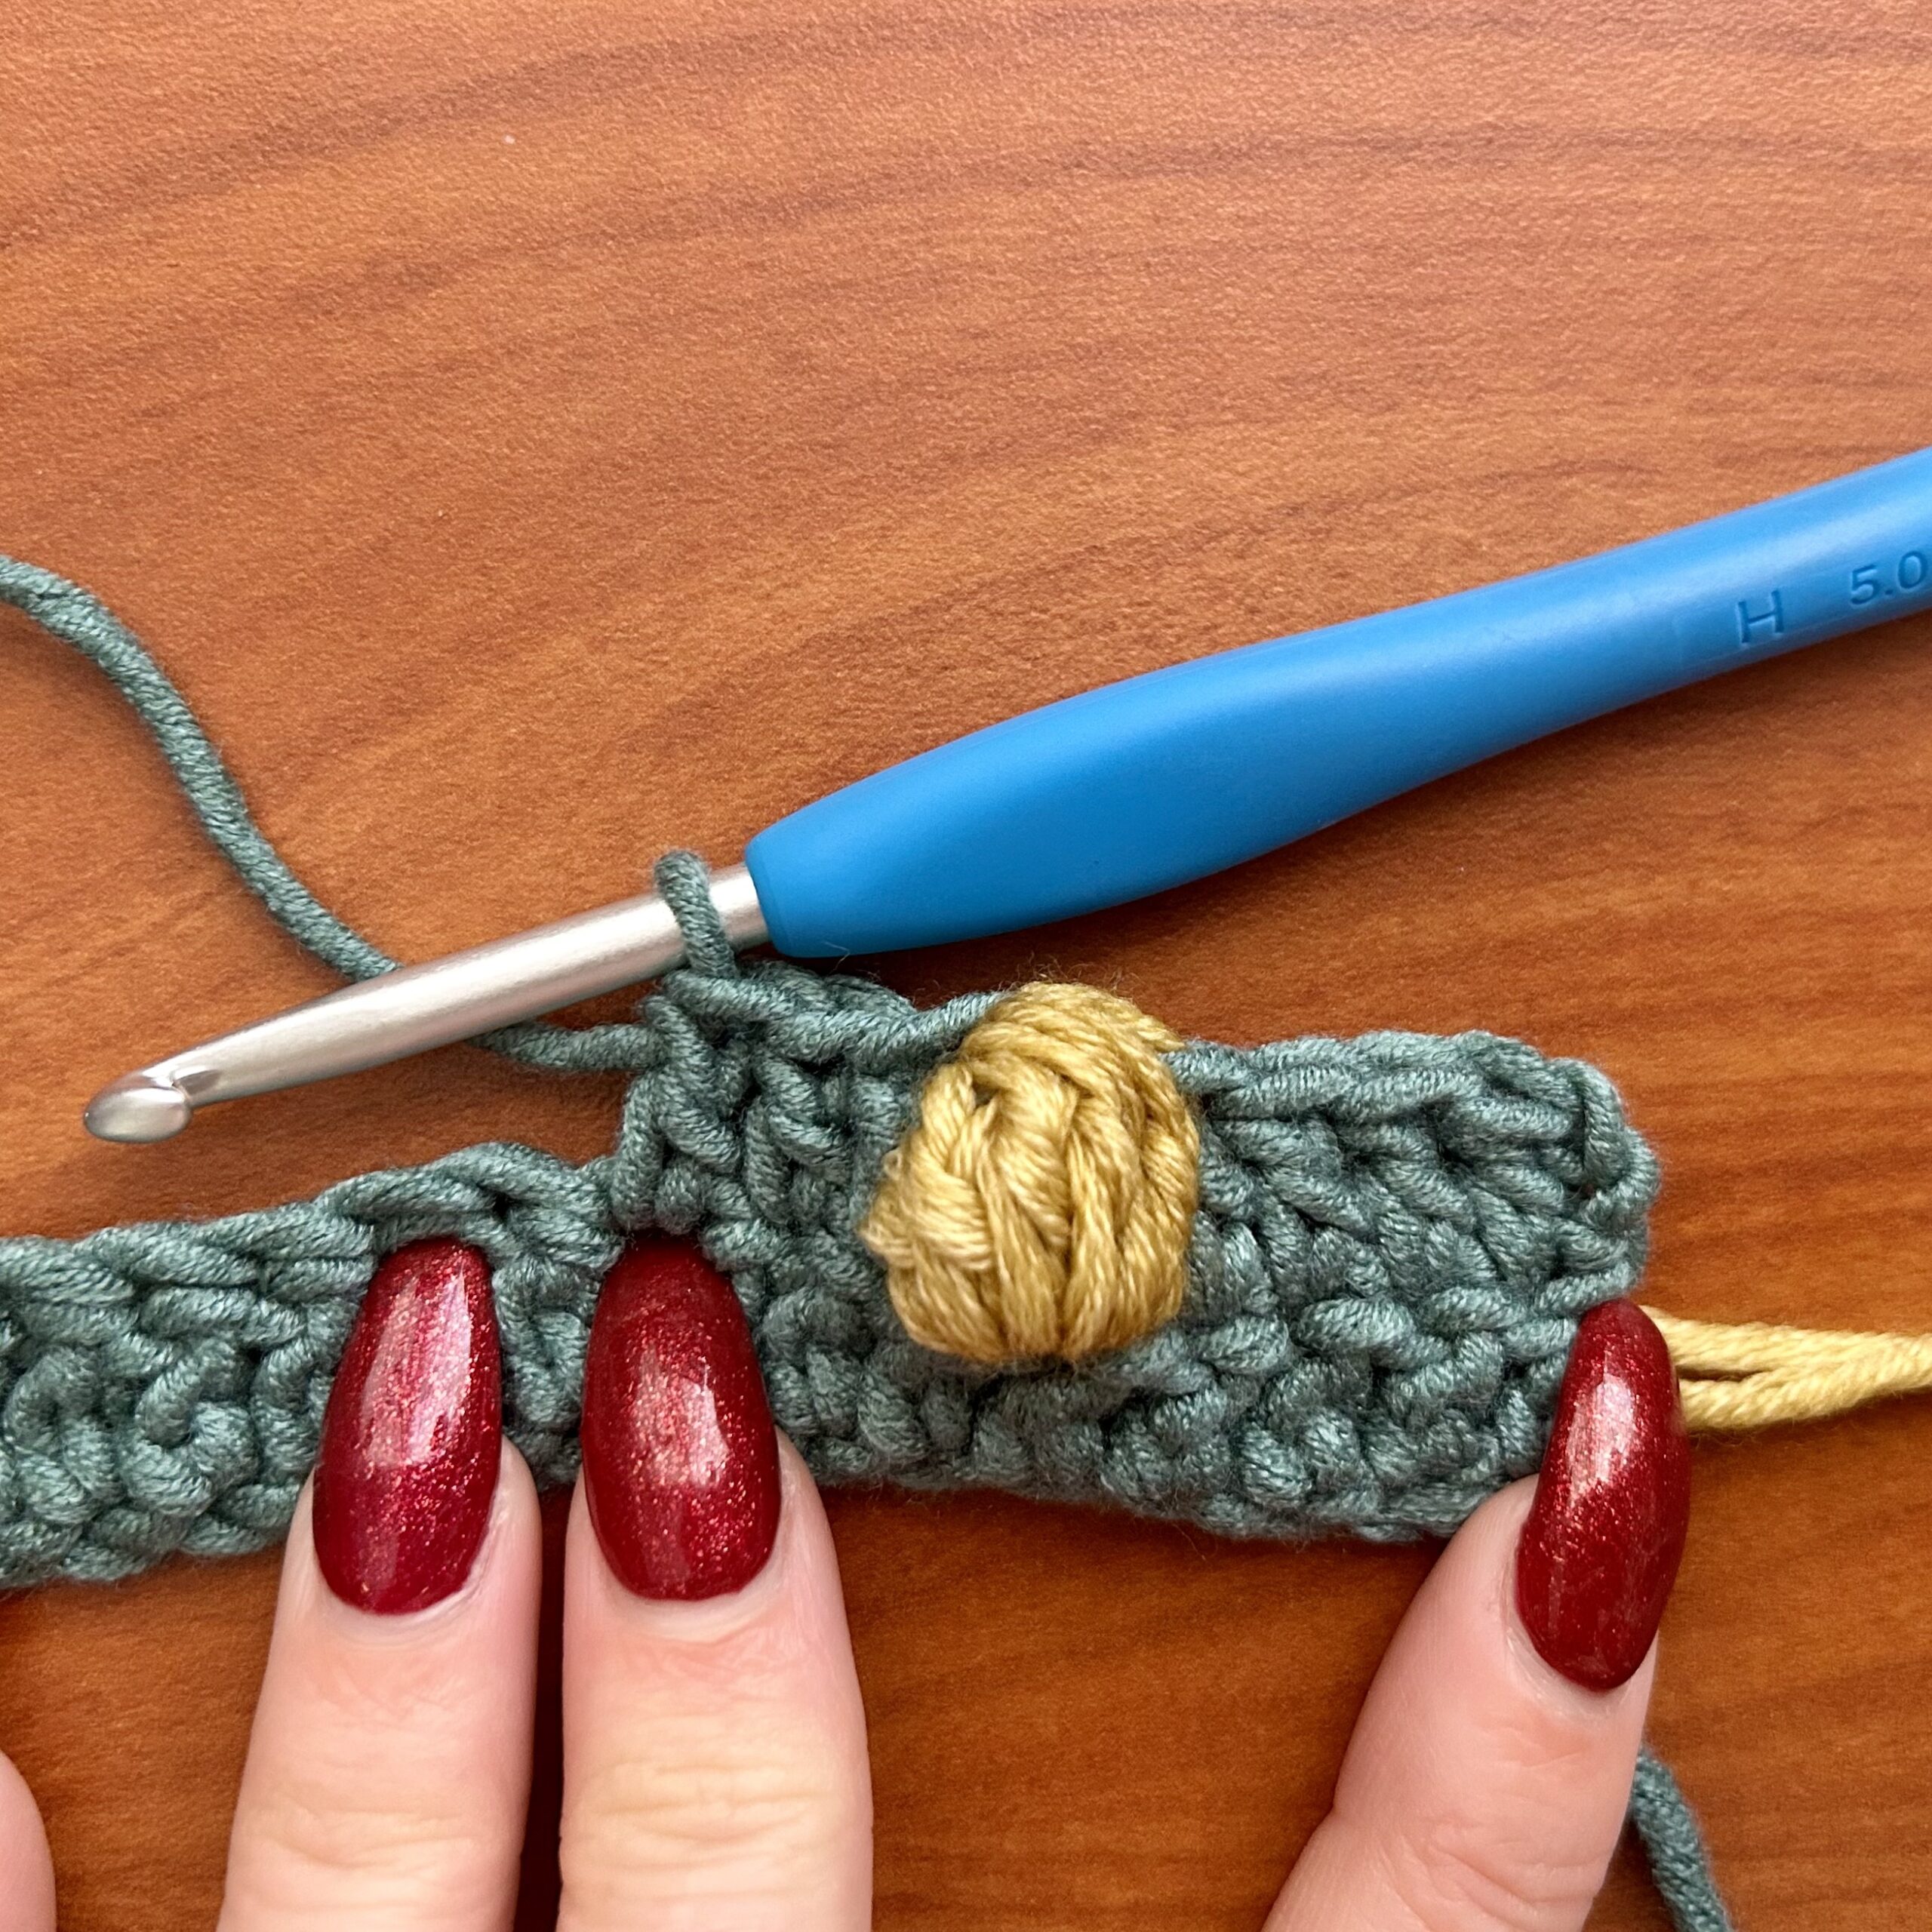
- Bobble stitch: If you are changing colors for your bobble stitches, you will drop your main color right before you finish the double crochet that is immediately before the bobble. You will then finish your double crochet (your last yarn over and pull through) with your bobble color. You will then yarn over, insert your hook into the next stitch, pull up a loop, yarn over and pull through the first two loops. Continue sequence all into the SAME stitch until you have a total of 7 loops on your hook, then cut your bobble color, grab your main color from behind and pull through all 7 loops. Then continue with the pattern. Do this every time you have a bobble stitch.
- Note: The pattern is worked in a rectangle that is then folded and whip stitched along the seam above and below the thumbhole.
- Bobble stitch: If you are changing colors for your bobble stitches, you will drop your main color right before you finish the double crochet that is immediately before the bobble. You will then finish your double crochet (your last yarn over and pull through) with your bobble color. You will then yarn over, insert your hook into the next stitch, pull up a loop, yarn over and pull through the first two loops. Continue sequence all into the SAME stitch until you have a total of 7 loops on your hook, then cut your bobble color, grab your main color from behind and pull through all 7 loops. Then continue with the pattern. Do this every time you have a bobble stitch.
PATTERN INSTRUCTIONS:
Loosely ch 26.
- Row 1: 1 dc in the 3rd ch from the hook and in each ch across. Ch 2, turn. (24 dc)
- Row 2: 1 dc in the first st and in the next 3 sts, *1 bobble in the next st, 1 dc in the next 4 sts,* repeat from * 3 more times. Ch 2, turn. (4 bobbles, 20 dc)
- Row 3: 1 dc in each st across (1 bobble counts as 1 st). Ch 2, turn. (24 dc)
- Row 4: 1 dc in the first two sts, 1 bobble in the next st, 1 dc in the next 4 sts, 1 bobble in the next st, 1 dc in the next 3 sts, 1 bobble in the next st, *1 dc in the next 4 sts, 1 bobble in the next st,* repeat from * one more time. 1 dc in the last 2 sts. Ch 2, turn. (5 bobbles, 19 dc)
- Row 5: 1 dc in each st across (1 bobble counts as 1 st). Ch 2, turn. (24 dc)
Repeat Rows 2 – 5 one more time.
- Row 10: 1 dc in the first st and in the next 3 sts, *1 bobble in the next st, 1 dc in the next 4 sts,* repeat from * 3 more times. Ch 2, turn. (4 bobbles, 20 dc)
- Row 11: 1 dc in each st across (1 bobble counts as 1 st). Ch 2, turn. (24 dc)
Finish off. Weave in all ends.

Fold in half, right sides together. Then whip stitch up the side seam starting at the bottom and stopping at Row 6. Fasten off and reattach at the top and whip stitch down two rows, leaving space for the thumb. Cut yarn and weave in ends.
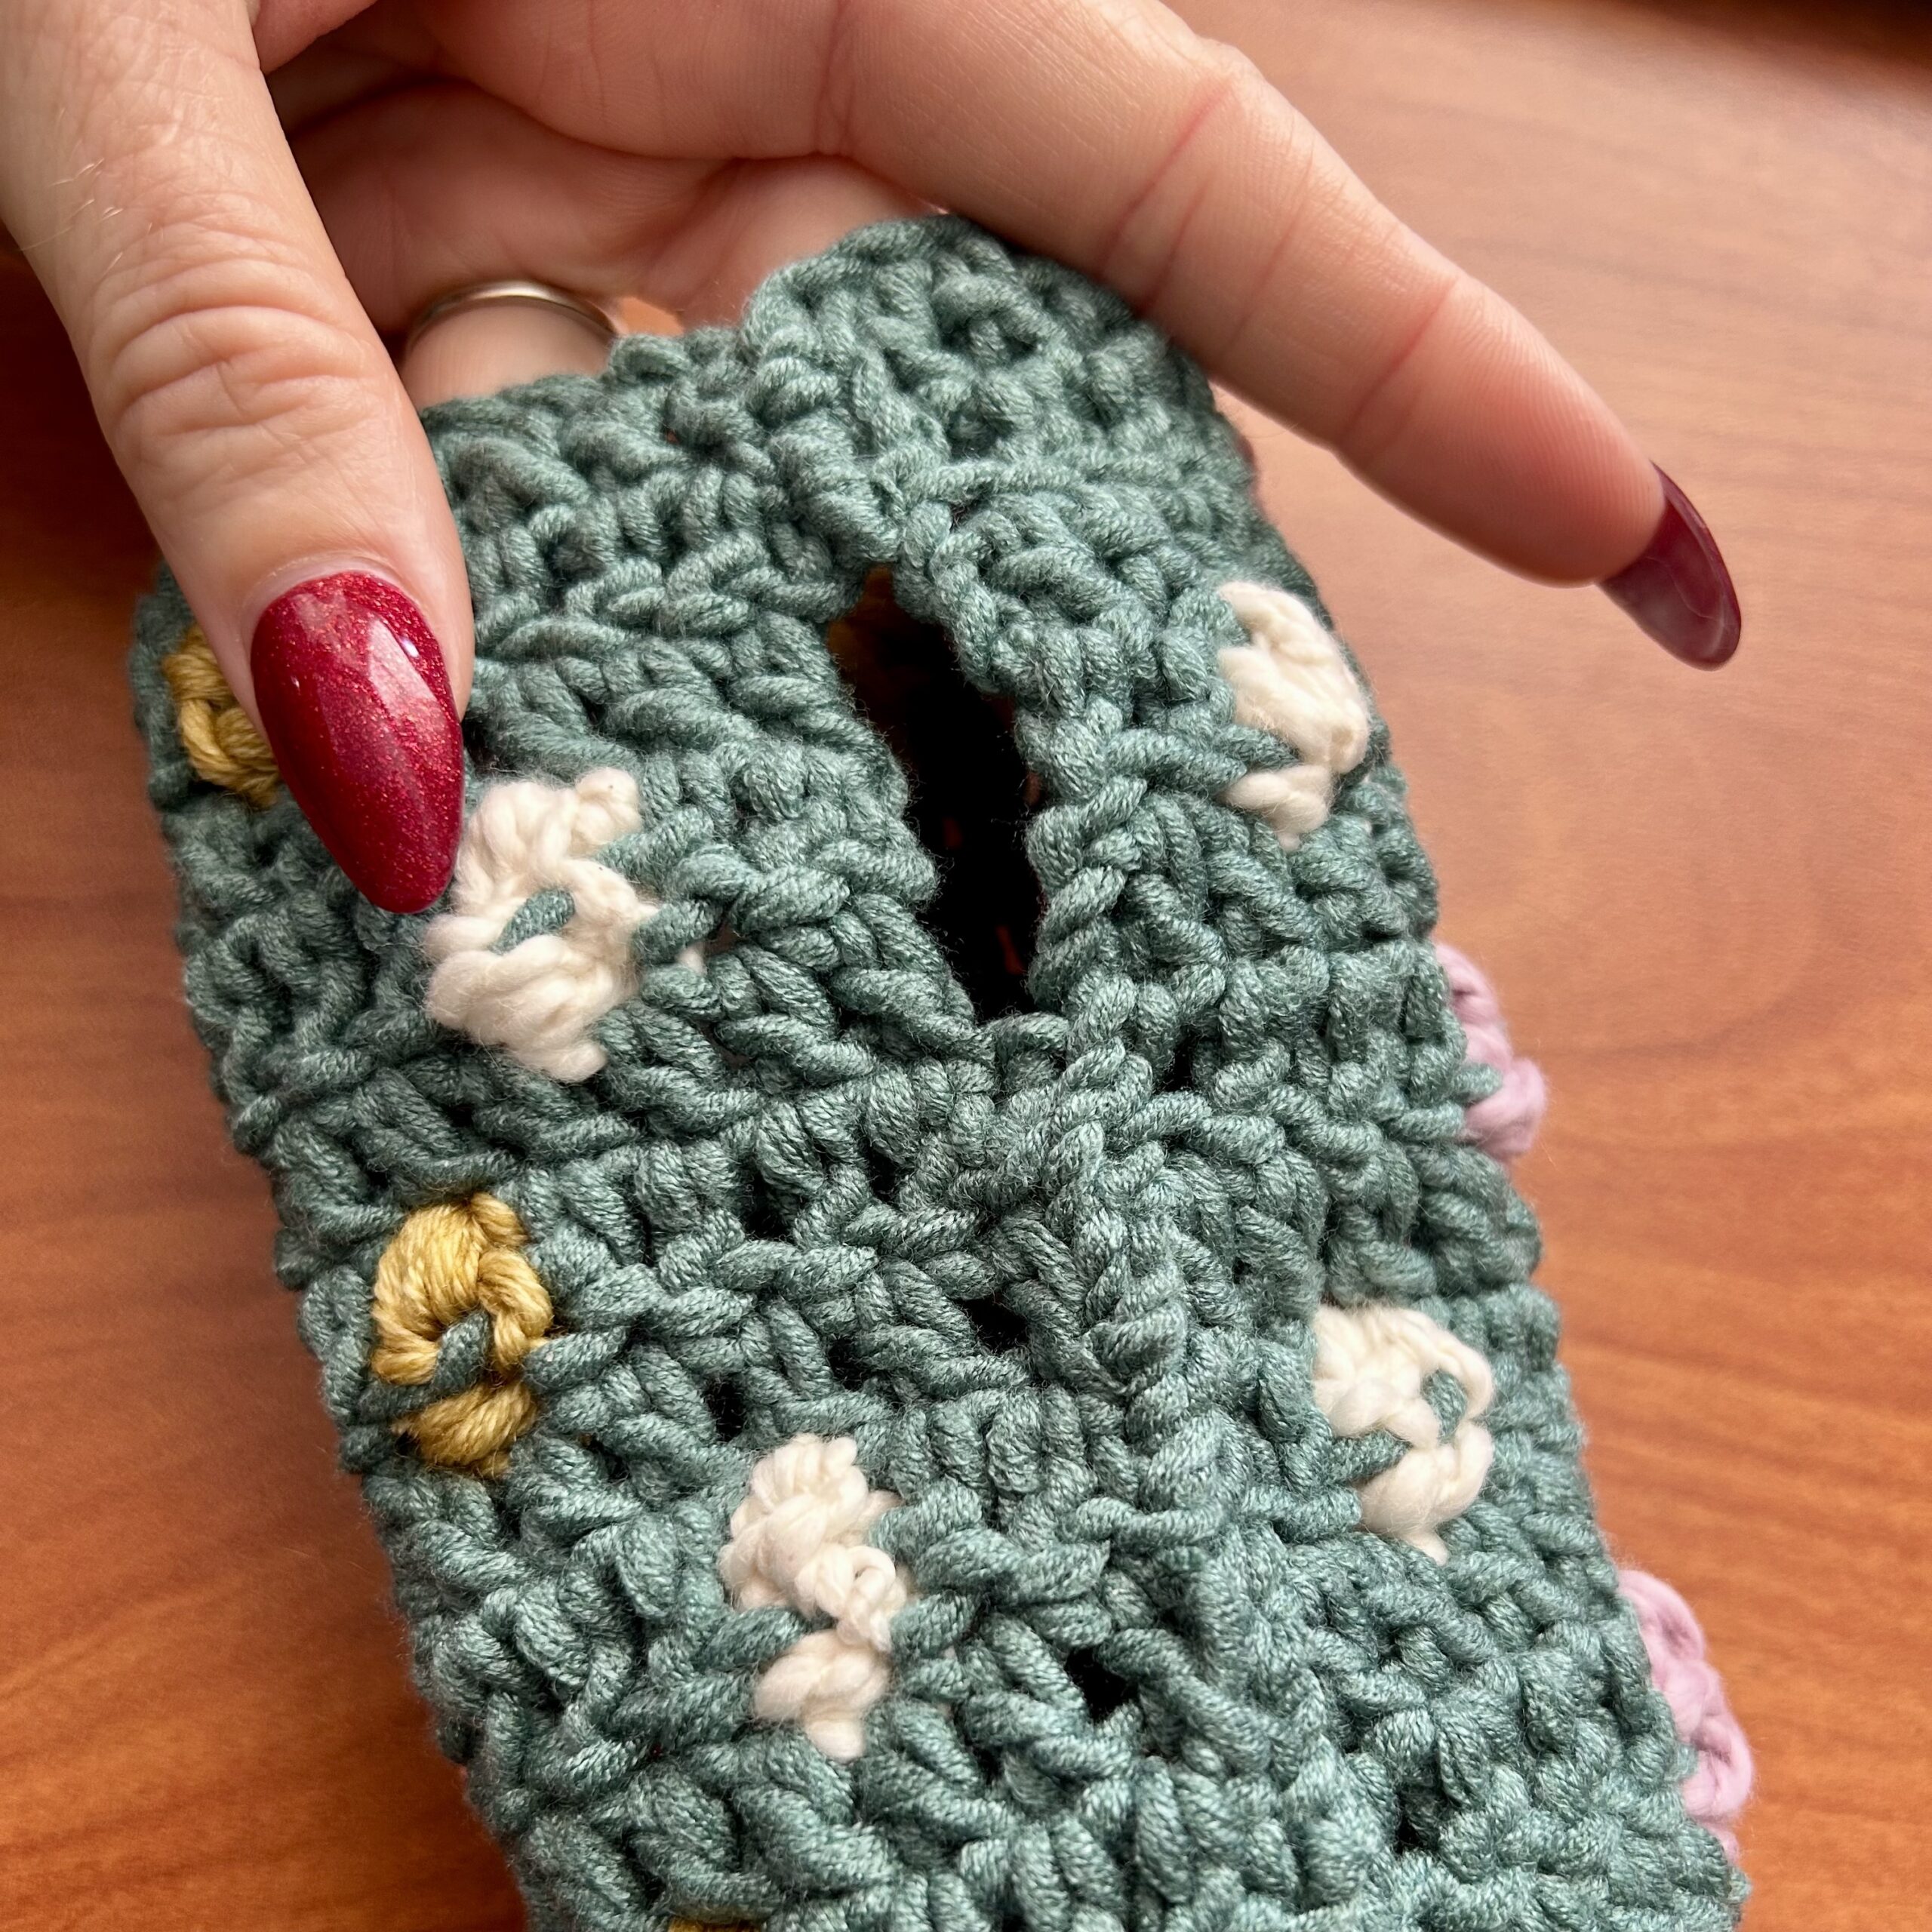
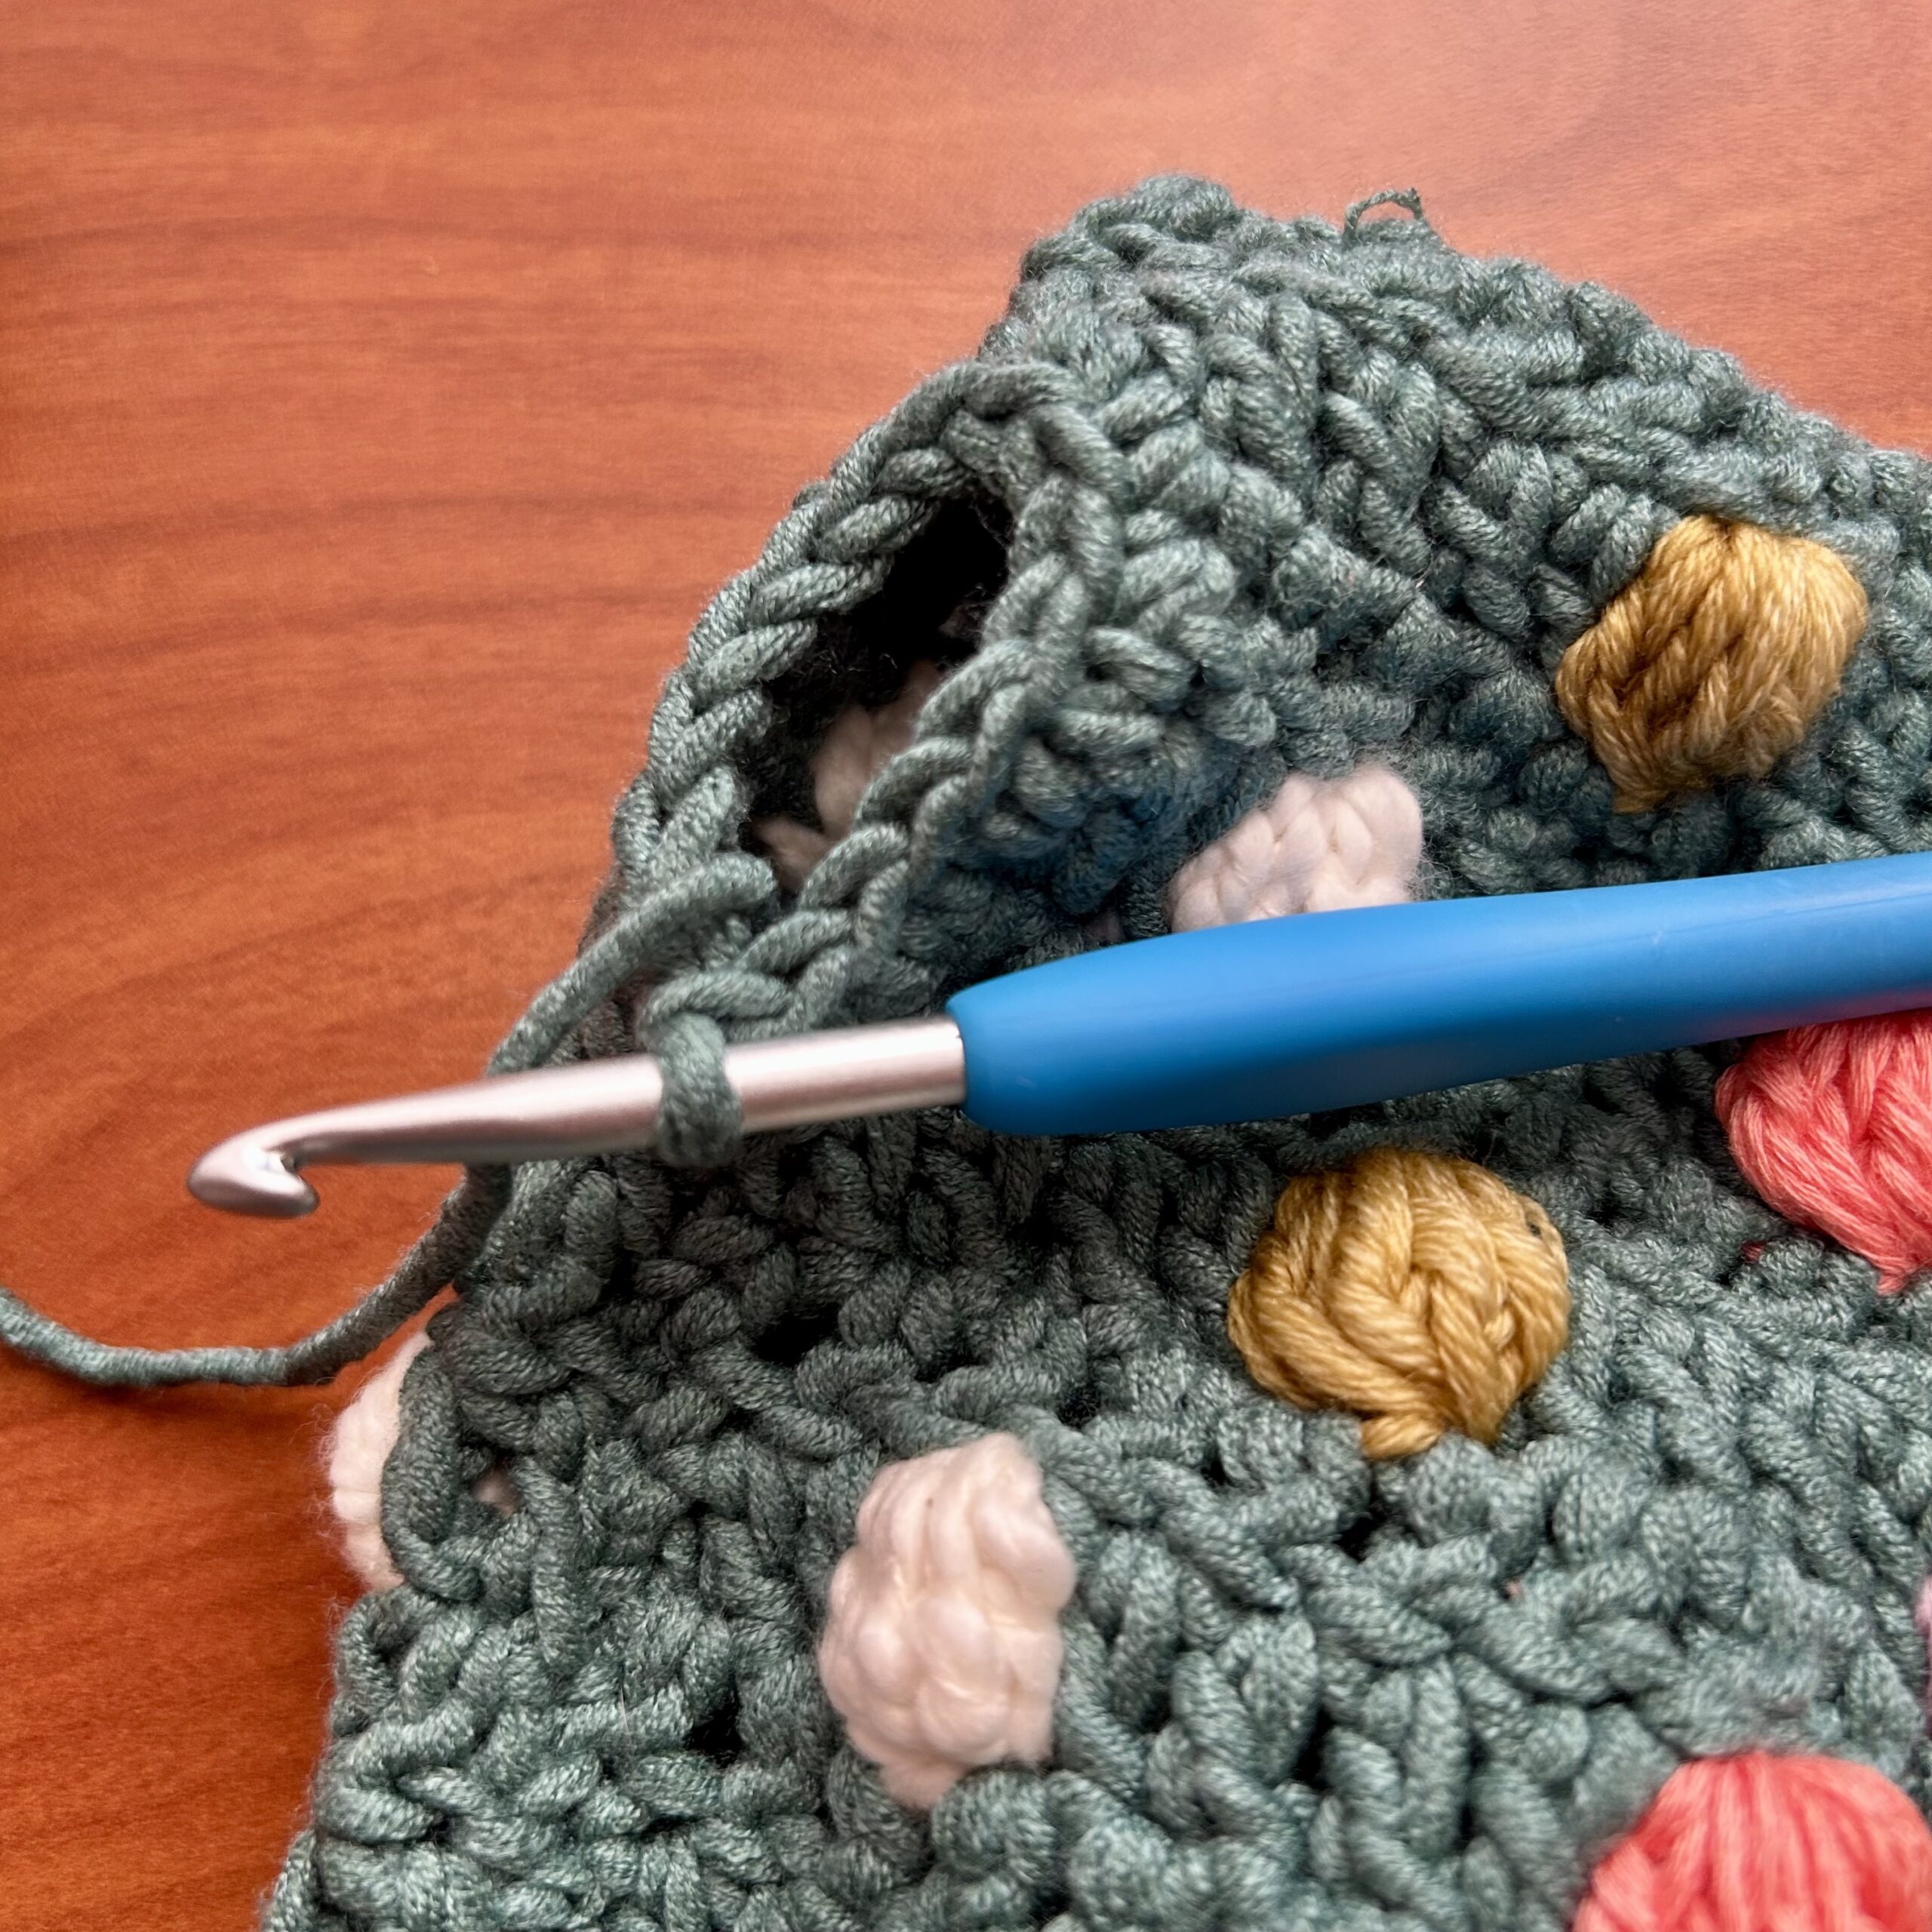
Turn right side out and insert your hook along the seam of the thumbhold.
- Round 1: Ch 1, 15 sc evenly around the thumbhole, sl st to the first sc.
- Round 2: Ch 1, 1 sc in each st around. Join with a sl st to the first sc. Finish off, weave in ends.
Now place one round of sc along the top and bottom of the glove. Finish off, weave in ends.
If you want to keep up with me, Julie, on social media for other fun projects, follow me on: Instagram
If you want to keep up with all things Clover, follow us on: Facebook | Twitter | Instagram | Pinterest | YouTube | Ravelry