Frozen Berries Beanie *crochet pattern*
Hi all! Elisa here from @stringsandcuddles on IG 🙂 Are you ready for the upcoming colder weather? Do you know what happens when the temperature gradually drops? The time for beanies and sweaters is almost here! I’m thrilled to present my most recent design for the next season. You will undoubtedly feel cozier and warmer with this accessory!
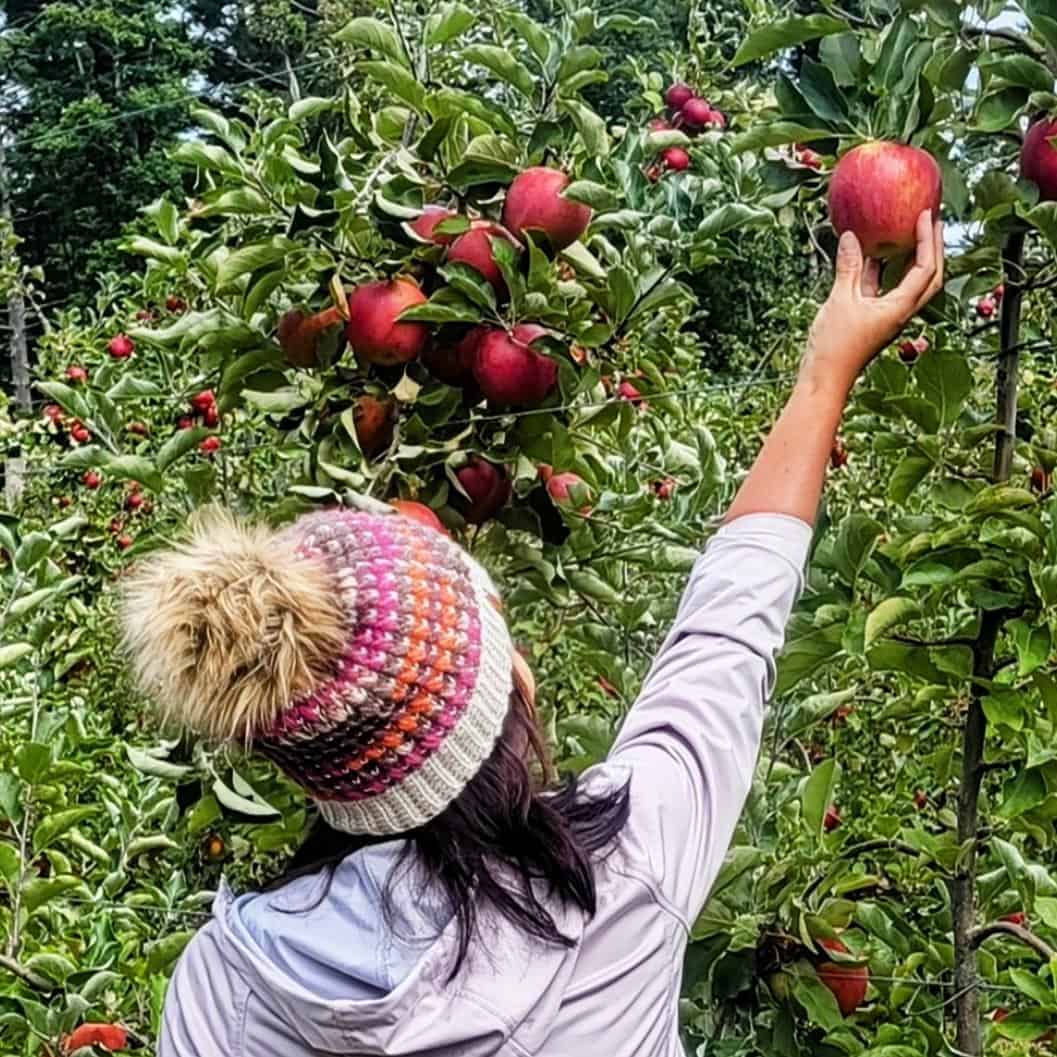
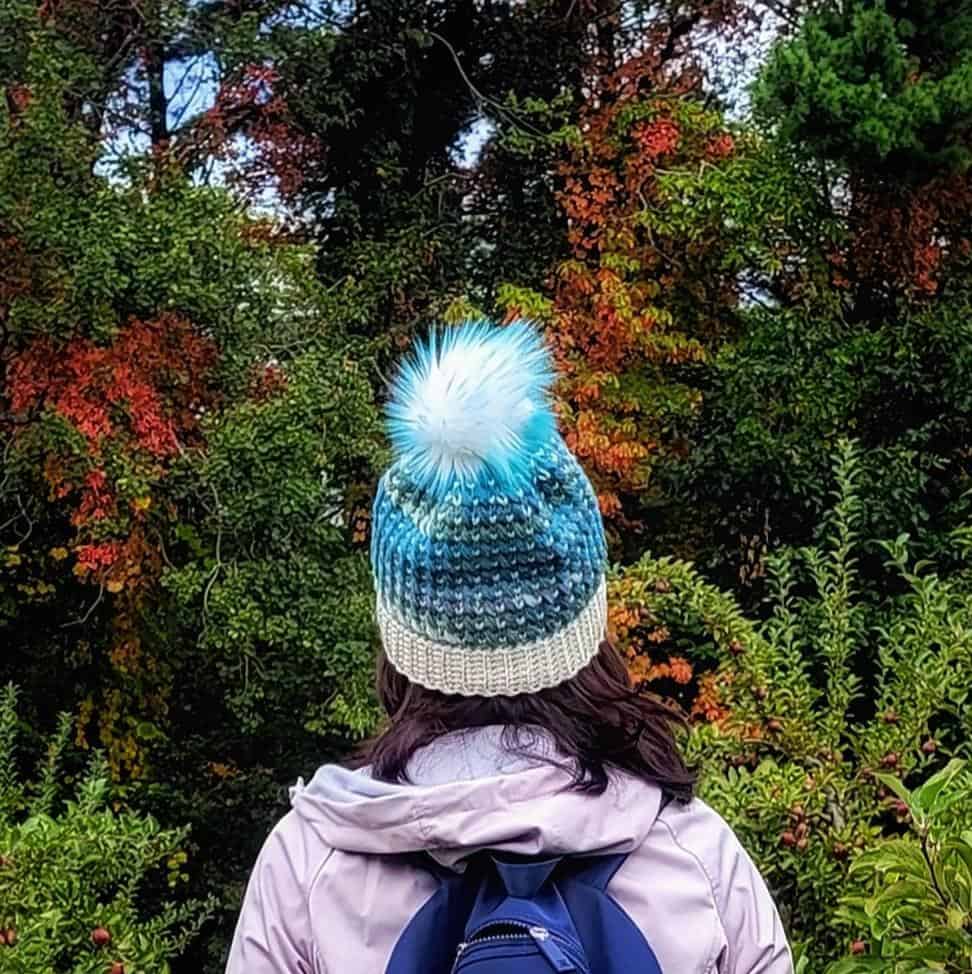
Introducing the Frozen Berries Beanie! It is a must-have piece for your fall and winter outfit.
It’s simple to work up this textured puffy beanie. Mix and match your favorite colors to fit any outfit with the use of stripping colors! This is an incredibly handy accessory to have for running errands, taking a stroll in the park, watching sports outdoors, or going anywhere on chilly days or nights. Join me as we crochet this beanie.
NOTES:
- Read the pattern carefully before starting.
- This pattern is worked from the bottom (band) up.
- I recommend using stitch markers to mark the beginning st/sp of each round of the beanie. Remember to move the stitch marker as you progress.
- The asterisk * indicates pattern repeats. You will need to repeat all the instructions between asterisks.
- Total stitches are indicated at the end of each round.
- To change the beanie’s size, add or subtract 6 rows for the band or 6 stitches for the body pattern. Although the pattern calls for multiples of 2, I recommend using multiples of 6 stitches to match the crown’s shaping. If you want your beanie to be slouchy, add a few more rows to the body of the beanie before continuing with the decreases or shaping of the crown.
- Try to work your waistcoat stitch as loosely as you can, particularly if you are a tight crocheter. The space where you need to insert your hook can get very tight and it will make crocheting the waistcoat stitch hard work on your hands.
- This pattern uses US crochet terms.
- Gauge: 7 sts X 8 rows = 2 inch
- Skill level: Intermediate
- Finished measurement: Approximately 8.75” (height) x 20.5” (circumference) – unstretched. Fits most adults.
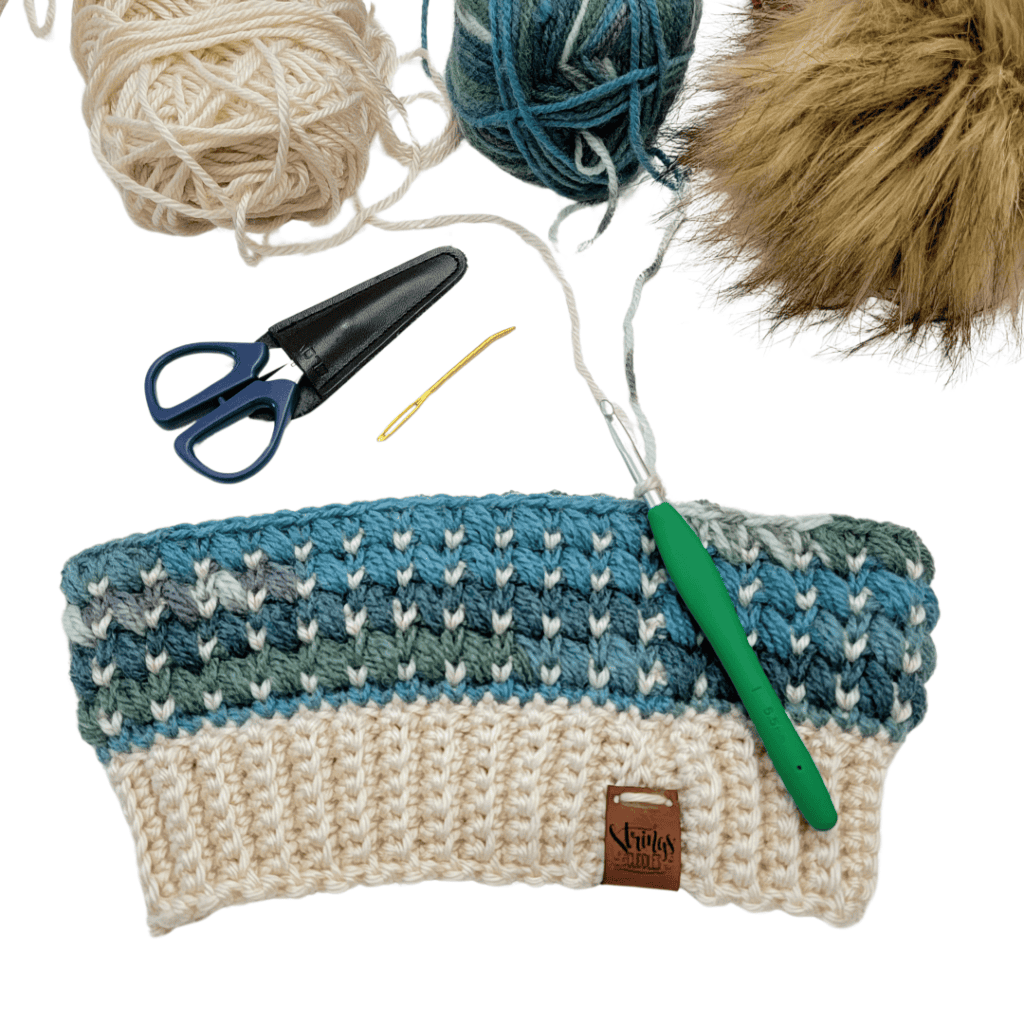
MATERIALS:
- Clover Amour Crochet Hook I/5.5 mm (or size to obtain gauge)
- Clover Patchwork Mini Scissors
- Clover Jumbo Tapestry Needle (Bent Point)
- Tape Measure
- Any 1 or 2 Colors of Worsted Weight (#4) Yarn
- Optional: Stitch Marker, Pompom
ABBREVIATIONS:
- BLO: back loop only
- ch(s): chain(s)
- R: row/round
- rep: repeat
- RS: right side
- SC: single crochet
- sk: skip
- sl st(s): slip stitch(es)
- sp(s): space(es)
- st(s): stitch(es)
- WS: wrong side
- WC: waistcoat (or knit stitch crochet): insert the hook in the center of the stitch, between the legs of the ‘V’ shape, yarn over and pull up a loop, yarn over again and pull through both loops on hook.
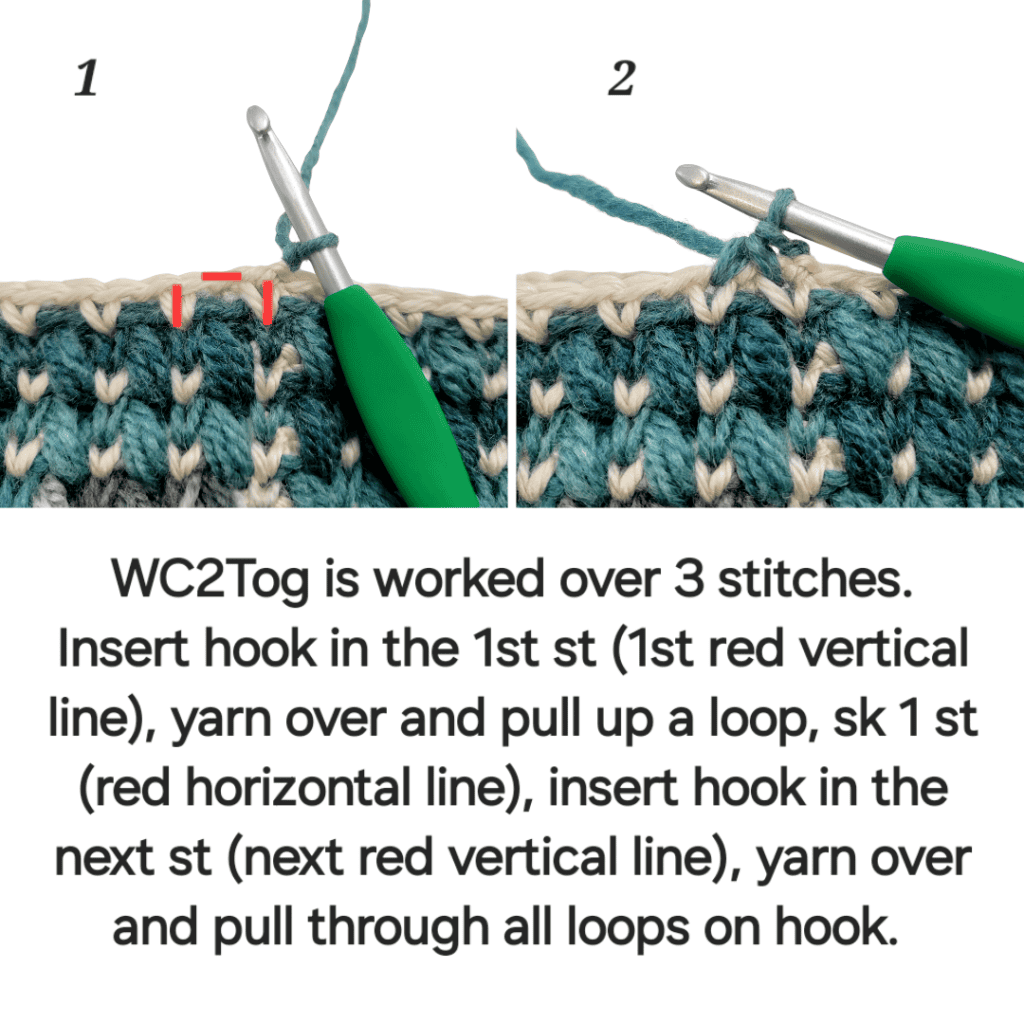
- WC2Tog: waistcoat 2 stitches together (decrease): This is worked over 3 stitches. Insert hook in the indicated st, yarn over and pull up a loop, sk the next st (ch-1-sp), insert hook in the next st, yarn over and pull up a loop, yarn over again and pull through all loops on hook.
- PS: puff stitch (or 3 half double crochet cluster): (yarn over, insert hook in the indicated st, yarn over again, pull up a loop to the height of the current row) three times, 7 loops on hook, yarn over and pull through all loops on hook.
BEANIE PATTERN
BAND:
Gauge: 8 SC X 7 rows = 2 inches
- R1 (RS): With Color 1, ch 9, SC in the 2nd ch from the hook and in each ch across. Turn. 8 sts
- R2 (WS): Ch 1 (does not count as a st throughout), SC – BLO in the 1st st and in the next 6 sts, SC in the last st. Turn. 8 sts.
- R3 – 72: Rep R2.
- The band measures approximately 20 inches without stretching. Do not fasten off, place both short ends together (RS facing in), ch 1, sl st closed through both loops in each st of the brim ends. Do not fasten off, turn the band inside out so the right side is facing out and sl st end is facing in. Continue with the BODY of the beanie.
BODY:
Gauge: 7 st X 8 rows = 2 inches
- R1: Ch 1, sl st loosely into the side of each row of the brim around. Sl st in the 1st st to join. Drop Color 1 and attached Color 2. 72 sts
- R2: Ch 1, SC in each st around. Sl st in the 1st st to join. Drop Color 2 and pick up Color 1. 72 sts
- Note: From this point, when joining with a sl st, I recommend slip stitching in the center of the V shape of the 1st st as if you are working WC st, drop your (working color) yarn and pick up the (next color) yarn. Refer to the photo below.
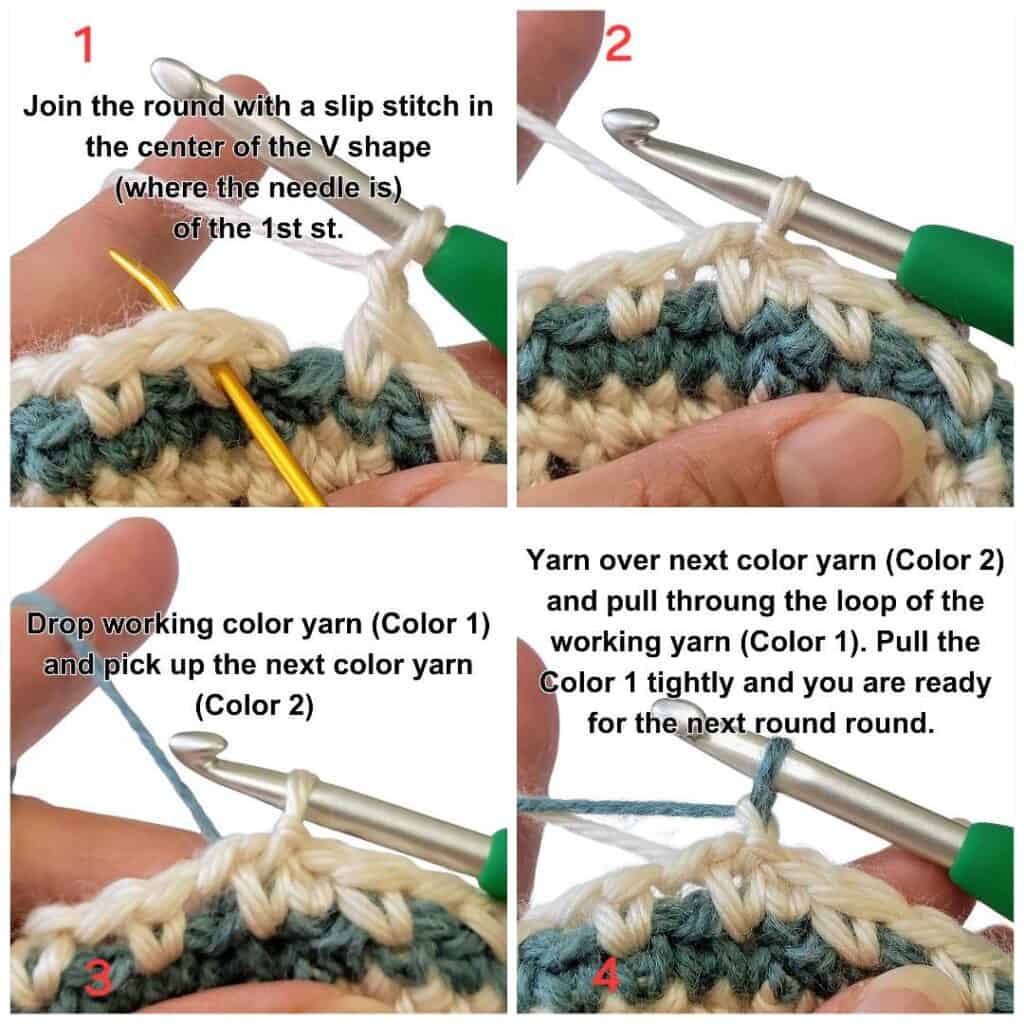
- R3: Ch 1, *WC, ch 1, sk 1 st*; Rep from * to * around. Sl st in the center of the V shape of the 1st st to join. Drop Color 1 and pick up Color 2. 72 sts
- R4: Ch 1, *WC, PS in the skipped st 2 rows below*; Rep from * to * around. Sl st in the center of the V shape of the 1st st to join. Drop Color 2 and pick up Color 1. 72 sts. Refer to the photo below. Please pay attention to the placement of each stitch.

- R5 – 21: Rep R3 and R4, ending with R3.
- The beanie measures approximately 7 inches in height. Continue with the Shaping the Crown and with the alternating yarn colors.
SHAPING THE CROWN:
- R22: Ch 1, *WC2Tog, PS in the skipped st 2 rows below, WC, PS in the skipped st 2 rows below*; Rep from * to * around. Sl st in the center of the V shape of the 1st st to join. 48 sts. Refer to the photo below.
- R23: Rep R3. 48 sts
- R24: Rep R22. 32 sts
- R25: Rep 3. 32 sts
- R26: Ch 1, *WC2Tog, PS in the skipped st 2 rows below*; Rep from * to * around. Sl st in the center of the V shape of the 1st st to join. 16 sts
- R27: Rep R3. 16 sts
- R28: Rep R26. 8 sts.
FINISHING:
- Fasten off leaving a long tail (approximately 12 inches) for closing the top of the beanie. With the long tail yarn and tapestry needle, thread through the sts around to close the top. Thread through the sts for the second time then pull tight to cinch closed.
- Fasten off and weave in all ends.
- Add your favorite pompom for a finishing touch, and you are done!
Please don’t hesitate to reach out with questions regarding this pattern. I would love to see your Frozen Berries Beanie version! Please tag me on IG @stringsandcuddles and use these hashtags to share: #stringsandcuddles, #stringsandcuddlesdesigns, #frozenberriesbeanie
If you want to keep up with me, Elisa, on social media for other fun projects, follow me on social media: Instagram | Pinterest | Facebook | Blog | Ravelry
If you want to keep up with all things Clover, follow us on: Facebook | Twitter | Instagram | Pinterest | YouTube | Ravelry