Island Halter Top
Hello everyone! My name is Julie and I am from @handsofzeal on IG 🙂 Dive into summer with the Island Girl Crochet Halter Top, a breezy and stylish top that’s perfect for beach days and warm evenings. This easy-to-follow pattern will have you whipping up a chic top in no time!
MATERIALS:
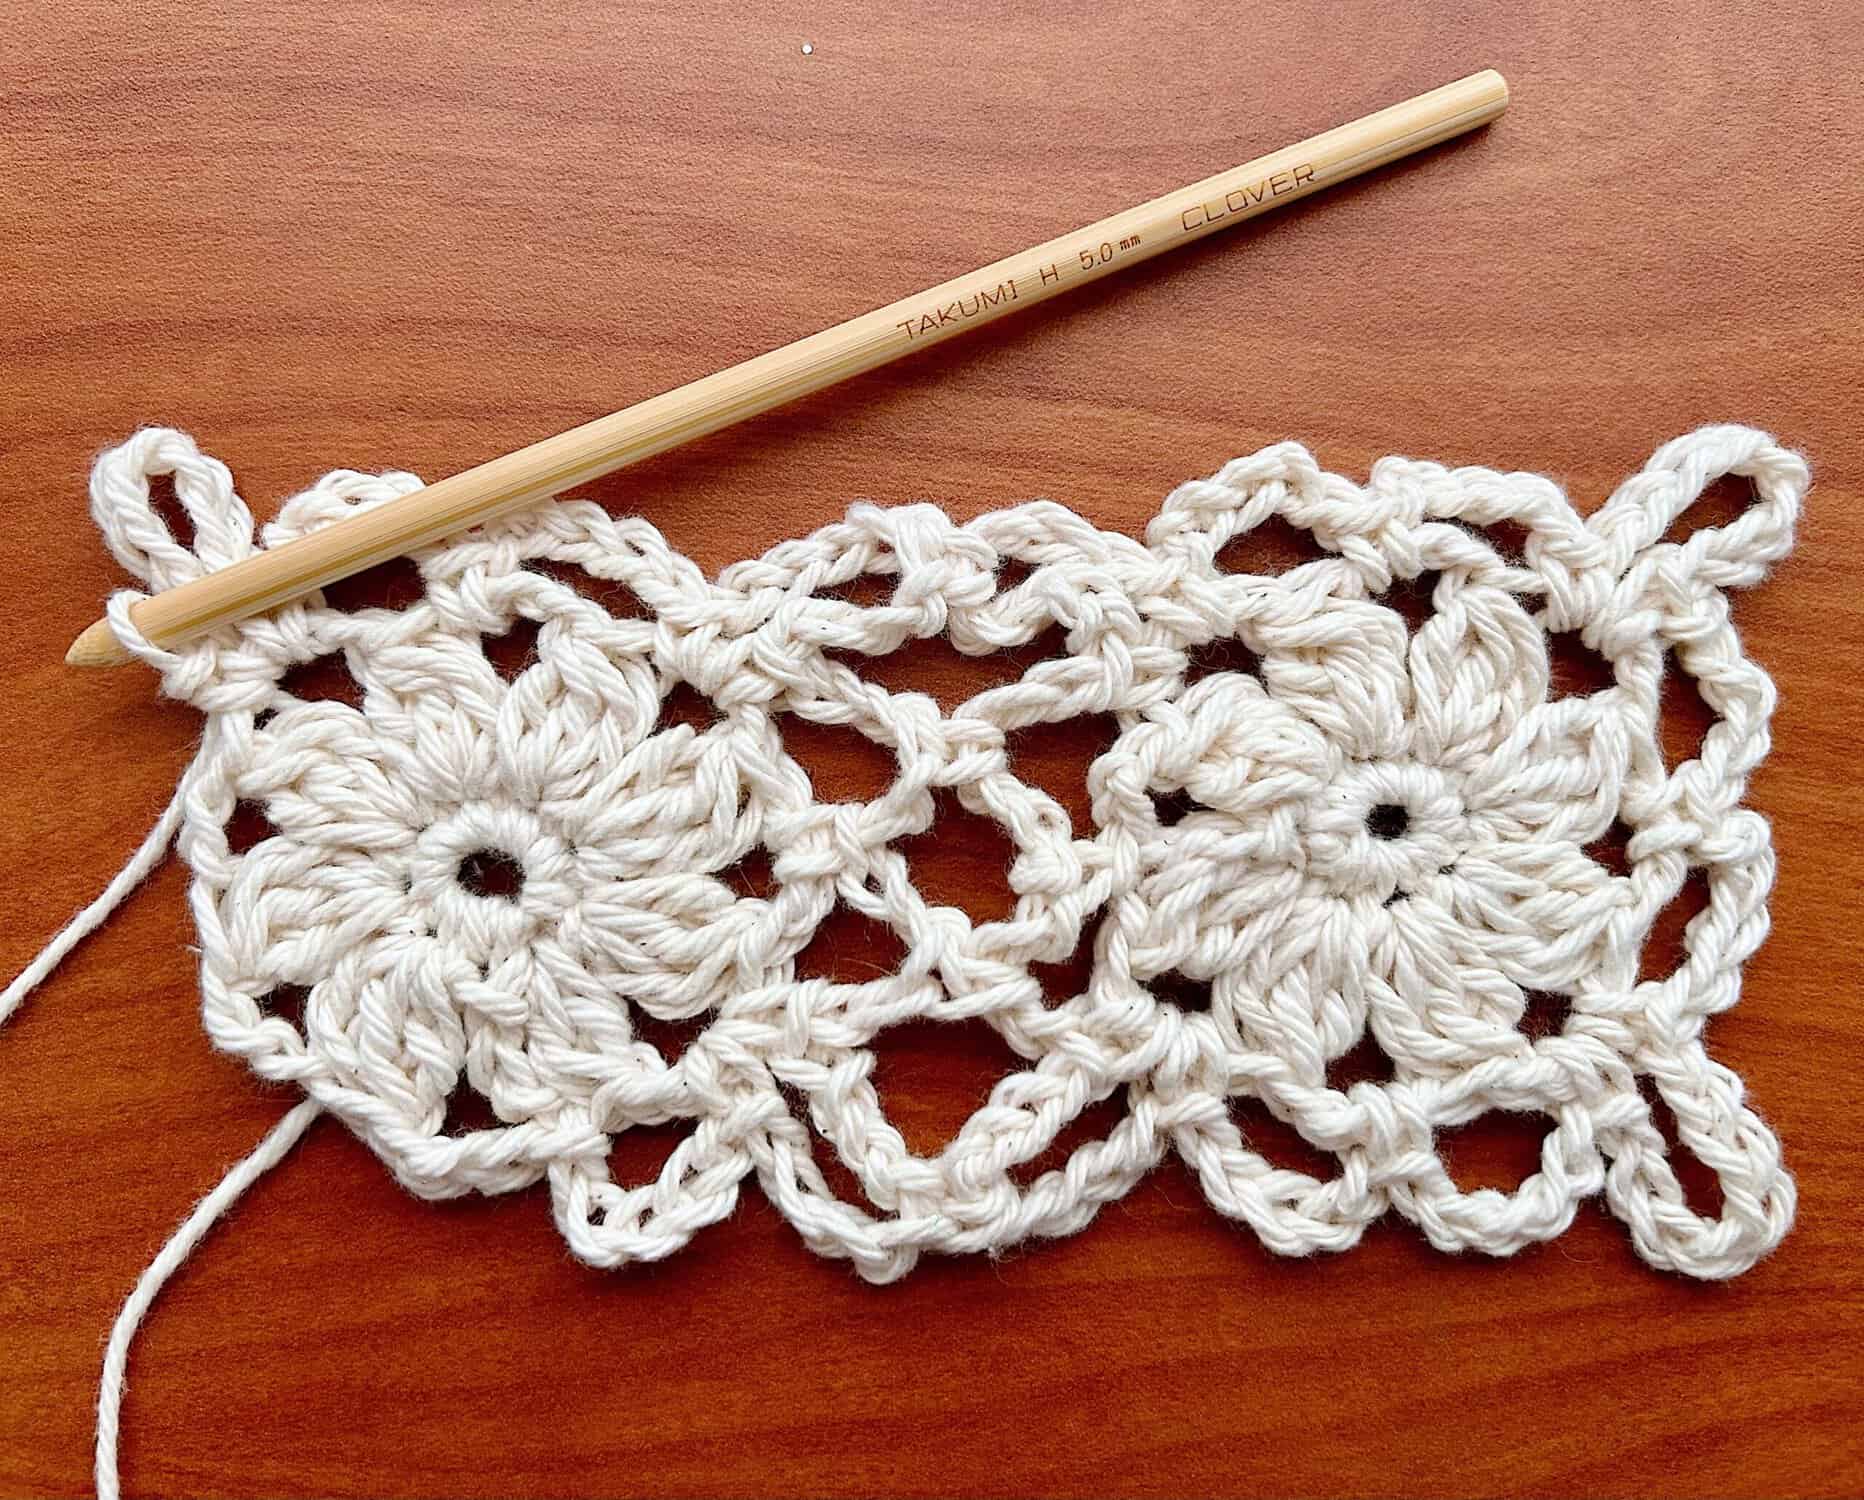
- Clover Bamboo Crochet Hook “Takumi” Size H (5.0mm)
- Clover Patchwork Scissors
- Clover Stitch Markers
- Clover Yarn Needle
- worsted weight yarn
ABBREVIATIONS:
- beg dc cluster: 2 double crochet together
- dc cluster: 3 double crochet together
INSTRUCTIONS (flower motif):
You will make 5 total unless you need a longer strip.
- Round 1: Make a magic ring, ch 1. 8 sc into the magic ring. Sl st into the first sc to join. Pull tight.
- Round 2: Ch 3 (counts as a dc), beg dc cluster in the first st, *ch 3, dc cluster in the next st,* repeat from * around, ending with a ch 3 and joining with a sl st to the top of the beginning ch 3.
- Round 3 (for your first motif ONLY): *Ch 5, sc in next ch 3 sp, ch 8, sc in same ch 3 sp, ch 5, sc in next ch 3 sp* repeat from * 2 more times. Ch 5, sc in next ch 3 sp, ch 8, sc in same ch 3 sp, ch 5, join with a sl st to the ch 1 of the beginning ch 5. Finish off.
Now you are going to join your next 6 motifs as you go along.
Repeat Rounds 1-2 ONLY for the Flower Motif then move on to these next steps:
- Ch 5, sc in next ch 3 space.
- Ch 4, join to the first motif by making a sc into one of the ch 8 spaces (from underneath), then ch 4. (Make sure you haven’t twisted your work).
- Then sc back into the same ch 4 sp of the main piece you are working on.
- Ch 2, 1 sc in the corresponding ch 5 space on the joining piece.
- Ch 2, 1 sc into next ch 3 space on the main piece.
- Ch 2, 1 sc into the corresponding ch 5 space on the joining piece. ch 2, sc into next
- Ch 3 space on the main piece.
- Ch 4, sc into the ch 8 space on the joining piece. Ch 4, sc back into the same ch 3 space on the main piece.
- *Ch 5, sc in next ch 3 space, ch 5, sc in the next ch 3 space, ch 8, sc in the same ch 3 space* repeat from * 1 more time. End with a ch 5, join with a sl st to the ch 1 of the beginning
- Ch 5. Finish off.
Keep joining motifs in this manner until you have a total of 5 joined together. If you need this part to extend longer, just keep adding motifs.
With right side facing you, join your yarn in the top corner ch 8 sp and ch 1.
- Row 1: *2 sc in the first ch 8 s, ch 2, 2 sc in the next ch 5 sp, ch 2, 2 sc in the next ch 5 sp, ch 2, 2 sc in the next ch 8 sp, ch 2,* repeat from * across ending with 2 sc in the last ch 8 sp. Ch 1, turn.
- Row 2: *1 sc in the first two sc, 1 sc in the ch 2 sp* repeat from * across.
- Finish off, weave in ends.
INSTRUCTIONS (back strap):
Rotate your work so you will be working along the side edge of the strip of motifs. Attach yarn to corner and ch 1.
- Row 1: 10 sc evenly across. Ch 1, turn.
- Row 2-3: 1 sc in each st across. Ch 1, turn.
- Row 4: 1 sc in the first st, sc dec over the next two sts, 1 sc in each of the next 4 sts, sc dec over the next two sts, 1 sc in the last st. Ch 1, turn.
- Row 5-6: 1 sc in each st across. Ch 1, turn.
- Row 7: 1 sc in the first st, sc dec over the next two sts, 1 sc in each of the next 2 sts, sc dec over the next two sts, 1 sc in the last st. Ch 1, turn.
- Row 8-9: 1 sc in each st across. Ch 1, turn.
- Row 10: 1 sc in the first st, sc dec over the next two sts, sc dec over the next two sts, 1 sc in the last st. Ch 1, turn.
- Row 11-12: 1 sc in each st across. Ch 1, turn.
- Row 13: Sc dec twice, ch 1, turn.
- Row 14: 1 sc in each st across. Turn. Ch 80, 1 hdc in the 3rd ch from the hook and each st across.
- Attach to next sc with a sl st. Finish off. Weave in ends. Repeat on other side.
INSTRUCTIONS (triangle – make 2):
- Row 1: Ch 12 (14, 16, 18), 1 sc in the second ch from the hook and in each ch to the end. 3 sc in the last ch (insert stitch marker in middle stitch), 1 sc in each ch down the other side of the foundation chain. Ch 1, turn.
- Row 2: 1 sc in each st across, 3 sc in the 2nd sc of the 3 sc you made (where stitch marker is – remove stitch marker and replace in the center sc), sc in each st back down. Ch 1, turn.
- Repeat Row 2 until your triangle is large enough for your desired coverage. Finish off.
ASSEMBLY:
Lay out motif strip, right side facing. The center flower will be your point of reference in the placement of the triangles. Whip stitch the triangle pieces (right sides together) to the motif strip, leaving 2 sc between the triangle pieces.*
INSTRUCTIONS (neck strap):
With right side facing, attach yarn to the right corner sc of motif strip and ch 1.
- Row 1: 1 sc in the same st as joining and in each st across until you reach the bottom corner of the triangle. 1 sc in bottom corner of triangle and in each st up the triangle, stop right before the center st of the ch 3. Ch 70, 1 sc in the second ch from the hook and in each st across. Sk next st (center st on triangle piece) join with a sc in next st. 1 sc in each st down the other side of the triangle, sc2tog over the middle stitches between triangles, 1 sc in first stitch on next triangle, repeat instruction from first triangle. Attach to motif strip with a sc in the next st and 1 sc in each st to the end. Finish off. Weave in ends. Add fringe if desired.
- Cut strands that are 24″ long (you will put 4 strands in each ch sp). Put 4 strands together and fold them in half. Insert folded strands through the front of the ch sp and pull strands through the loop. Pull tight.

And there you have it! Your very own island halter top! 🙂
If you want to keep up with me, Julie, on social media for other fun projects, follow me on: Instagram
If you want to keep up with all things Clover, follow us on: Facebook | Twitter | Instagram | Pinterest | YouTube | Ravelry