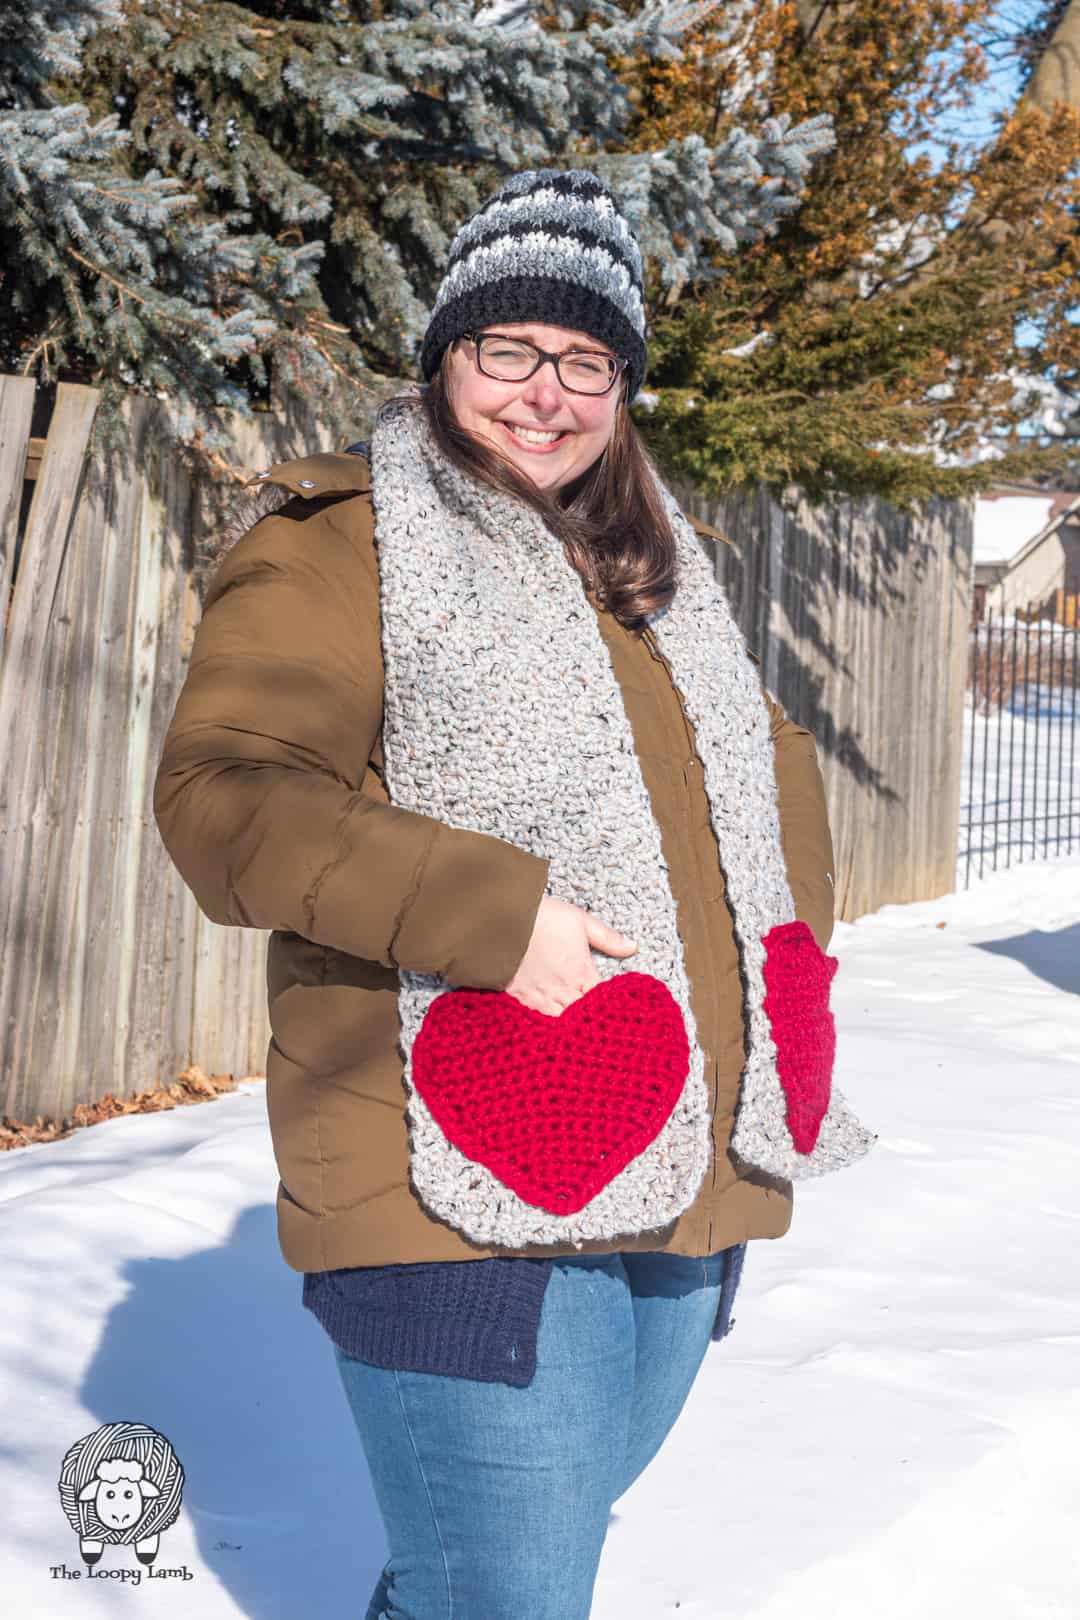
Wool You Be Mine Crochet Scarf Pattern – Crochet Scarf With Heart Pockets
Hi Everyone! I’m Ashley, the designer and maker behind The Loopy Lamb. I’m so excited to be invited back to the Clover blog to share a free crochet pattern to make my Wool You Be Mine Crochet Scarf. This scarf was designed to have large heart pockets on it to make it a fun and festive project that’s perfect for Valentine’s Day.
I don’t know about you, but Valentine’s Day sneaks up on me EVERY. YEAR. I know it’s coming and yet a couple of days before Valentine’s Day I wake up one day and realize that Valentine’s Day is mere days away and I’m unprepared…..again. This year, thanks to our friends at Clover, I’m prepared and I hope that this crochet scarf with heart pockets will help get you prepared as well, even if you’re doing it last minute.
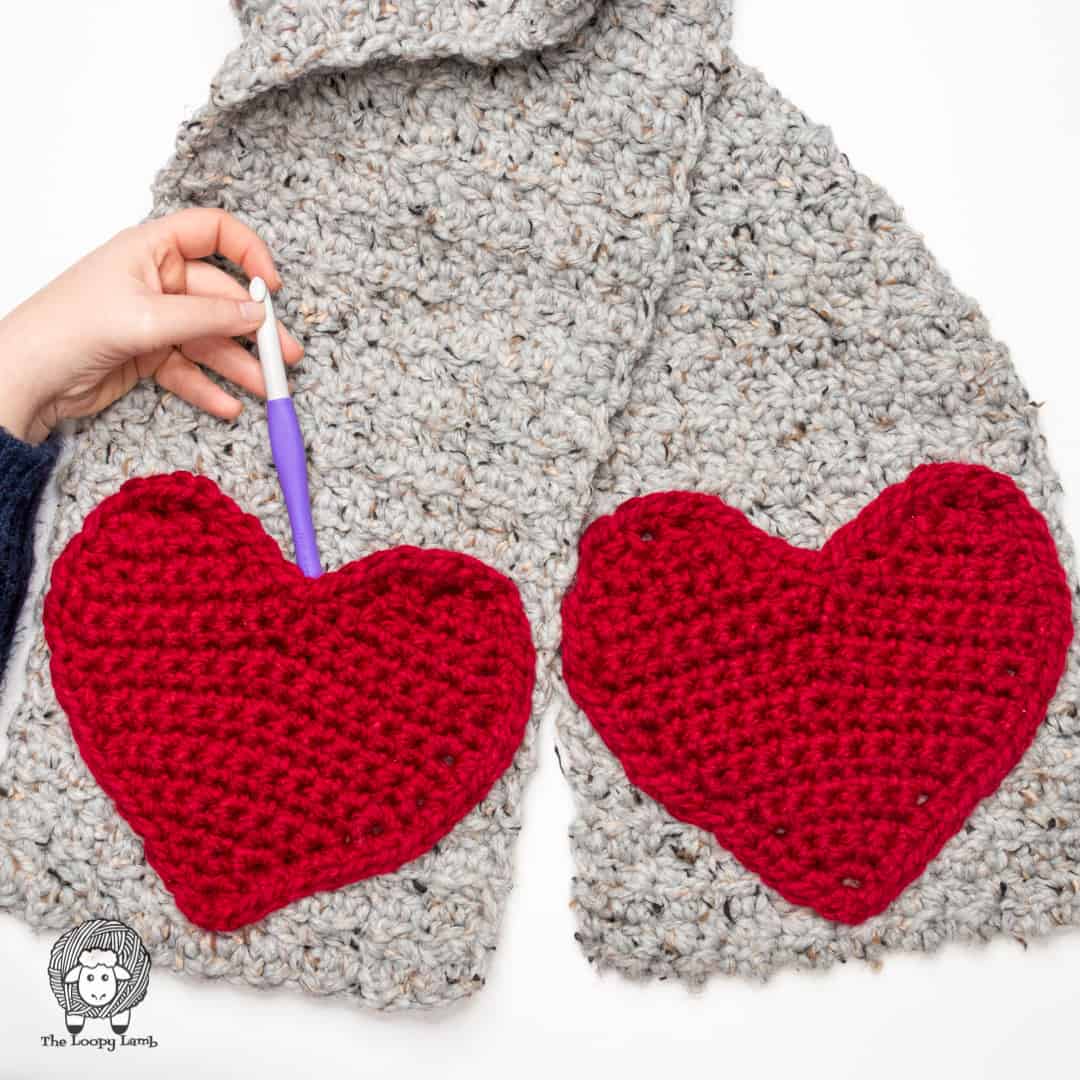
The Wool You Be Mine Scarf is a crochet scarf with heart shaped pockets that is made with a super bulky weight yarn and a large, 10mm(N/P) crochet hook so even if you’re starting this project the day before Valentine’s Day, you’ should be able to get it done in time for the big day. I love that the pockets on this scarf are your standard square or rectangular pockets that we see a lot of yarn projects because they give the project a big pop of personality.
This scarf is approximately 60″ long but you can adjust the length of this scarf by continuing to crochet until you have reached your desired length. I have also included a video tutorial to walk you through this project so if you prefered video tutorials over written patterns, I’ve got you covered.
Wool You Be Mine Crochet Scarf Pattern – Crochet Scarf with Heart Pockets
Skill Level: Easy
Terminology: U.S. Terminology
Supplies:
- 10 mm (N/P) Clover Amour Crochet Hook
- Lion Brand Wool Ease Thick & Quick (82% Acrylic/10% Wool/8% Rayon, 106 yds / 97 m, 170 g / 6 oz), in the colours:
- Colour A: Grey Marble, 3 skeins needed
- Colour B: Cranberry, 1 skein needed
- Clover Patchwork Mini Scissors
- Clover Chibi Tapestry Needle
- Clover Locking Stitch Marker
Abbreviations:
- CH = Chain
- DC = Double Crochet
- FO = Finish Off
- RS = Right Side
- SC = Single Crochet
- SCDEC = Single Crochet Decrease
- SCINC = Single Crochet Increase/2 Single Crochet Stiches in the Same Stitch
- SL ST = Slip Stitch
- ST(S) = Stitches
- YO = Yarn Over
Special Techniques:
- Invisible Finish/Join: FO leaving a long tail. Thread the tail onto a tapestry needle. Place the tapestry needle through the top of the 2nd ST from front to back and pull through. Place tip of needle into top of the last ST of the round, under the back loop of the stitch, and pull through to the back of the work. Weave in the end. Find a tutorial on my blog HERE or the video tutorial below.
[youtube https://www.youtube.com/watch?v=ERIzus0nQ9A&w=560&h=315]
Finished Size:
- Scarf: 10” wide x 60” long
- Heart Pockets:75” wide x 8” tall (including trim, measured from tip of heart to top of left bump)
Gauge:
- Scarf: 7 sts x 7 rows = 4”
- Heart: Approx. 8 sts x 9 rows = 4”
NOTES:
- Instructions within the brackets () are to be repeated the number of times specified next to the brackets.
- This pattern is worked back and forth in rows (unless stated otherwise).
- Gauge is not vital to the project but it may affect the amount of yarn needed for the project and the size of your scarf.
- I recommend gently steam blocking your scarf upon completion.
You can purchase a PDF, printable copy of the written pattern for the Wool You Be Mine Crochet Scarf pattern HERE in my Ravelry shop or HERE in my Etsy shop. The PDF version of the pattern includes the written pattern and the photo tutorial for the heart pockets.
Check out the YouTube Tutorial for this Project:
[youtube https://www.youtube.com/watch?v=MtmS-Eyh_Og&w=560&h=315]
Scarf
Using Colour A, CH 20
Row 1: SC in 2nd CH from the hook, DC in the next, *SC in the next CH, DC in the next, repeat from * across until 1 CH remains. SC in last CH. (19)
Rows 2 – 103: CH 1 and turn. *SC in the first st, DC in the next, repeat from * until 1 st remains. SC in the last st.
FO and weave in ends.
Heart Pockets (Make Two)
Using Colour B, make a MC.
Row 1 (RS): SC 3 into the MC. (3)
Row 2: CH 1 and turn. SCINC in the first st, SC in the next, SCINC in the last st. (5)
Row 3: CH 1 and turn. SC in each st across. (5)
Row 4: CH 1 and turn. SCINC in the first st, SC in the next 3 sts, SCINC in the last st. (7)
Row 5: CH 1 and turn. SCINC in the first st, SC in the next 5 sts, SCINC in the last st. (9)
Row 6: CH 1 and turn. SCINC in the first st, SC in the next 7 sts, SCINC in the last st. (11)
Row 7: CH 1 and turn. SCINC in the first st, SC in the next 9 sts, SCINC in the last st. (13)
Row 8: CH 1 and turn. SC in each st across. (13)
Row 9: CH 1 and turn. SC in the first 6 sts, SCINC in the next, SC in the last 6 sts. (14)
Row 10: CH 1 and turn. SC in each st across. (14)
Row 11: CH 1 and turn. SCINC in the first st, SC in the next 12 sts, SCINC in the last st. (16)
Row 12: CH 1 and turn. SC in the first 7 sts, SCINC in the next, SC in the last 8 sts. (17)
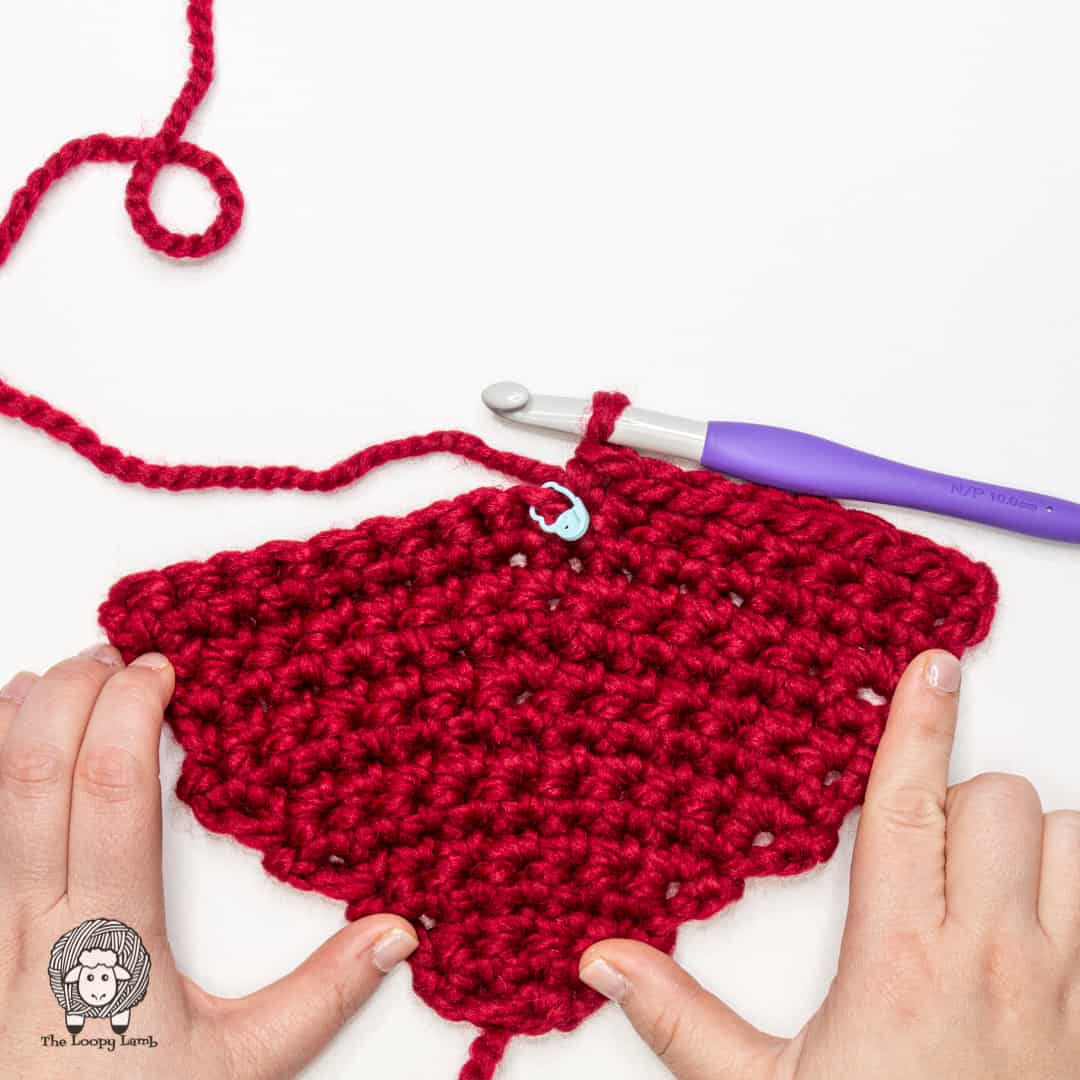
Right Bump of Heart
Row 13: CH 1 and turn. SC in the first 8 sts. Leave remaining sts unworked. PM in 9th st of Row 12. (8)
Row 14: CH 1 and turn. SCDEC, SC in the next 4 sts, SCDEC. (6)
Row 15: CH 1 and turn. SC across. (6)
Row 16: CH 1 and turn. SCDEC, SC in the next 2 sts, SCDEC (4)
Row 17: CH 1 and turn. SCDEC x 2 (2)
FO.
Left Bump of Heart
With RS facing you, attach yarn to 10th st of Row 12 with a SL ST.
Row 1: SC in the same st as the join. SC in the remaining 7 sts. (8)
Row 2: CH 1 and turn. SCDEC, SC in the next 4 sts, SCDEC. (6)
Row 3: CH 1 and turn. SC across. (6)
Row 4: CH 1 and turn. SCDEC, SC in the next 2 sts, SCDEC (4)
Row 5: CH 1 and turn. (SCDEC) x 2 (2)
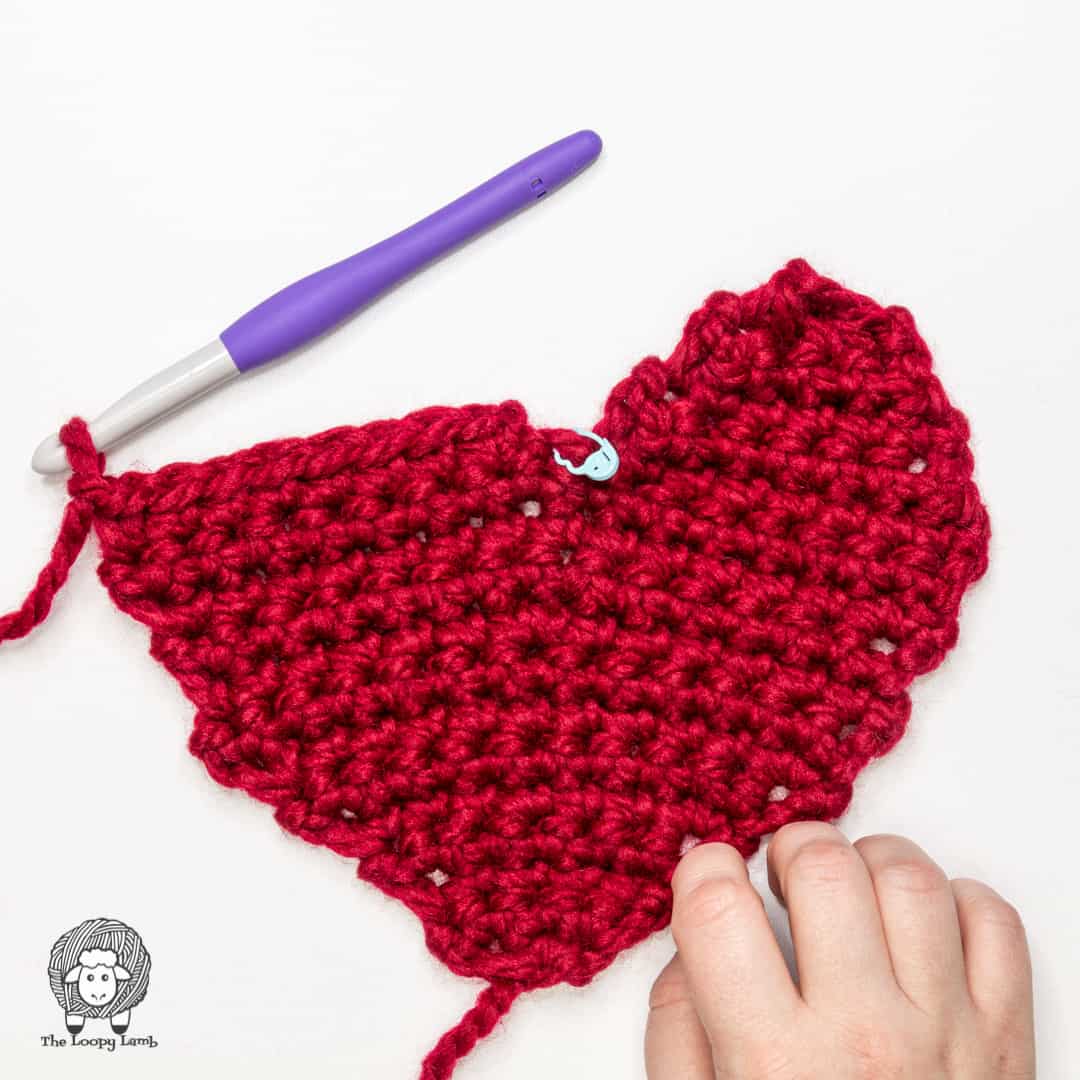
Do NOT FO. Continue on to trim.
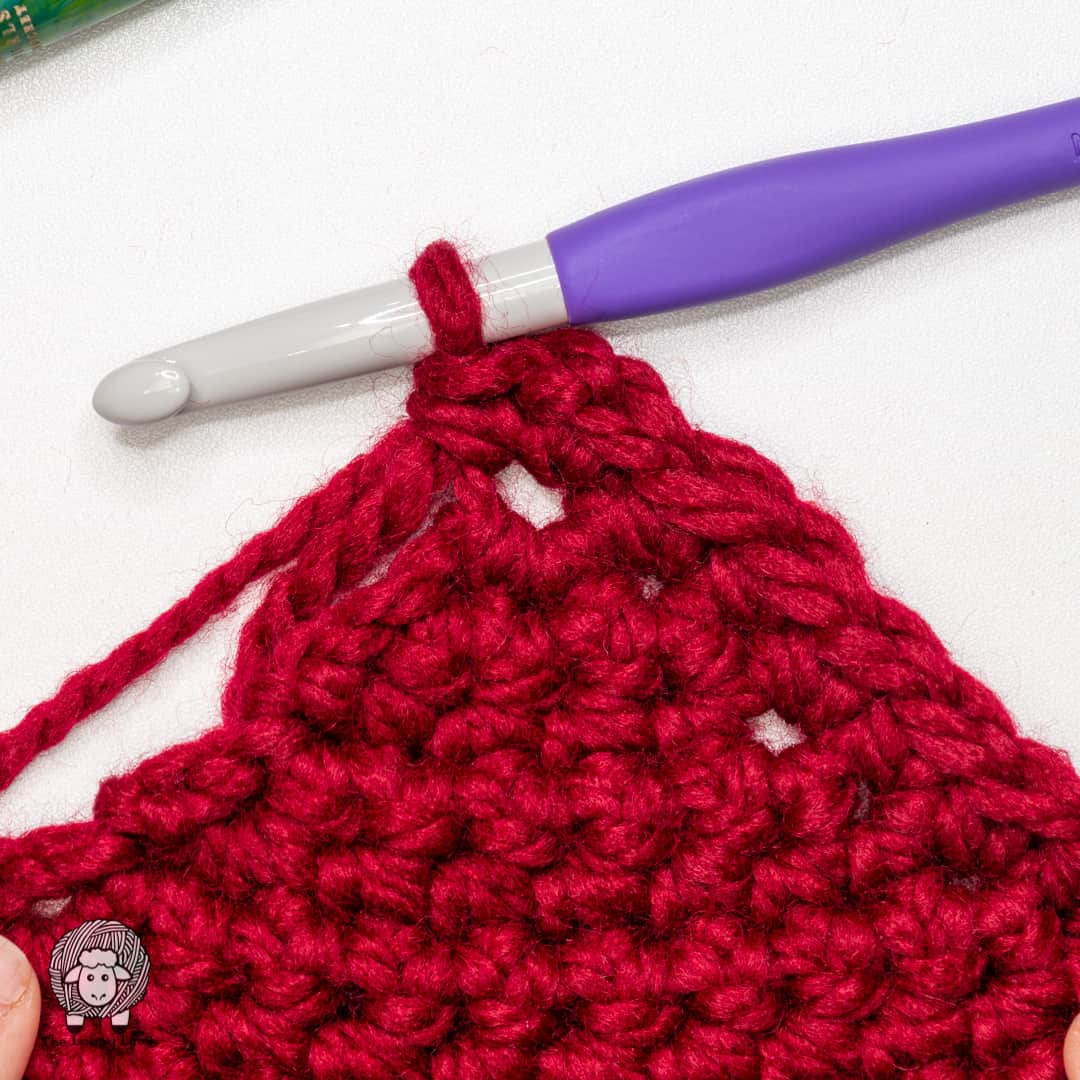
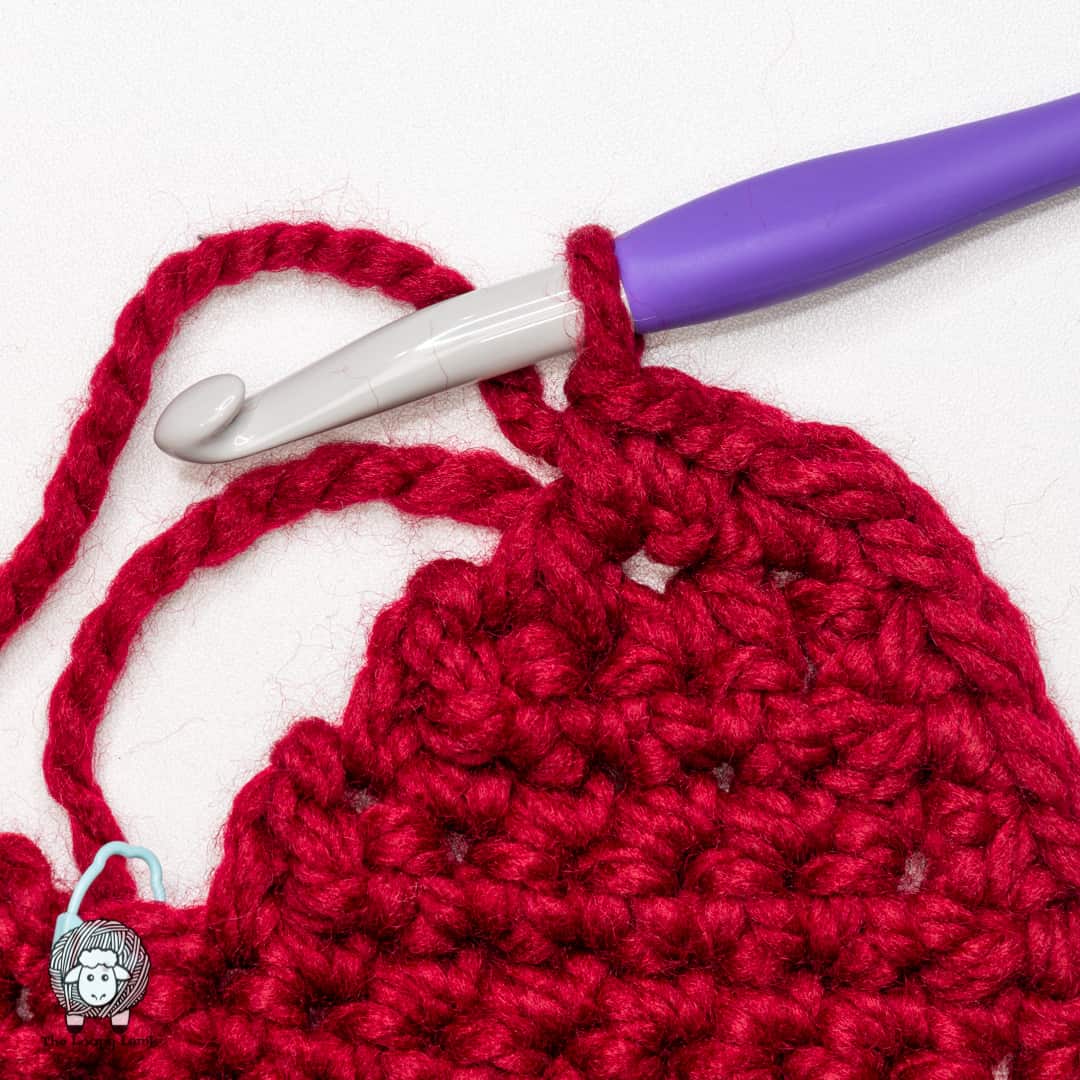
Heart Trim
CH 1 and rotate piece clockwise so that you will be working along the left edge of the heart. SC evenly down the left edge, placing 1 SC st into the end of every row until you reach the point. (PM to mark your first st).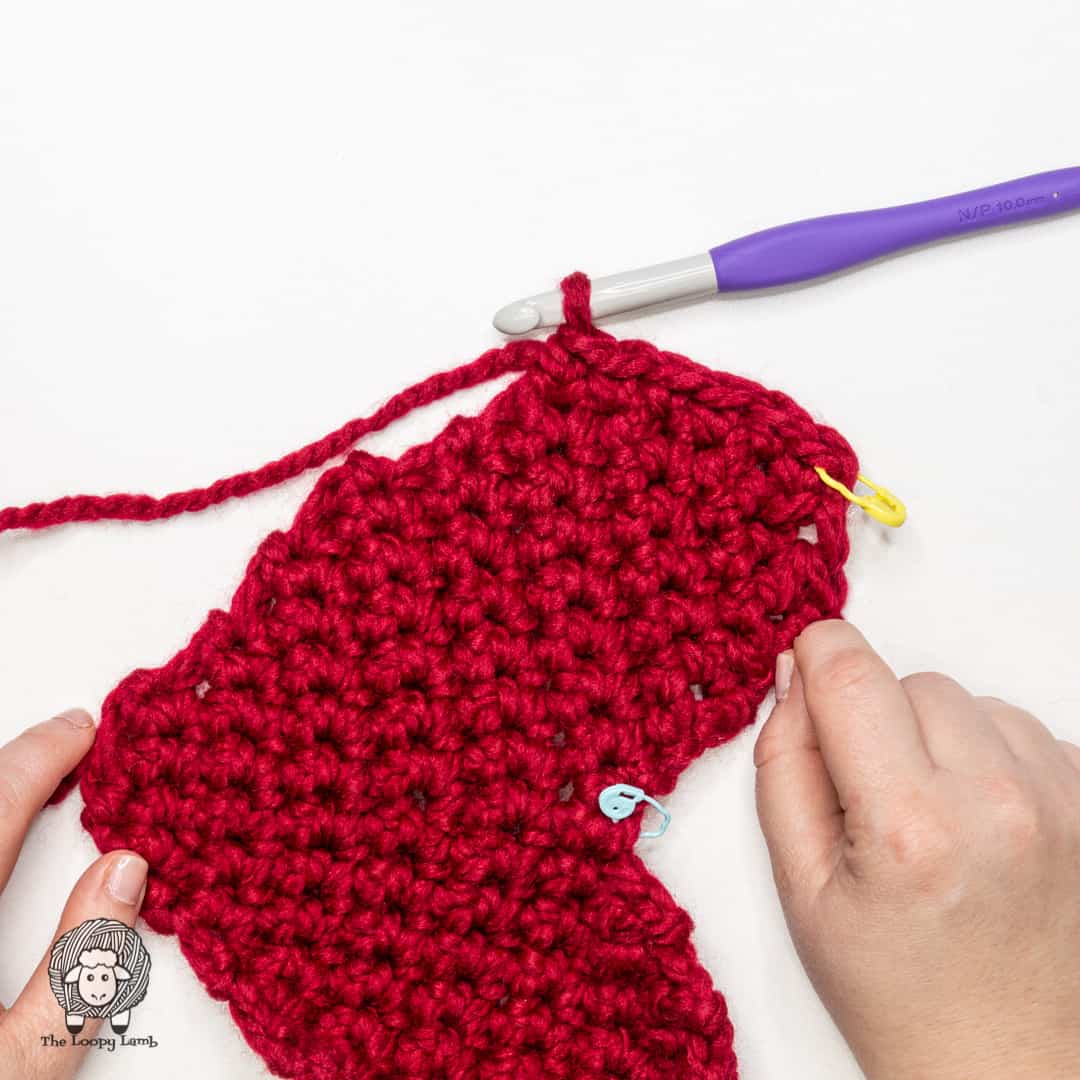
When you reach the point of the heart, SC, CH 1, SC into the point of the heart.
Rotate piece and continue working up the other side of the heart, placing 1 SC into the end of each row until you reach Row 17 of the Right Bump.
Place 2 SC sts in each sts of Row 17 of the Right Bump.
Rotate the piece and place an SC into the end of each Row working down towards the center of the heart.
SC into the unworked ST from Row 12 (the center of the heart). Rotate piece and work up the right side of the left bump, placing one SC into the end of each row until you reach Row 5 of the left bump.
Place 2 SC sts in each of the sts from Row 5 of the left bump.
FO leaving a long tail for seaming. Join last st to first st with invisible join (see special techniques).

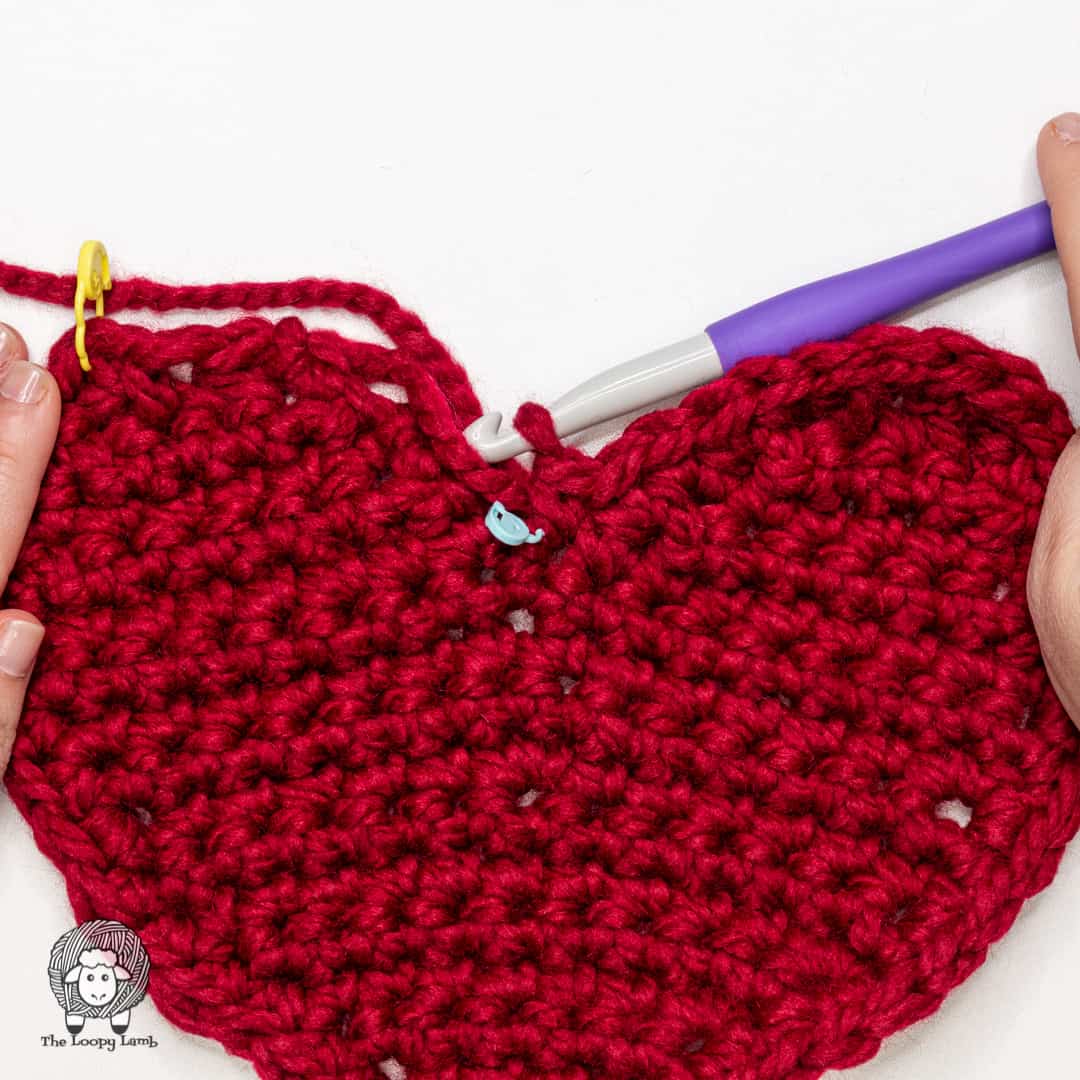
Assembly:
Use tail to sew a heart to each end of the scarf, sewing around the outside, bottom section of the scarf, leaving the top unseamed.
Disclaimer:
Feel free to sell the item created by this pattern but please provide pattern credit back to me when posting online, and please provide a link to my blog: http://www.theloopylamb.com. Please do not resell, distribute, duplicate, or share this pattern in any printed or digital form, or claim this pattern as your own original design. Please do not use my photos when selling your finished items.
I’d love to see your finished items! Please share your finished makes by tagging the pattern on Ravelry, sharing it to our Facebook page or Instagram. Don’t forget to follow me on Facebook, Instagram and Pinterest
Facebook: www.facebook.com/TheLoopyLamb
Instagram: www.instagram.com/TheLoopyLamb
YouTube: The Loopy Lamb YouTube Channel
Pinterest: www.pinterest.com/theloopylamb
Newsletter: Sign up for my newsletter!
I hope that you enjoyed making your crochet scarf with heart pockets! I’d love to see your finished projects! Please share your finished makes by tagging the pattern on Ravelry, tagging me or using #theloopylamb on Facebook and Instagram. Don’t forget to follow me on Facebook, Instagram and Pinterest
Find me on social media and check out my free crochet patterns on my Blog | YouTube | Instagram | Facebook | Pinterest