Sew a 3D Applique Project!
 With a few smaller-scale quilts under my belt, I thought what better time than now to try out some new quilting techniques for my next project! I’ve always adored the look of applique work on handmade quilts. The more intricately detailed and unique, the better! My favorite of all, though, are those applique pieces that use 3D elements, whether it be simple accents like pom-poms and tassels, or more uncommon, like braids of yarn used as hair. Since the holiday season is in full swing, I decided to keep with the festivities in creating a gift-wrapped present box with a 3D bow on top! This motif has a million applications depending on the occasion and color choices of the fabric.
Let’s get started.
Supplies:
- Patchwork Scissors (small)- Art. No 493/s
- Design Pro Applique Mat- Art. No 4095
- Wonder Fuse- Art. No 4090
- Universal Machine Needles – Art. No 9114
- 50 weight thread
- Assortment of Quilting Cotton Fabrics
Print and Outline Design:
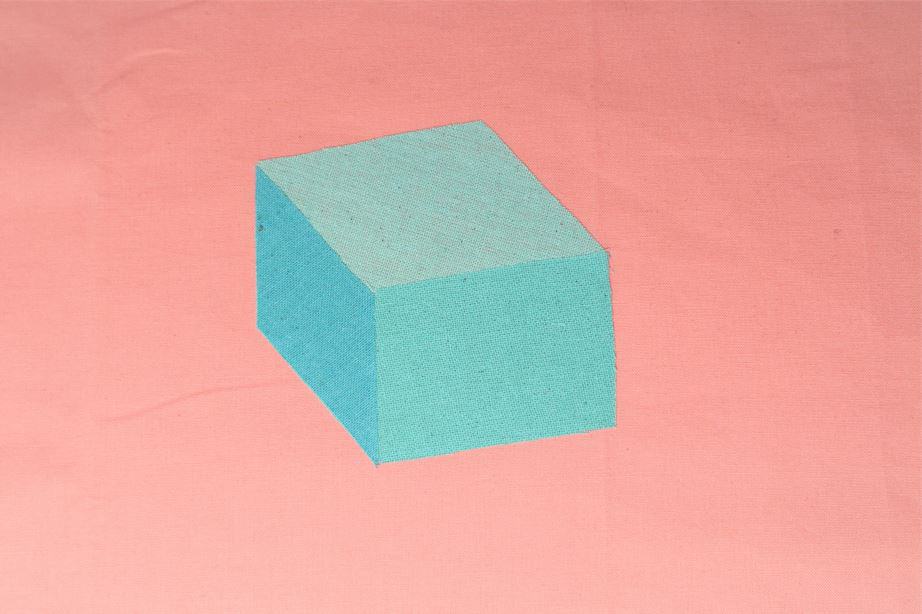
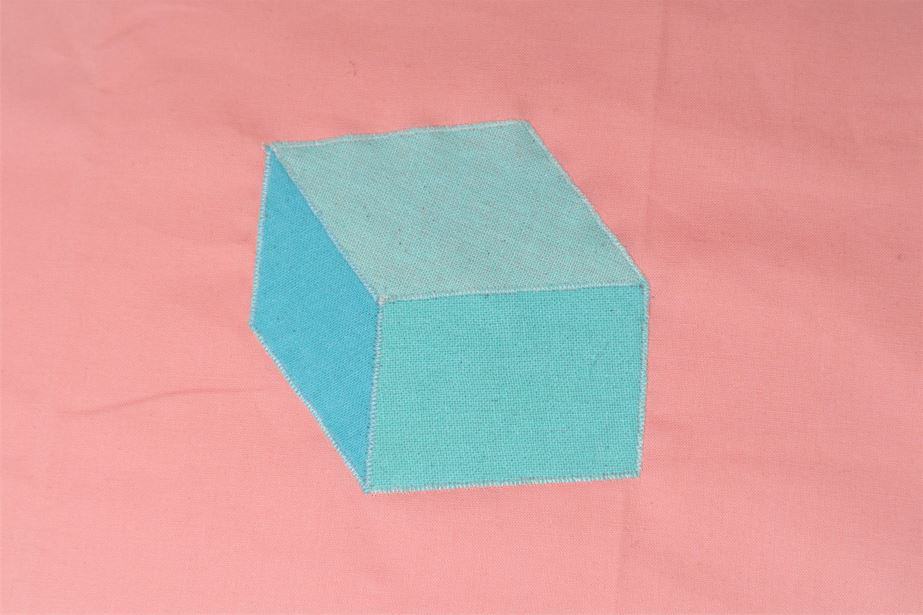
Print out the present box pattern below to the desired scale. The design will be flipped when appliqueing, so be sure to flip the design if working with an image that is not reversible. Select fabrics to achieve the desired look. For a more realistic 3D box, choose 3 shades of the same color to give the illusion of shadows. Cut two squares of Wonder Fuse roughly 1-2” wider than design and place paper-side-up onto the design. With the first square of Wonder Fuse, outline the design in its entirety for the base of the applique. With the second, outline every section separately as shown below. Cut all pieces out of Wonder Fuse.


Press and Cut:
With the shiny side of the Wonder Fuse and wrong side of fabric together, iron Wonder Fuse onto fabric pieces as below according to Wonder Fuse directions and the settings of your Iron. After ironing, allow to fully cool before cutting. Cut directly around the Wonder Fuse for all pieces.


Begin Applying:
Stack all pieces atop each other to check for accuracy. We will be sewing all the applique work after to secure it for long-term use, however, you may choose to only finish with fusing. If that is the case, skip all sewing steps but Creating the Bow. Remove ribbon sections and peel away the paper on both box side sections of applique. Place Design under applique mat, and place applique base fabric atop the mat. Place both box side sections atop base and cover with pressing mat. Iron applique. Peel the paper from applique base and iron base onto the intended fabric as previously stated for sides.


Stitch Down Applique (optional):
For applique work that will not get much wear, as for a wall hanging, you may skip this step. For work on garments and quilts, I would recommend reinforcing your applique. Stitch around every edge of each applique section using a short and dense zigzag stitch.


Iron Ribbon Applique:
Iron on ribbon applique in the same manner as previously instructed. Set aside applique.


Creating the Bow:
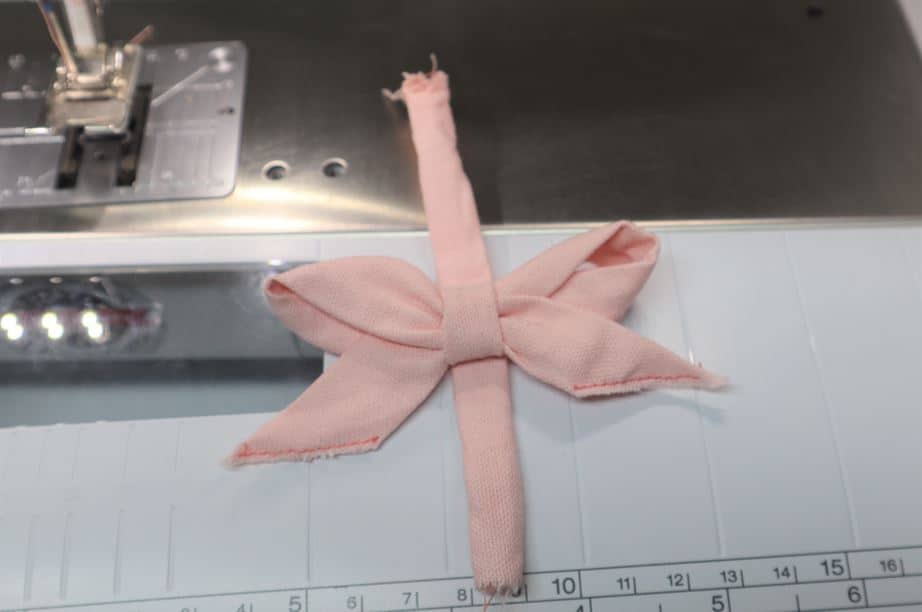
Cut two pieces of fabric in the same color as the ribbon applique. Dimensions here are flexible depending on your desired bow size and the size of your applique design. For my bow, the larger piece of fabric is approximately 1”x 5”, while the smaller piece is 3/4” by 3”. Fold both fabrics in half lengthwise and sew down their middle using a short straight stitch. Trim excess fabric along the edge if desired and flip tubes right sides out. On the longer tube, sew diagonal straight stitches along either end to close. Fold longer tube into a bow shape, refer to photos below. Tack down the middle of the bow to hold it in place. Fold the smaller tube in half and sew a 1/2” loop. Pull bow through the loop to finish the bow. Do not clip the excess fabric of the shorter loop.


Finishing:
Stitch around every edge of both ribbon applique sections using a short and dense zigzag stitch. Place bow directly on the intersection of the ribbon appliques. Sew along both sides of the shorter tube directly against the formed loop using a straight stitch. Be sure to backstitch here. Take scissors and cut both ends directly against seams and clip all loose threads. Fluff bow to finish.


And just like that, we’ve completed our 3D applique present! I am so excited to see everyone else’s rendition of this design, and see all the amazing holidays it can apply to! If you make your own, be sure to tag Clover and I so we can see!
Until next time, happy crafting!
Follow what Quayln is up to next on his Blog | Instagram | Facebook | Pinterest | YouTube | Ravelry
Stay connected with Clover on Facebook | Twitter | Instagram | Pinterest | YouTube | Ravelry