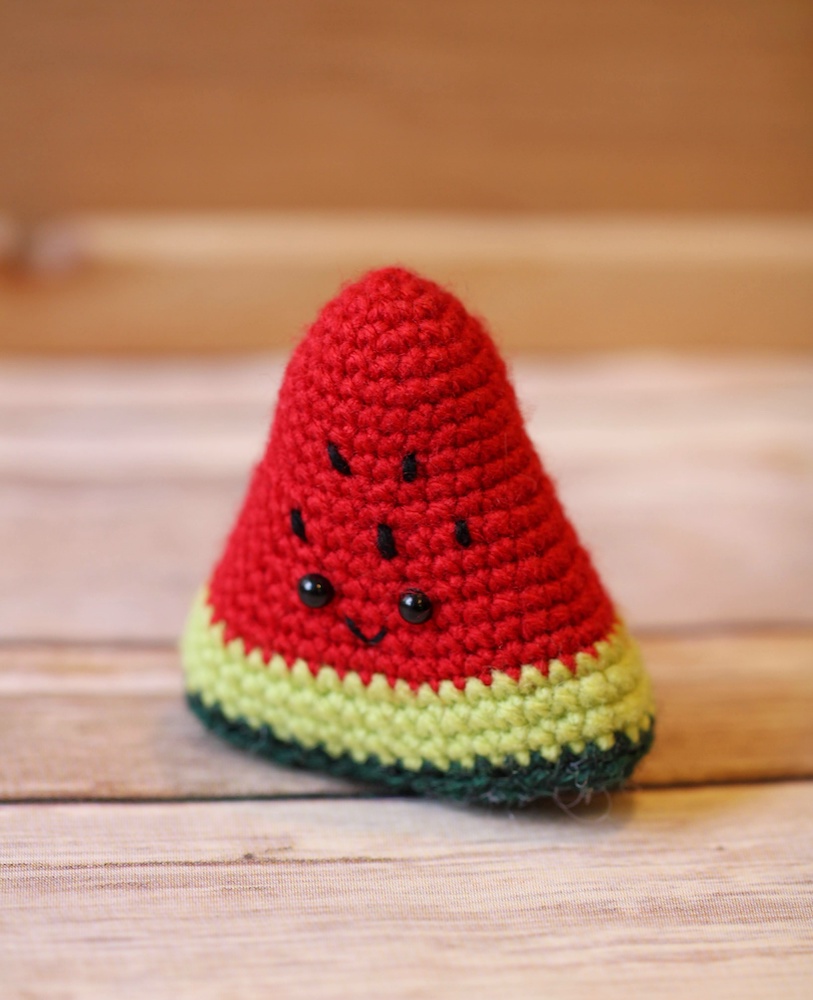
Watermelon Amigurumi
Hi everyone! I’m Julia from Little World of Whimsy, and I’m here to share a cute watermelon pattern, just in time for National Watermelon Day!
This watermelon is super easy to make, despite the strange shape! If you can make a ball, then you can make this watermelon. You can get the inexpensive, beautifully formatted, printable PDF on Etsy here.

This tiny watermelon slice works up quickly and is super cute! It fits snugly in the palm of your hand and can be customized to any other melon slice. This pattern is accessible to beginners, and you can adapt it to any size you want by changing the weight of the yarn!
Materials
Clover Amour Crochet Hook D (3.25 mm) – Art. No 1042/D
WeCrochet Brava Sport (<1 skein of each color: Red, Alfafa (light green), Hunter (dark green))
Mini Patchworks Scissors – Art. No 493/CW
Quick Locking Stitch Marker (Small) – Art. No 3030
Darning Needle Set (Bent Tip) – Art. No 3121
5.0mm Safety eyes
Fiberfill stuffing
Abbreviations
CC: contrast color
ch: chain
dc: double crochet
dec: decrease
FSC: foundation single crochet (tutorial here)
hdc: half double crochet
inc: increase (2 scs in the same stitch)
MC: main color
MR: magic ring
rnd: round
sc: single crochet
slst: slip stitch
st(s): stitch(es)
x sc: sc x number of times
(x sts): x total stitches in round/row
(…) x: repeat stitches within brackets x times
Technical Notes
1.Crochet in continuous spiral rounds, unless specified otherwise. Use a stitch marker or piece of yarn to keep track of the last stitch in each round.
2.When filling with polyester stuffing, pull apart each large chunk into many smaller chunks. This ensures an even distribution of firmness within the amigurumi.
- For help on how to crochet around a foundation chain, see here.
4.For this pattern, the MC is red, CC1 is light green, and CC2 is dark green.
Final Size
Approx: 2.5″ x 2.5″

Special Stitches
Invisible finish off: click here for tutorial.
Foundation Single Crochet: click here for tutorial.
PATTERN
WATERMELON SLICE (begin in MC. See Special Stitches for FSC.)
Round 1 6 sc in MR (6 sts)
Round 2 inc x6 (12 sts)
Round 3 (sc, inc) x6 (18 sts)
Round 4 sc around (18 sts)
Round 5 (2 sc, inc) x6 (24 sts)
Round 6-9 (4 rnds) sc around (24 sts) Round 10 (3 sc, inc) x6 (30 sts)
Round 11-12 (2 rnds) sc around (30 sts) Round 13 (4 sc, inc) x6 (36 sts)
Round 14-15 (2 rnds) sc around (36 sts)
Round 16 (5 sc, inc) x6 (42 sts)
Switch to CC1. Insert 4mm safety eyes between rnds 13-14 (from the top), 4 sts apart. Using black embroidery thread, embroider a “V” shape on round 14, below the eyes.
Round 17-19 (3 rnds) sc around (42 sts)
Switch to CC2.
Round 20 sc around (42 sts)
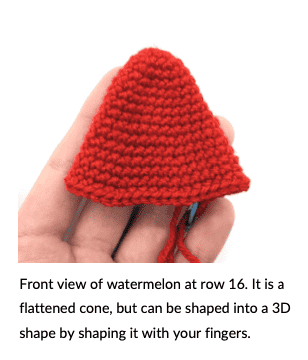
Shape the cone with your hands so that the opening of the cone forms a long rectangle measuring about 16 stitches across at the very bottom for the front and back, and about 5 stitches across on each of the sides. Finish off and weave in the end. Using black yarn, sew black seeds on rounds 8 and 11 (counting from the top).


RIND (in CC2. See Special Stitches for FSC. Worked in turned rows.)
Row 1 FSC 3, chain and turn (3 sts)
Row 2-13 (12 rows) sc across, chain and turn (3 sts)
Border: Chain 1 and crochet to the left along the side of the rectangle, one stitch in each row for a total of 12 stitches. Place 3 single crochets in the corner and sc 3 across. Then, sc 3 in the corner and sc 12 back along the long side of the rectangle. Sc 3 in the corner and slip stitch into the first stitch of the border. Finish off, leaving a long tail for sewing.

Stuff the watermelon slice and whip stitch the rind to the opening, roughly matching up the long sides and the short sides. To help you make sure you don’t over or under shoot, attach a stitch marker at each of the corners. The stitch counts of the rind and top part may not match exactly, but it’s okay. Stuff the watermelon further as you finish sewing.
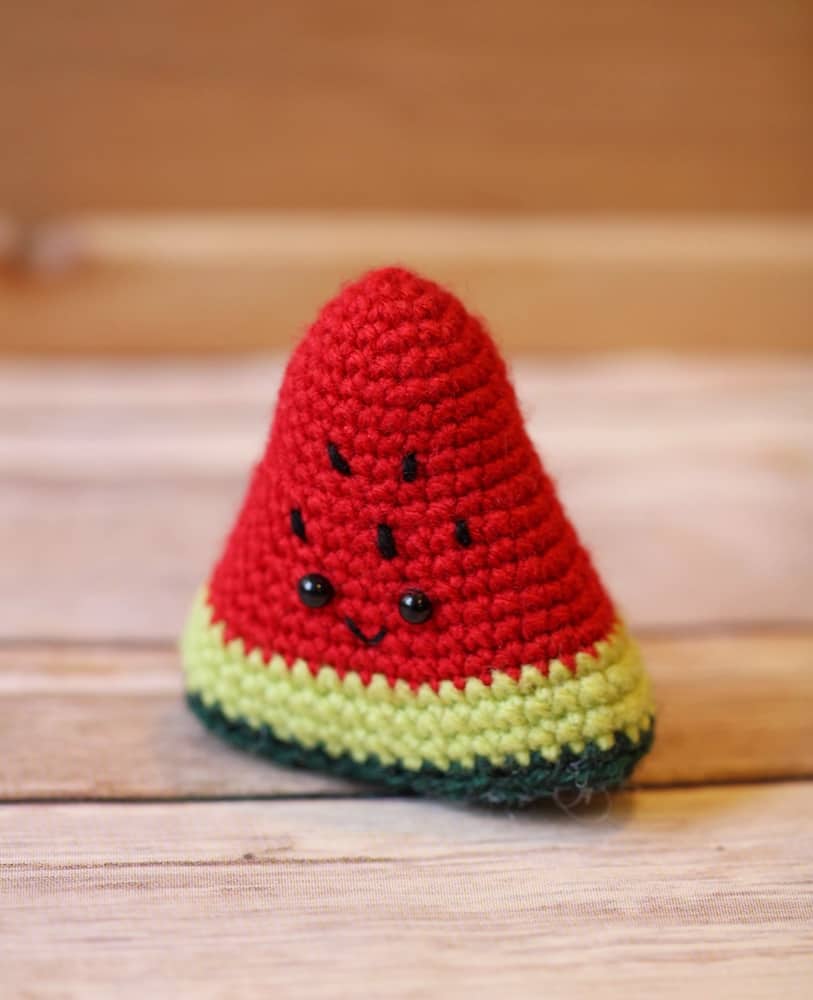
Your watermelon is all done!
I hope you enjoyed crocheting it and found the pattern helpful. I would love to see your finished amigurumi, so share a picture on Instagram with me by using the #littleworldofwhimsy and tagging me @littleworldofwhimsy.
This pattern is free but if you’d like to purchase a low-cost PDF, you can find it here.
Once again, if you have any questions don’t hesitate to reach out to me with a direct message on Instagram @littleworldofwhimsy or through email at littleworldofwhimsy@gmail.com.
Happy crocheting!
—
Julia Chiang
Little World of Whimsy