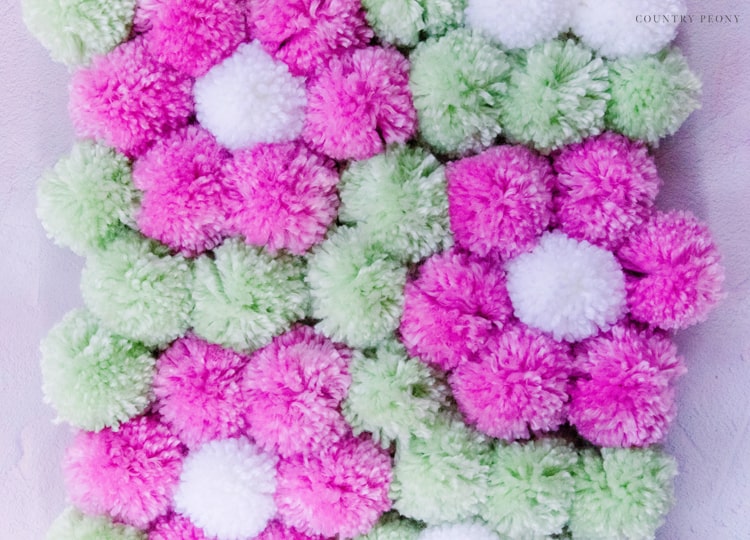
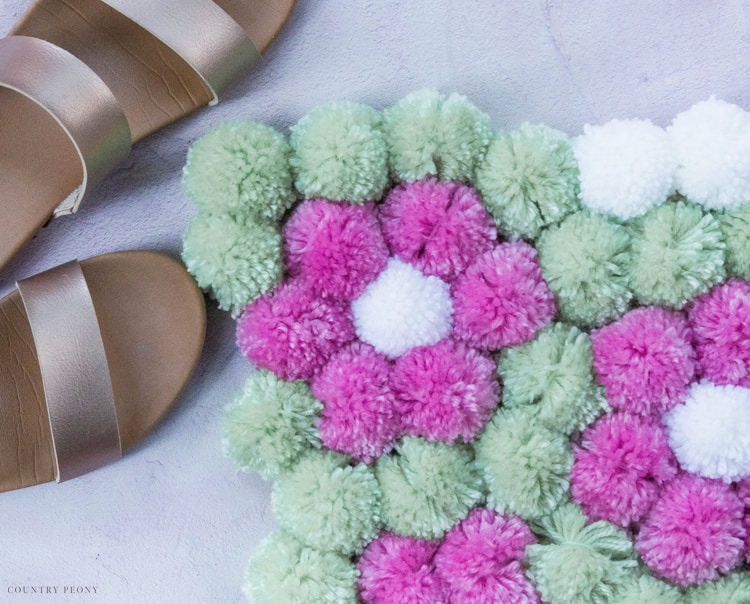
DIY Pom-Pom Daisy Rug
Hello from Texas! Elizabeth here, and I am the DIY and Craft blogger behind Country Peony. Today I am excited to share another fun pom-pom project with you.
Pom-poms are such a wonderful embellishment that helps to bring a little extra cheer and whimsy into your life. I love adding them to my craft projects, and also more permanent home décor items like today’s project. Today I want to show you how to create a pom-pom rug that would be the perfect addition to your bathroom, laundry room, or next to your bed.
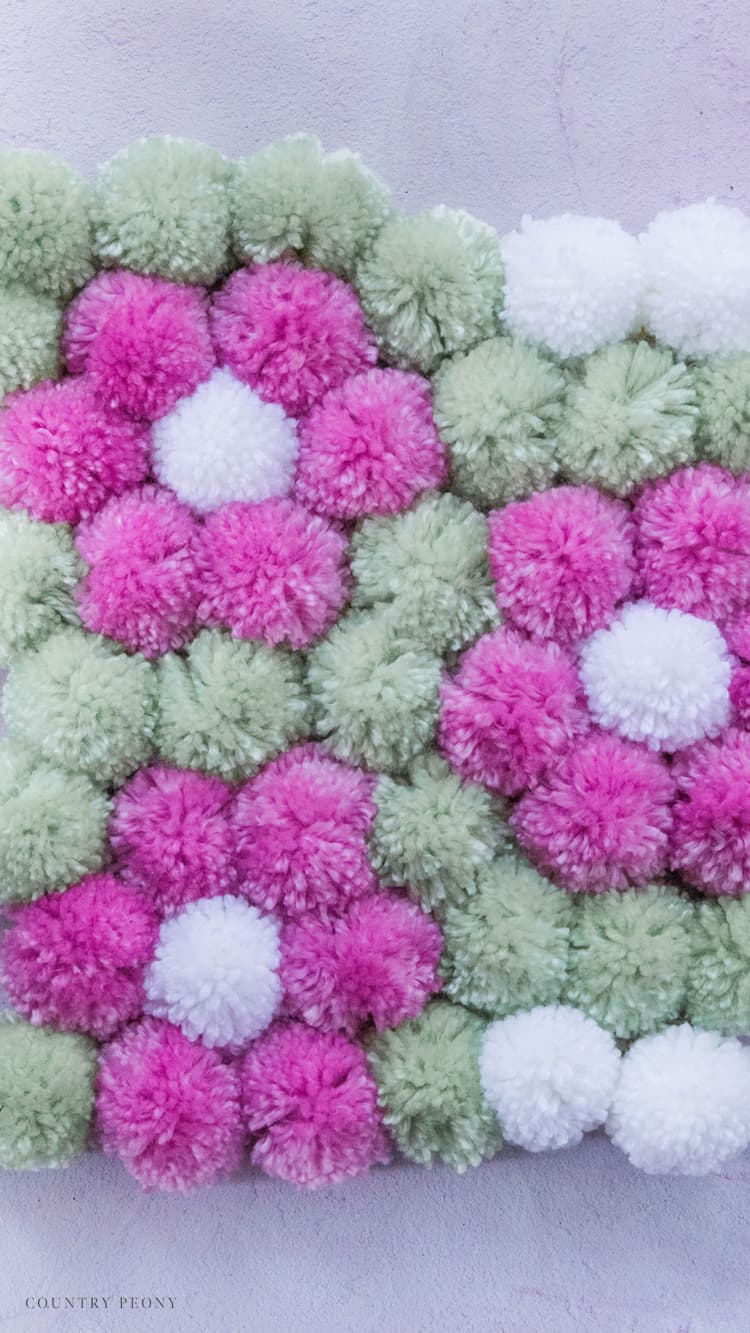
The beauty in this DIY is that you can customize it to fit your home’s color scheme, and you can create any design that you want. Daisies were a natural choice for me, because I love decorating with flowers and the pom-poms easily create this sweet flower.
Watch DIY Pom-Pom Daisy Rug Tik Tok Tutorial
If you have been here for a while you may know that I love using Clover’s pom-pom makers for my projects as you can see from the DIY Colorful Pom-Pom Christmas Tree, the DIY Pom-Pom Heart Wreath for Valentine’s Day, the DIY Pom-Pom Summer Floral Arrangement, DIY Christmas Village Pom-Pom Wreath, and more recently the DIY Pom-Pom Lampshade. Clover’s Pom-Pom Makers make it so easy and fun to create consistent and cute pom-poms every time in less time. Plus, the different sizes allow you to experiment with so many different projects. The possibilities are endless!
Today I hope to encourage you to think outside of the box when decorating with pom-poms to know that they can also be applied to more permanent home décor items like a blanket, picture frames, baskets, lampshades, or even rugs.
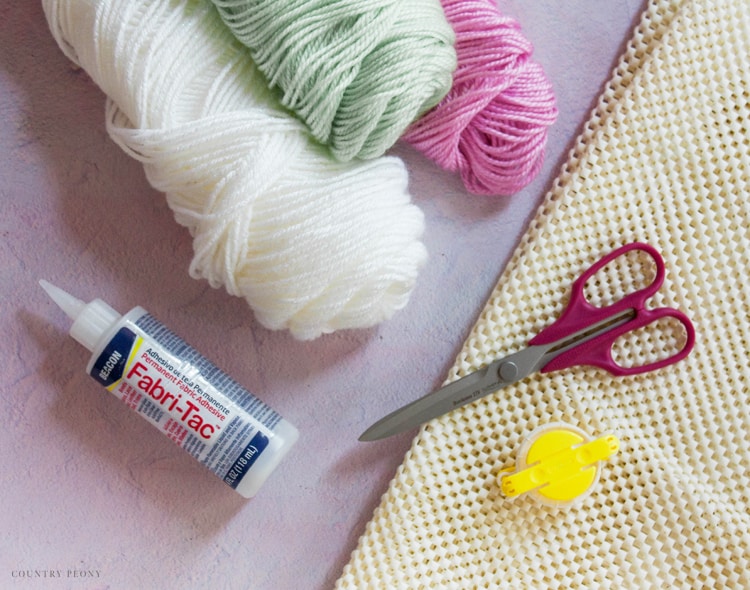
To make your own Pom-Pom Rug, you will need:
- Pom-Pom Maker Set (Art. No 3129) or (Small) *I used the 1 & 3/4 inch for this project
- Yarn
- Rug Gripper
- Mini Patchwork Scissors (Art. No 493/CW)
- Permanent Fabric Glue
Make Pom-Poms with Clover’s Pom-Pom Maker
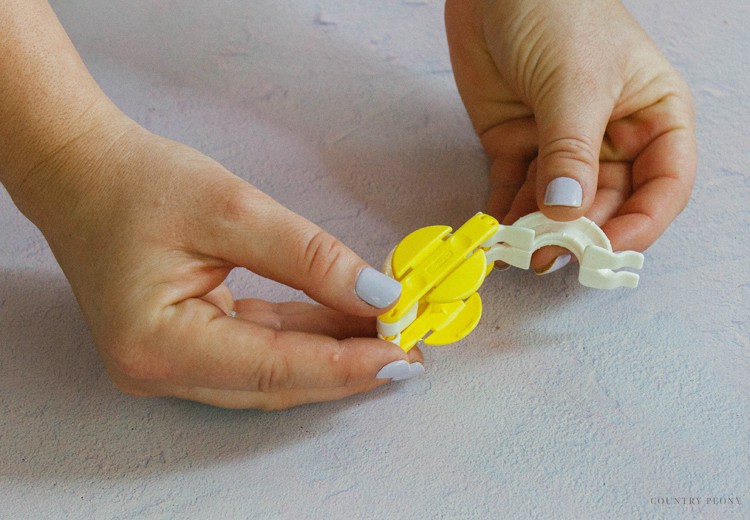
Open up the pom-pom maker.
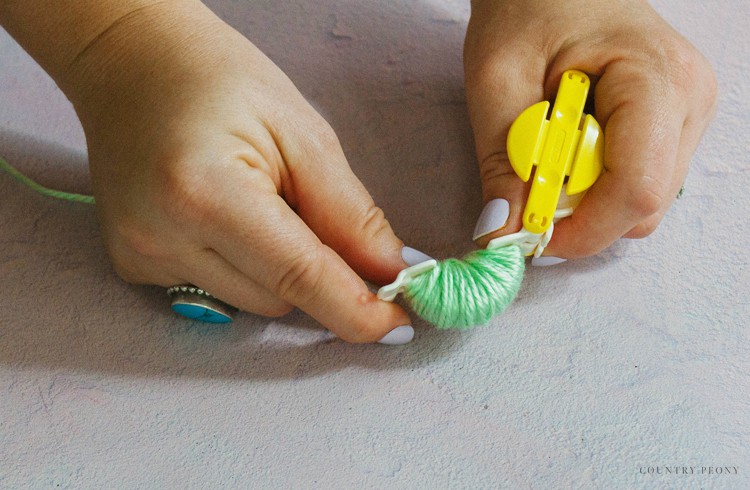
Tightly wrap the yarn around one side of the pom-pom maker arm until you have a full, consistent amount of yarn on your pom-pom arm.
Then, close the pom-pom maker arm and carry the yarn over to the other arm. Continue to wrap until you have a full, consistent amount of yarn on your other pom-pom arm.
*Keep in mind the more yarn you add to the pom-pom maker, the fluffier and more full the pom-pom will be.
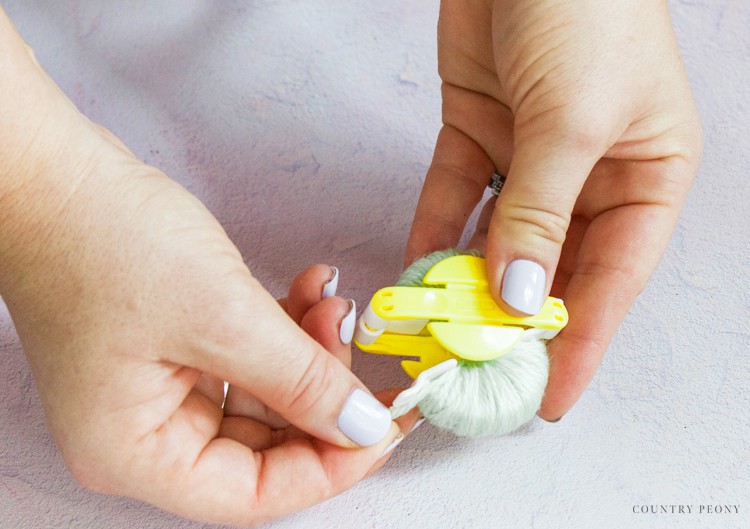
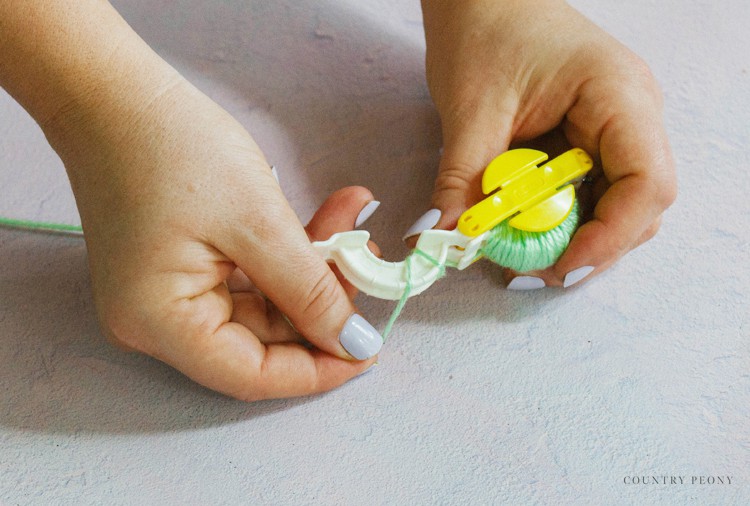
Once you achieve the yarn fullness you are after close the arm on the other side.
Snip the excess yarn.

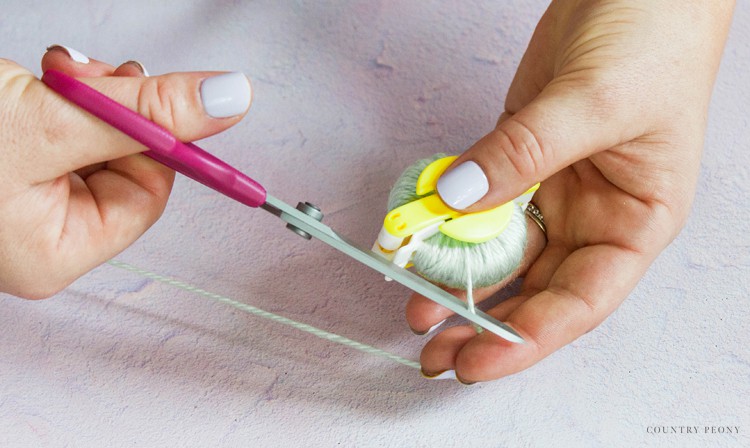
Ensure that both pom-pom arms are tightly closed, then follow the pom-pom maker guideline in the middle and cut the yarn all the way through and around.
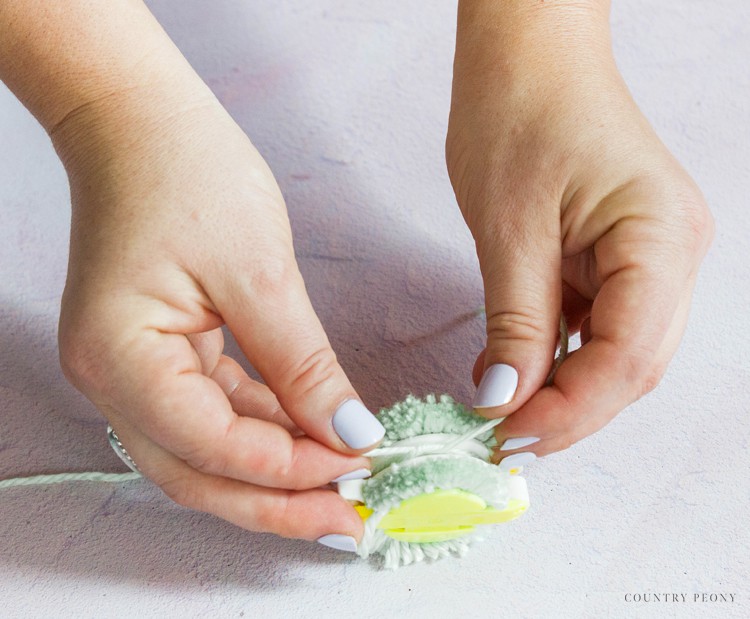
Once you cut the yarn all the way around the pom-pom maker, double knot an extra piece of yarn around the pom-pom.
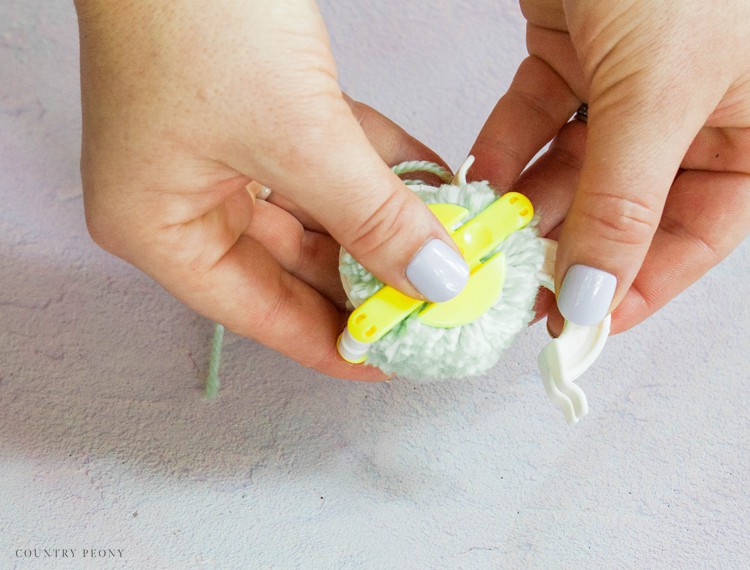
Now for my favorite part: open the pom-pom maker arms, then slowly pull the pom-pom maker apart, revealing the cutest pom-pom ever!
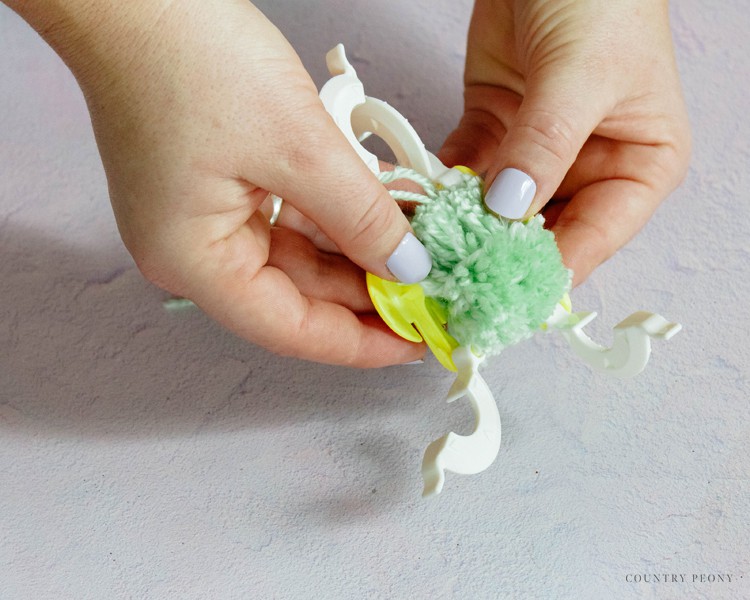
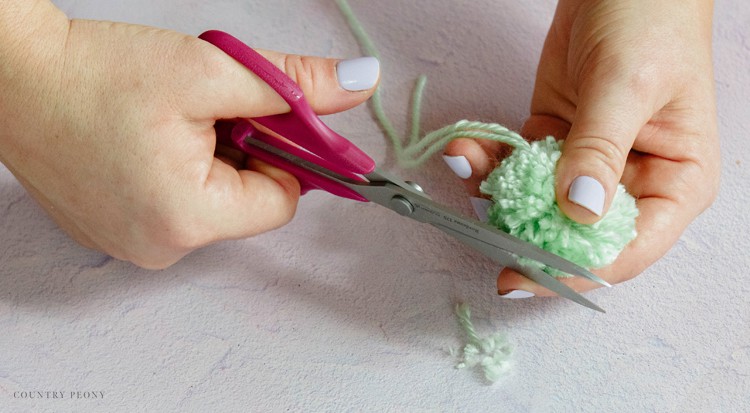
Now it is time to fine tune and give your pom-pom a little trim. Cut off any excess yarn around the pom-pom to give it a full and consistent look.
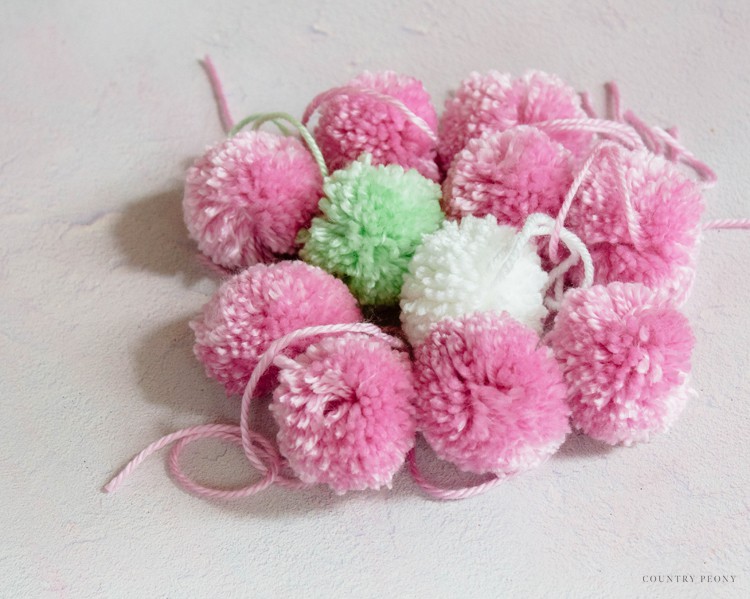
Make enough pom-poms for the rug.
Create the Pom-Pom Rug
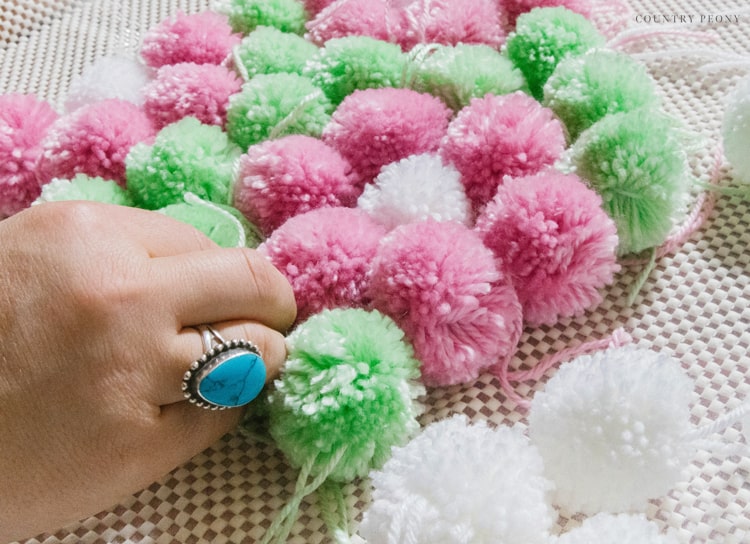
Determine the pattern for the rug.
Attach each pom-pom to the rug.
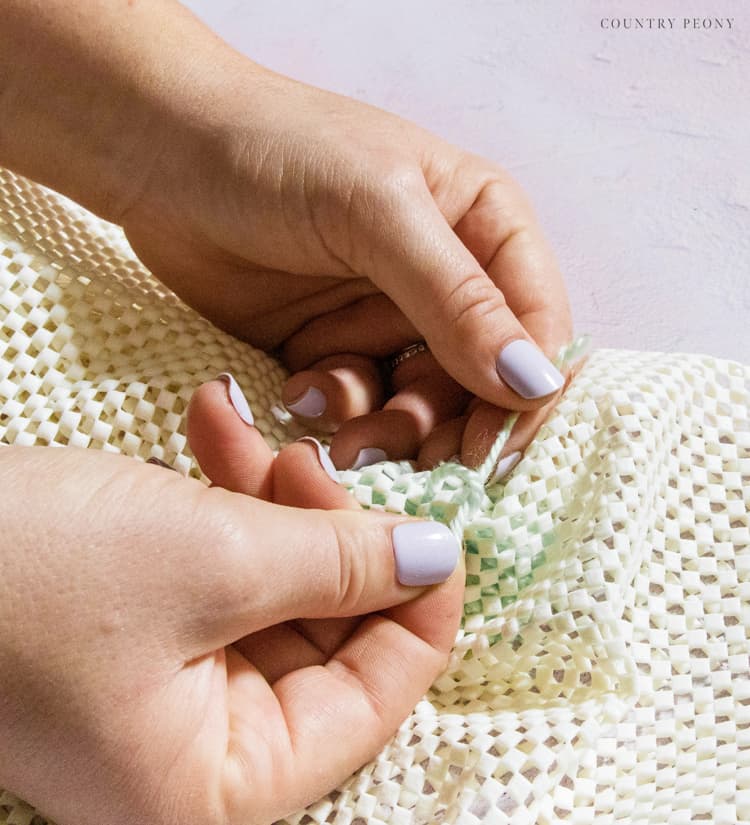
Bring the yarn strings of the pom-pom through the holes in the rug gripper to the back, then triple knot the yarn strings together.
*Place the yarn strings several holes away from each other, so the strings don’t tear the rug pad.
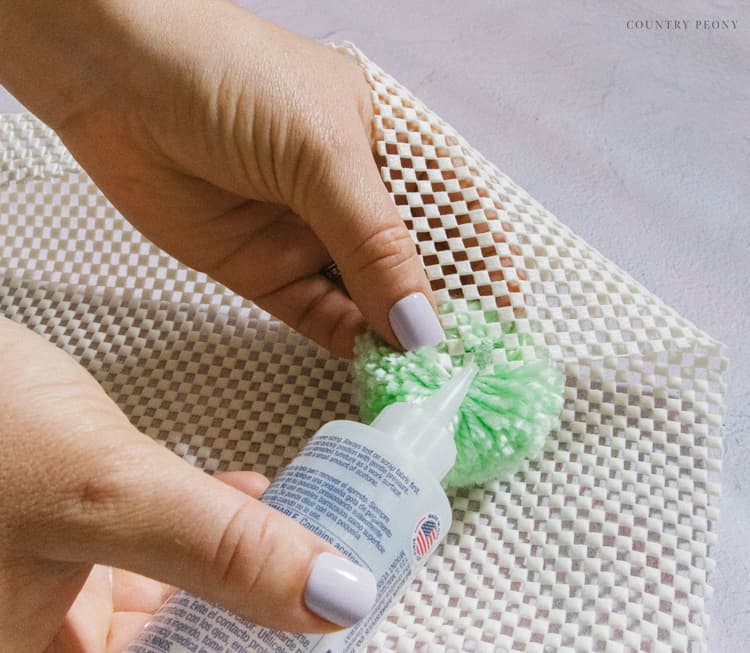
Trim the pom-pom strings, then add permanent fabric glue to the trimmed pom-pom strings to secure the pom-pom to the rug gripper.
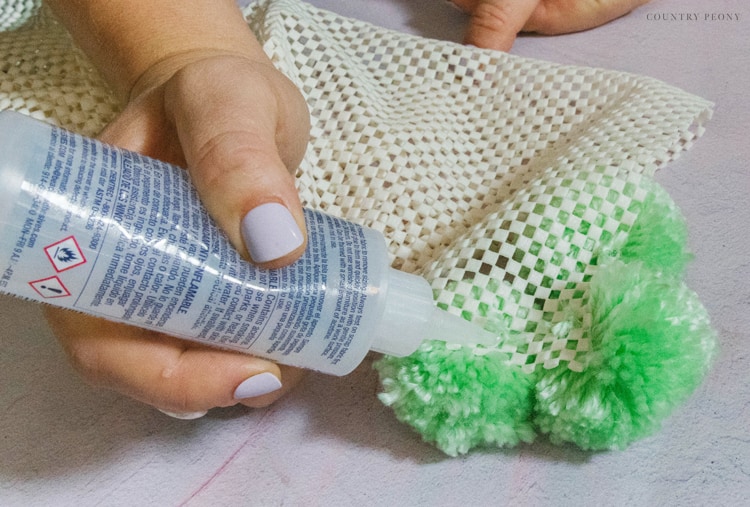
Continue to attach pom-poms to the rug gripper to create the rug design.
Then, cut the rug gripper to match the rug design.
Enjoy Your Custom Pom-Pom Rug
I just love how my rug turned out. It is the coziest and cutest rug I own, and I hope you enjoy making your own!

Thank you to Clover for the opportunity to create this necklace using their fantastic Pom-Pom Maker.
If you want to see more projects I created with Clover’s tools, please CLICK HERE.
@cloverneedlecraft Add some color to your space with a DIY Pom-Pom Daisy rug! 💜 Free pattern on our blog👉 Blog.clover-USA.com @thecountrypeony #pompom #diyproject
I can’t wait to see your custom pom-pom rugs. Please tag me @thecountrypeony, and use the #countrypeony so I can see and share your project.
Thank you so much for following along today.
Happy Crafting!
Elizabeth
Please feel free to follow along on my DIY and crafting adventures through my Blog | Instagram | Facebook | Pinterest | YouTube
Stay connected with Clover on Facebook | Twitter | Instagram | Pinterest | YouTube | Ravelry