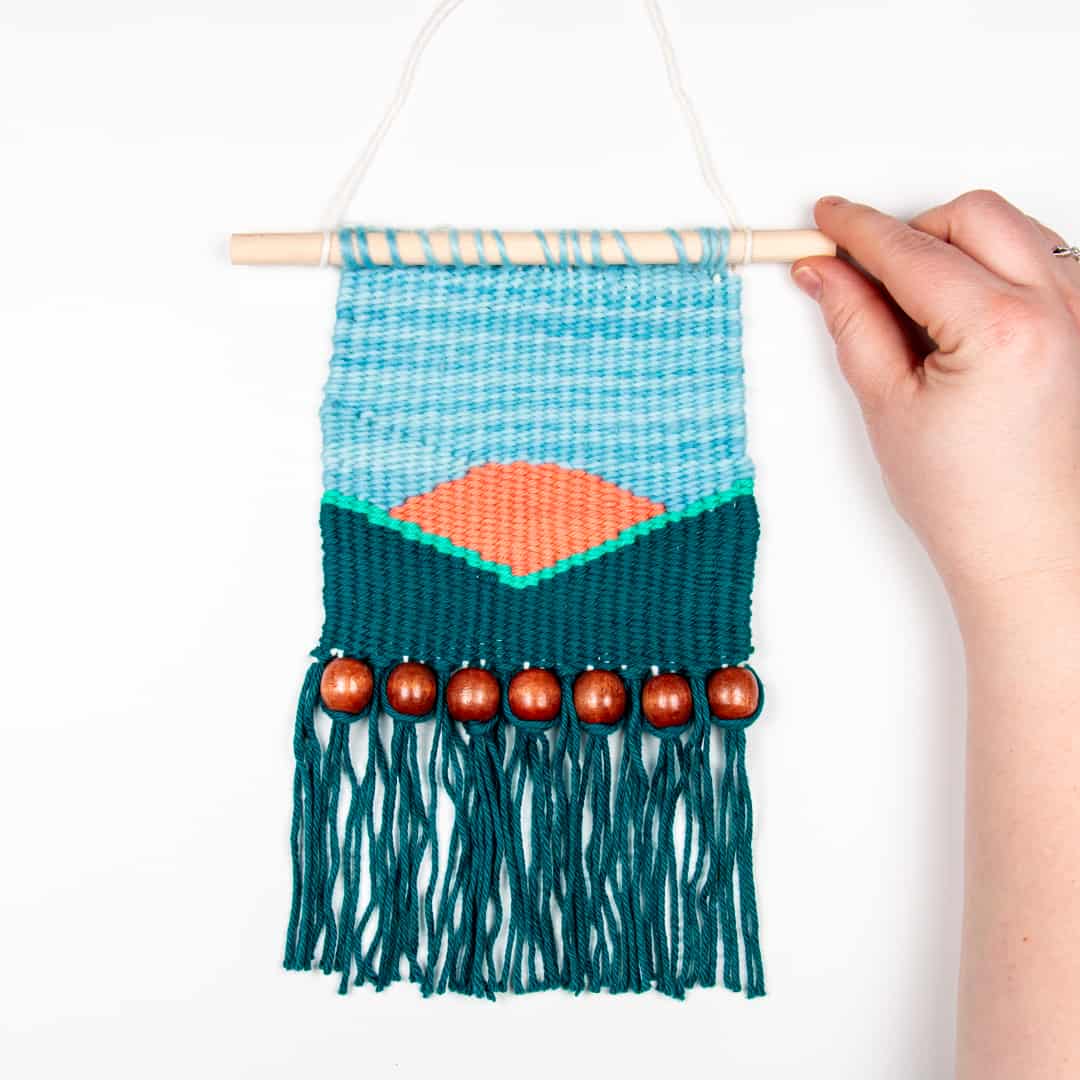
Sunrise Woven Wall Hanging – Mini Weaving Loom Project
Hi Everyone! I’m Ashley, the designer and maker behind The Loopy Lamb. I’m so excited to be invited back to the Clover blog to teach you all how to make this Sunrise Wall Hanging.
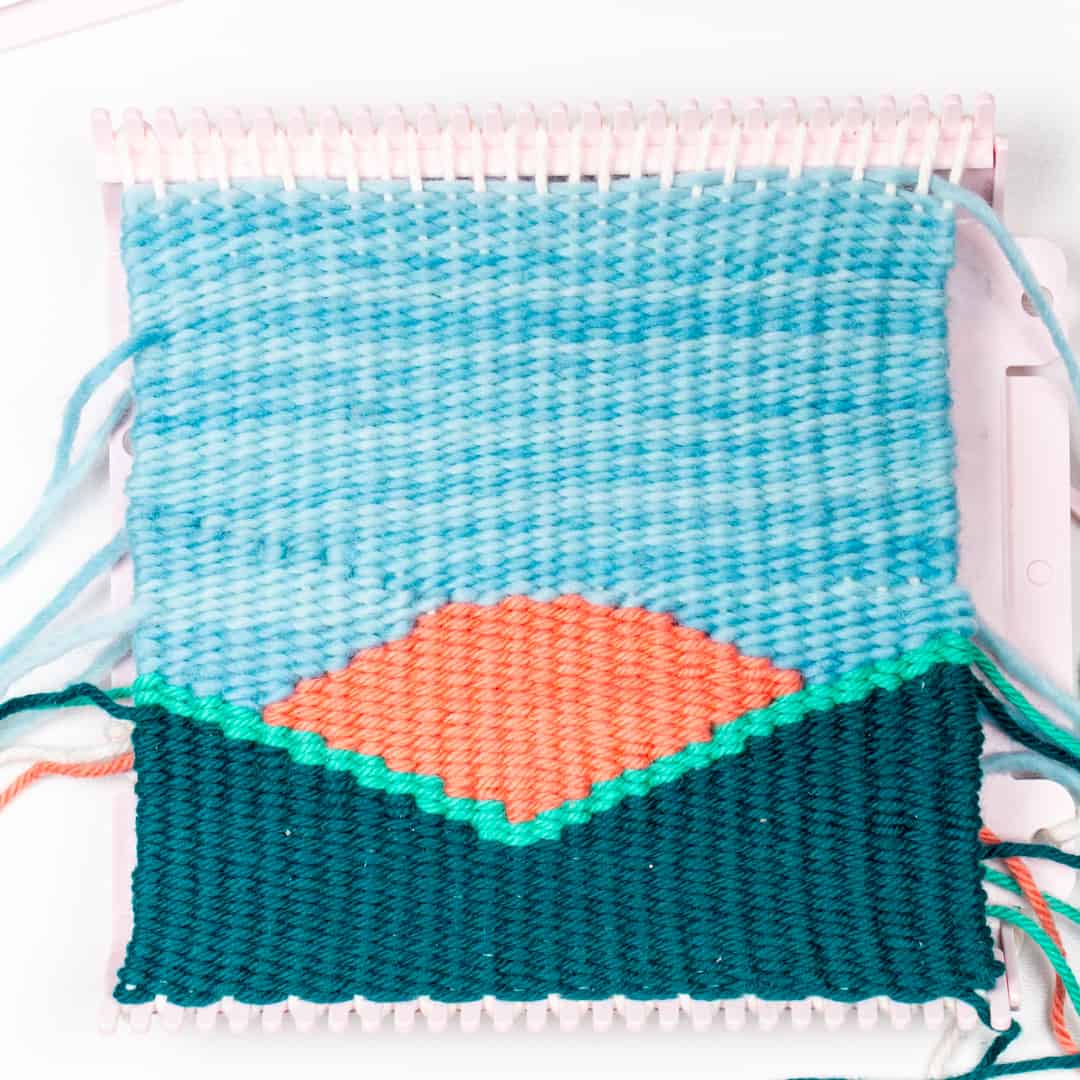
This is a weaving project that is accessible for beginners and will create a wall hanging that pictures a sun rising over the hills in the spring.
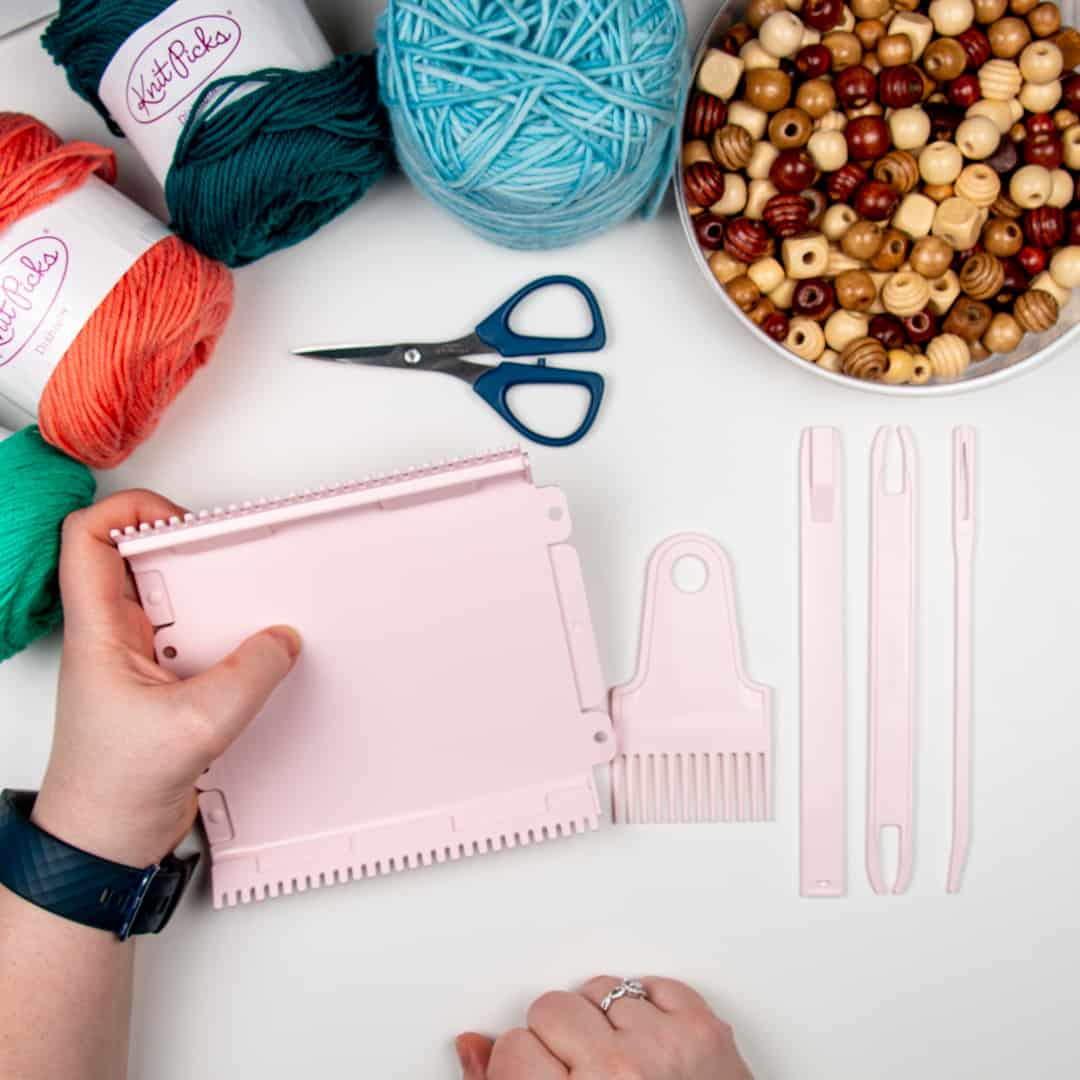
Materials:
- Clover Mini Weaving Loom (single) – Art. No 3176
- We Crochet Dishie Yarn in Swan (100% Cotton yarn, Worsted Weight)
- We Crochet Dishie Yarn in Conch (100% Cotton yarn, Worsted Weight)
- We Crochet Dishie Yarn in Kenai (100% Cotton yarn, Worsted Weight)
- We Crochet Dishie Yarn in Verdigris (100% Cotton yarn, Worsted Weight)
- We Crochet Preciosa Tonal Yarn in Summer Sky (100% Merino Wool, Worsted Weight)
- Clover Mini Patchwork Scissors –Art. No 493/CW
- 7” long piece of 3/8” wooden dowl or a branch
- 7 – ½” Round Wooden Bead In Preferred Color
- Clover Darning Needle Set – Art. No 339
Finished Size:
- Approximately 9.25” long (excluding dowel and hanger) x 5” wide
Directions:
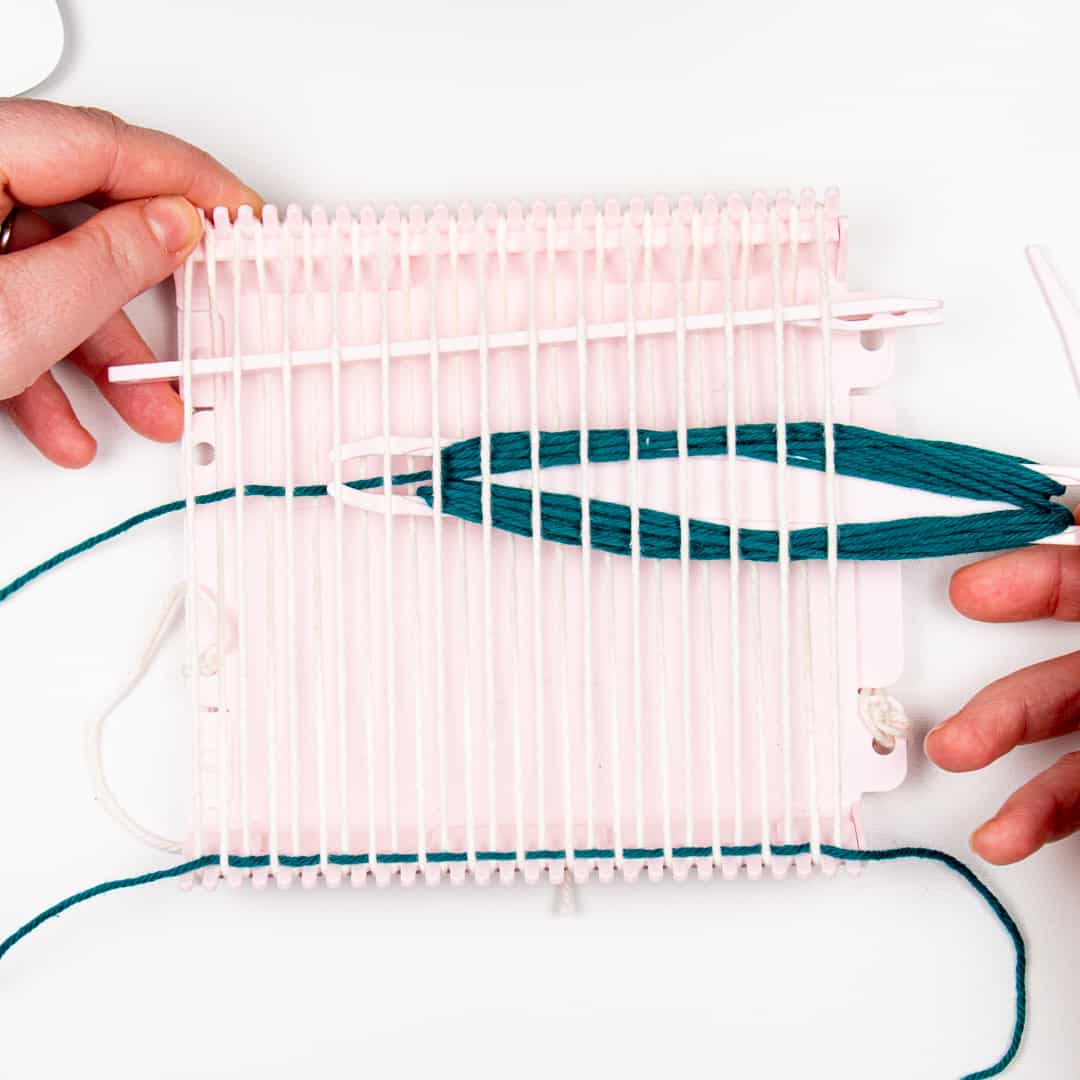
Set-up: Using the Dishie in Swan, set up the loom warp so you have 27 warp yarns.
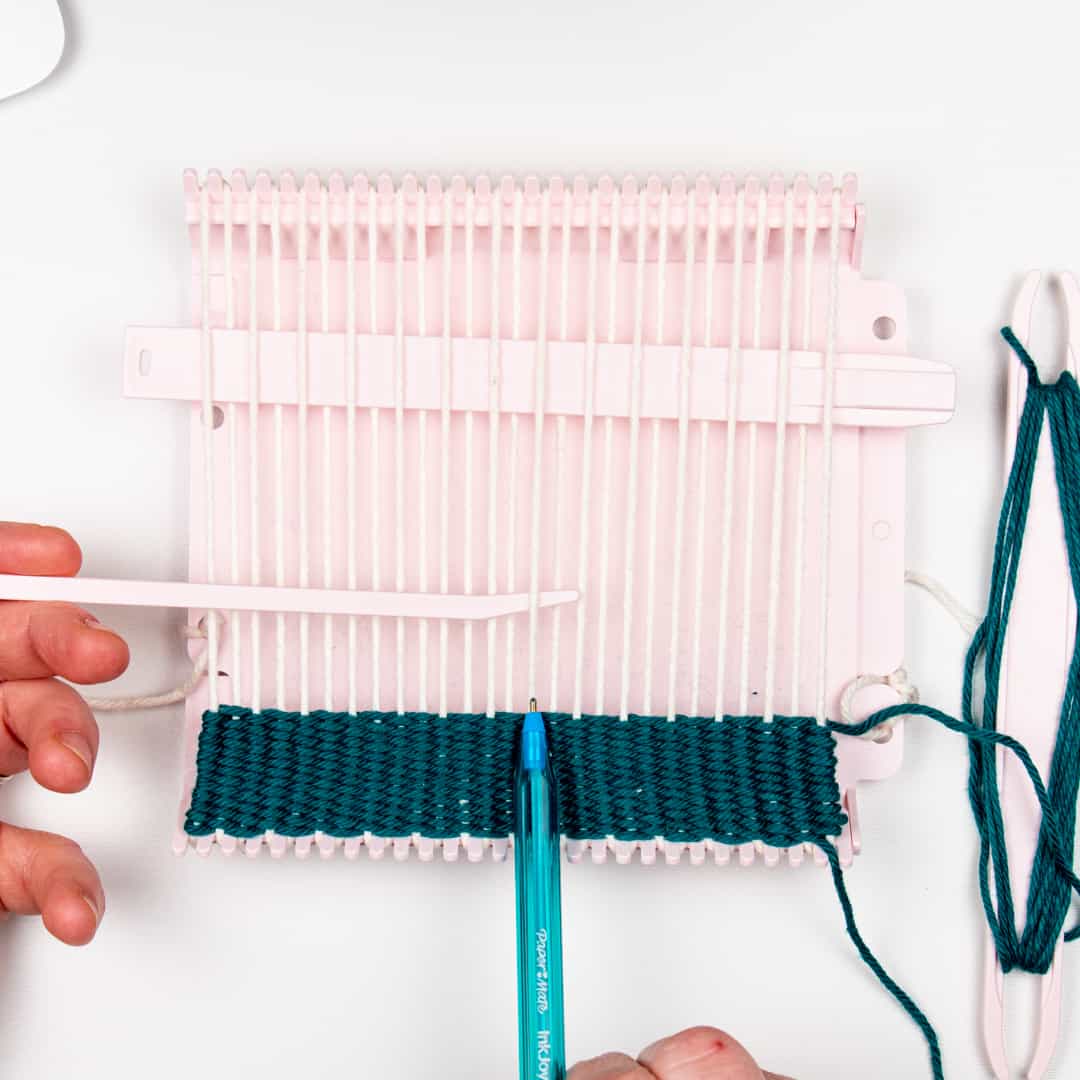
How to do the Tabby Weave Stitch
Weaving Section 1 – Landscape Base: Before we start, we need to prepare the weft. We’ll be starting with We Crochet Dishie yarn in Kenai. Wind the weft with Kenai. We’re going to be using what’s called a Tabby weave for this wall hanging. Tabby Weave is done by weaving the yarn over the first yarn warp and under the next, repeating that motion across the loom. On your second row or return pass, you’ll go over the yarn warps you went under in the first row and then under the warps you went over in row one. Do 24 rows of Tabby Weave in Kenai.
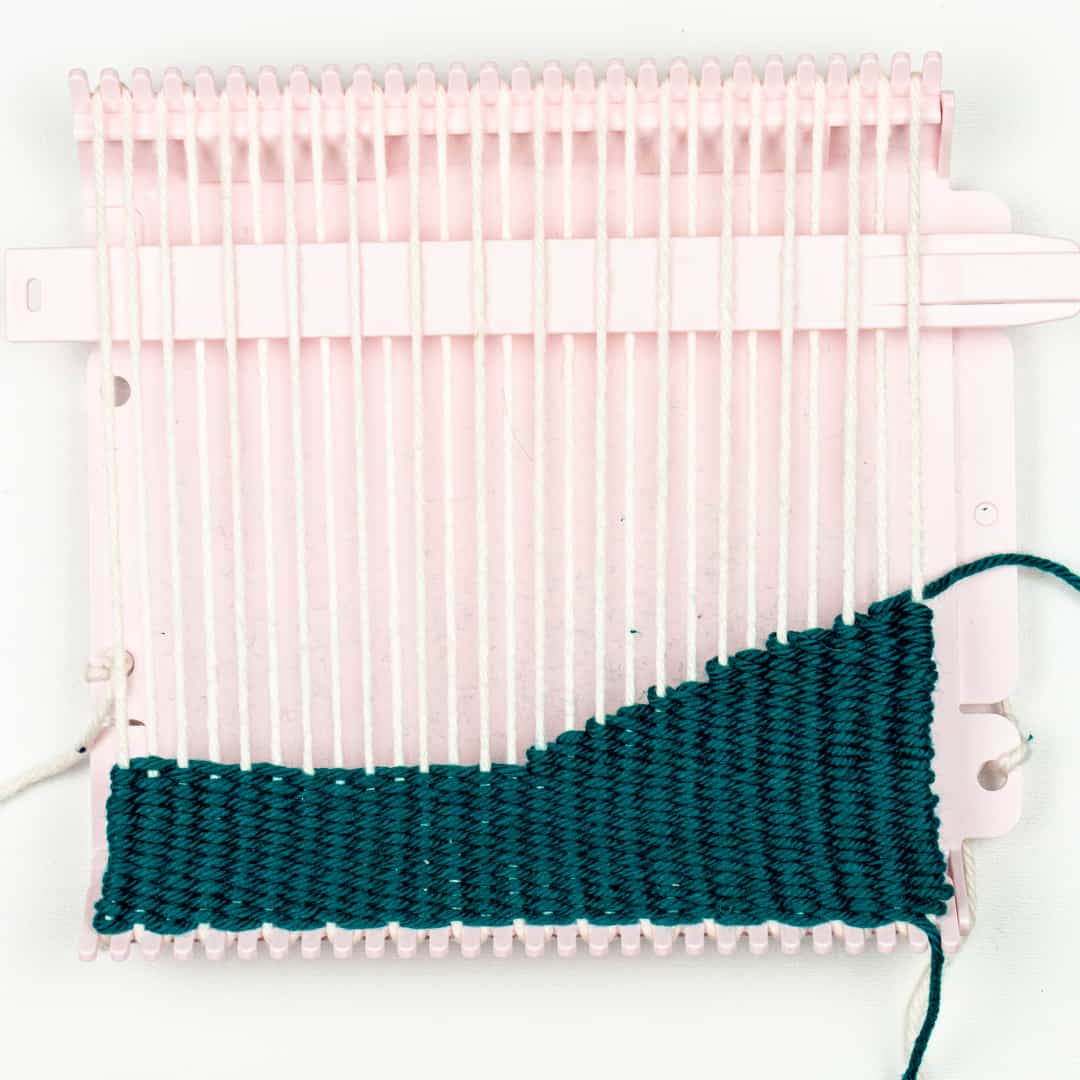
Weaving Section 2 – Right Hill: In this section, we are going to start decreasing how many warp yarns we work to create the shaping for the right hill. We will continue to work with Dishie in Kenai. We will be working one less warp per row. I have included instructions with the warp numbers to assist you. If you find yourself running low on yarn, make sure to leave enough yarn to weave in your end and rewind your weft to continue weaving.
Rows 25 – 28: Tabby Weave over the first 13 warps

Rows 29 – 30: Tabby Weave over the first 12 warps.
Rows 31 – 32: Tabby Weave over the first 11 warps.
Rows 33 – 34: Tabby Weave over the first 10 warps.
Rows 35 – 36: Tabby Weave over the first 9 warps.
Rows 37 – 38: Tabby Weave over the first 8 warps.
Rows 39 – 42: Tabby Weave over the first 7 warps.
Rows 43 – 44: Tabby Weave over the first 6 warps.
Rows 45 – 46: Tabby Weave over the first 5 warps.
Rows 47 – 48: Tabby Weave over the first 4 warps.
Rows 49 – 50: Tabby Weave over the first 3 warps.
Rows 51 – 54: Tabby Weave over the first 2 warps.
Rows 55 – 6: Tabby Weave over the first warp. Finish off, leaving a long tail to weave in ends.
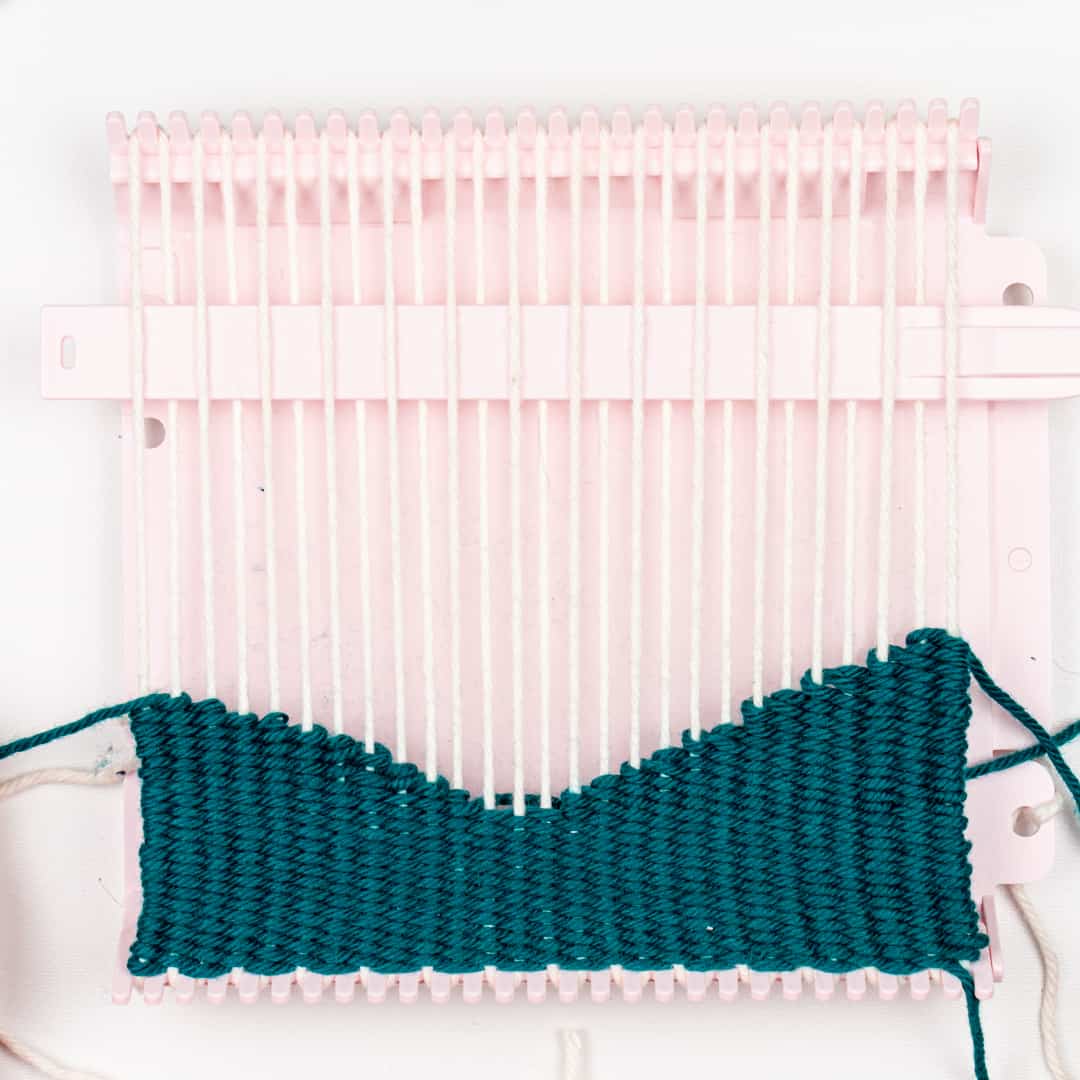
Weaving Section 3 – Left Hill: In this section, we are going to start creating the left hill by adding new yarn to the loom and decreasing how many warp yarns we work to create the shaping for the left hill. We will continue to work with Dishie in Kenai. We will be working one less warp per row. I have included instructions with the warp numbers to assist you. If you find yourself running low on yarn, make sure to leave enough yarn to weave in your end and rewind your weft to continue weaving.
Rows 1 – 3: Bringing the shuttle from right to left under the warp yarns, begin weaving on the 17th warp yarn making sure to leave a tail to weave in at the end. Tabby Weave over the last 11 warps
Rows 4 – 5: Tabby Weave over the last 10 warps
Rows 5 – 6: Tabby Weave over the last 9 warps
Rows 6 – 7: Tabby Weave over the last 8 warps
Rows 8 – 9: Tabby Weave over the last 7 warps
Rows 10 – 11: Tabby Weave over the last 6 warps
Rows 12 – 13: Tabby Weave over the last 5 warps
Rows 14 – 15: Tabby Weave over the last 4 warps
Rows 16 – 17: Tabby Weave over the last 3 warps
Rows 18 – 19: Tabby Weave over the last 2 warps. Finish off, leaving a long tail to weave in ends.
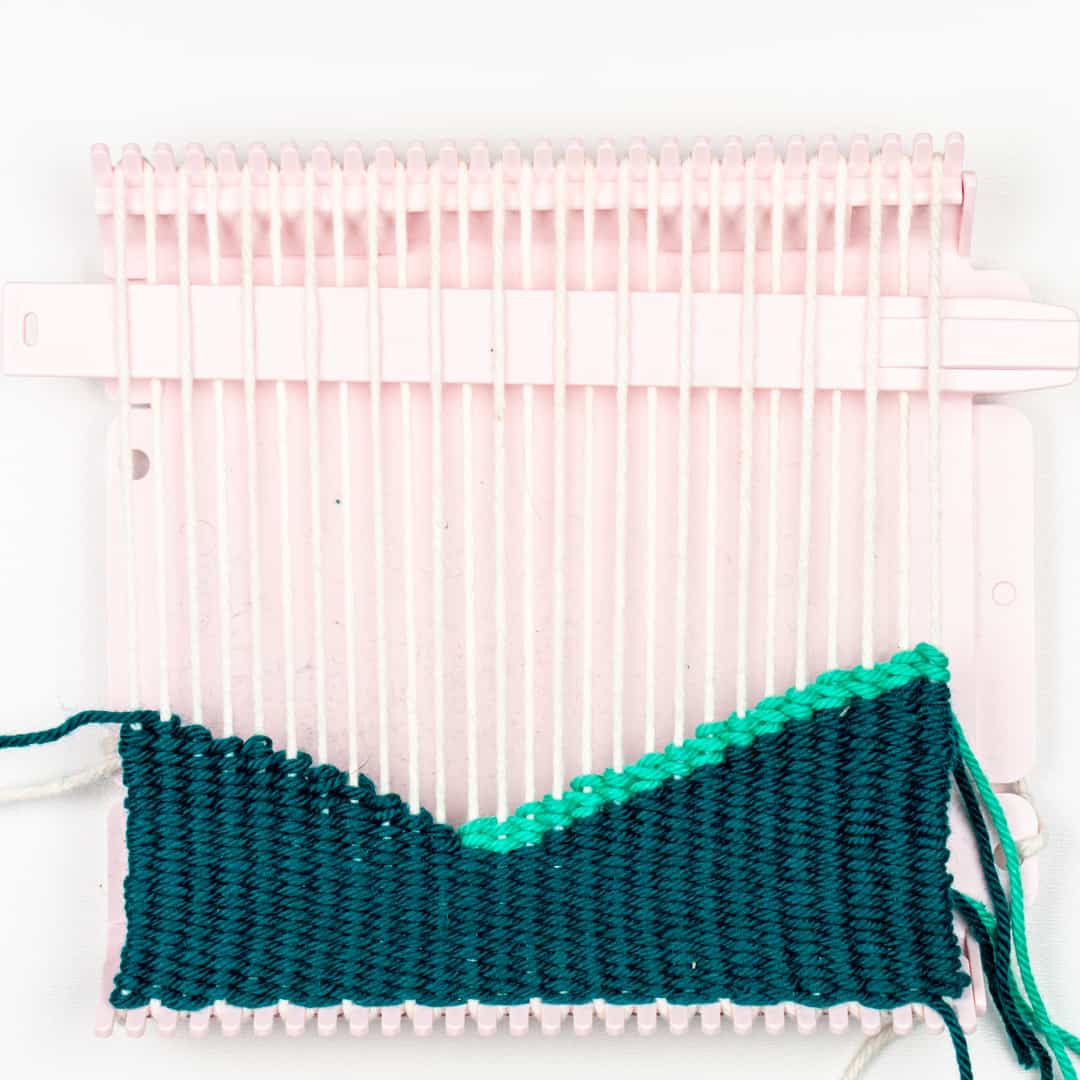
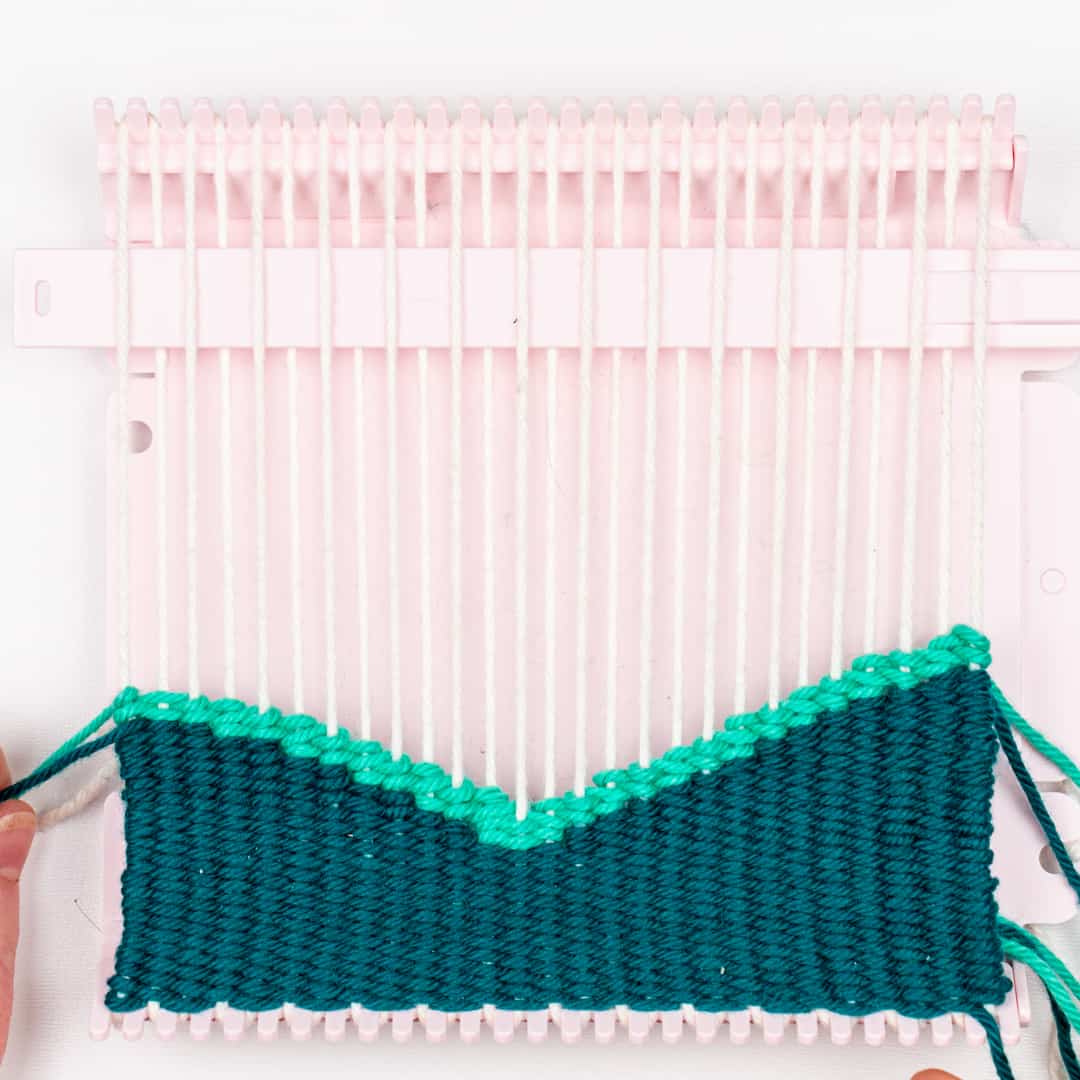
Weaving Section 4 – Highlight of Hills: In this section, we are going to create the lighter section along the ridge of the hills to simulate the light from the sun touching the earth. Wind your weft with Dishie in Verdigris, alternatively, you may find this section easier using the needle provided in the kit. We will begin by doing tabby weave up the right side of the hill in Part A and working up the left side of the hill in Part B.
Part A: Row 1: Bringing the shuttle from right to left under the warp yarns, begin weaving on the 14th warp yarn (making sure to leave a tail to weave in at the end), coming up under the 14th warp, over the 15th and under the 16th.
Row 2: Tabby Weave over the 16th, 15th and 14th warps
Row 3: Tabby Weave over the 14th, 15th and 16th warps
Row 4: Tabby Weave over the 16th, 15th, 14th and 13th warps
We’re going to start working up the hill on the right side
Row 5: Tabby Weave over the 13th and 14th warps
Row 6: Tabby Weave over the 14th, 13th and 12th warps
Row 7: Tabby Weave over the 12th and 13th warps
Row 8: Tabby Weave over the 13th, 12th and 11th warps
Row 9: Tabby Weave over the 11th and 12th warps
Row 10: Tabby Weave over the 12th, 11th and 10th warps
Row 11: Tabby Weave over the 10th and 11th warps
Row 12: Tabby Weave over the 11th, 10th and 9th warps
Row 13: Tabby Weave over the 9th and 10th warps
Row 14: Tabby Weave over the 10th, 9th and 8th warps
Row 15: Tabby Weave over the 8th and 9th warps
Row 16: Tabby Weave over the 9th, 8th and 7th warps
Row 17: Tabby Weave over the 7th and 8th warps
Row 18: Tabby Weave over the 8th, 7th and 6th warps
Row 19: Tabby Weave over the 6th and 7th warps
Row 20: Tabby Weave over the 7th, 6th and 5th warps
Row 21: Tabby Weave over the 5th and 6th warps
Row 22: Tabby Weave over the 6th, 5th and 4th warps
Row 23: Tabby Weave over the 4th and 5th warps
Row 24: Tabby Weave over the 5th, 4th and 3rd warps
Row 25: Tabby Weave over the 3rd and 4th warps
Row 26: Tabby Weave over the 4th, 3rd and 2nd warps
Row 27: Tabby Weave over the 2nd and 3rd warps
Row 26: Tabby Weave over the 3rd, 2nd and 1st warps
Rows 27 – 28: Tabby Weave over the 1st and 2nd warps
Rows 29 – 30: Tabby Weave over the 1st warp. Finish off, leaving a long tail to weave in ends.
Part B: Row 1: Bringing the shuttle from right to left under the warp yarns, begin weaving on the 16th warp yarn (making sure to leave a tail to weave in at the end), coming up over the 16th warp and under the 17th.
Row 2: Tabby Weave over the 17th and 16th warps.
Row 3: Tabby Weave over the 16th, 17th and 18th warps.
Row 4: Tabby Weave over the 18th and 17th warps.
Row 5: Tabby Weave over the 17th, 18th and 19th warps.
Row 6: Tabby Weave over the 19th and 18th warps.
Row 7: Tabby Weave over the 18th, 19th and 20th warps.
Row 8: Tabby Weave over the 19th and 20th warps.
Row 9: Tabby Weave over the 19th, 20th and 21st warps.
Row 10: Tabby Weave over the 21st and 20th warps.
Row 11: Tabby Weave over the 20th, 21st and 22nd warps.
Row 12: Tabby Weave over the 22nd and 21st warps.
Row 13: Tabby Weave over the 21st, 22nd and 23rd warps.
Row 14: Tabby Weave over the 23rd and 22nd warps.
Row 15: Tabby Weave over the 22nd, 23rd and 24th warps.
Row 16: Tabby Weave over the 24th and 23rd warps.
Row 17: Tabby Weave over the 23rd, 24th and 25th warps.
Row 18: Tabby Weave over the 25th and 24th warps.
Row 19: Tabby Weave over the 24th, 25th, 26th and 27th warps.
Rows 20 – 21: Tabby Weave over the 27th, 26th and 25th warps.
Row 22: Tabby Weave over the 27th warp. Finish off, leaving a long tail to weave in ends.
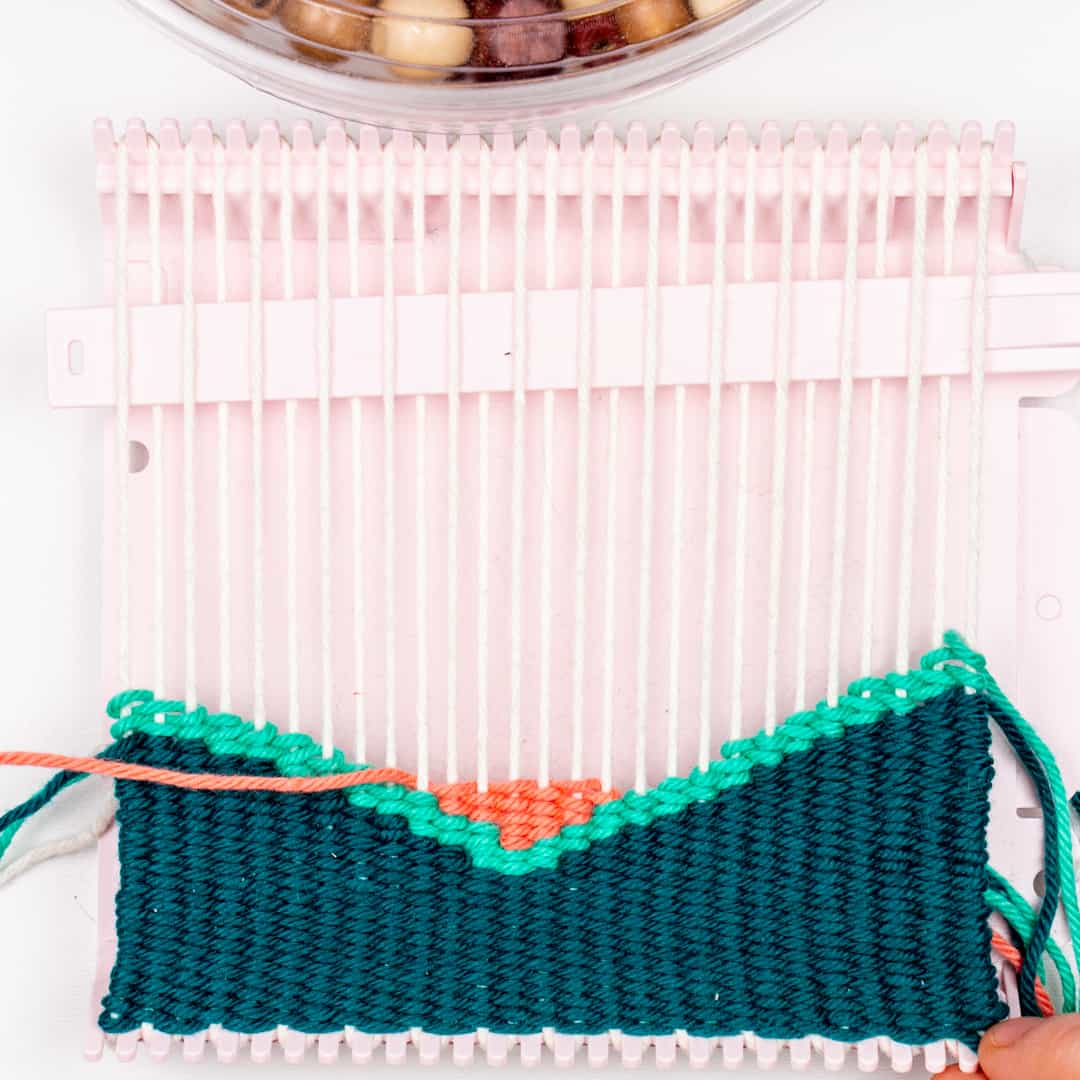
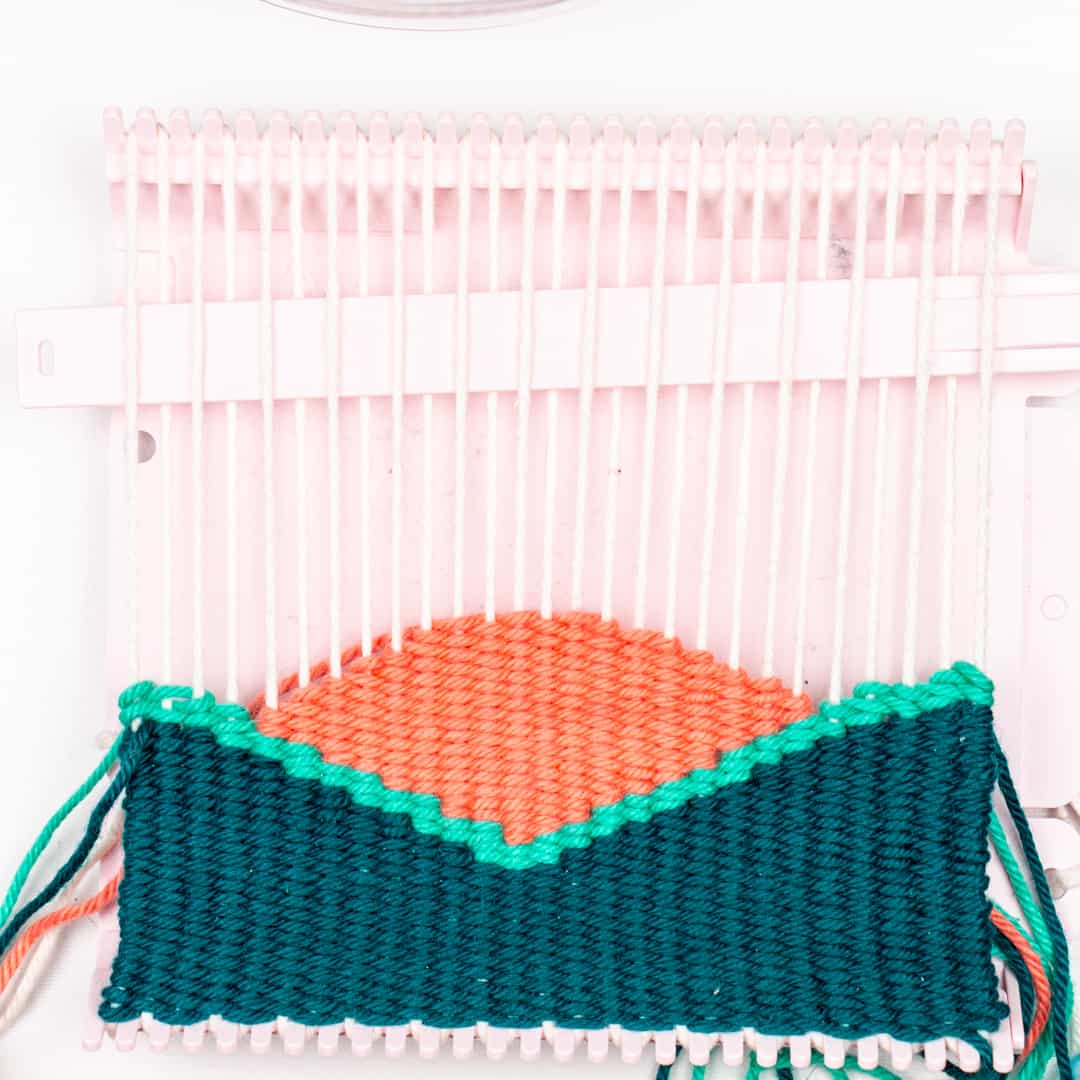
Weaving Section 5 – Sunset: In this section, we are going to create the Sun between the hills. Wind your weft with Dishie in Conch, alternatively, you may find this section easier using the needle provided in the kit. In this section, we’re going to begin weaving in the center-point of our hills and start adding warps on either side as we work to fill in the space with Conch and create our sun. Once we have filled in most of the space, we will being decreasing to add the rounded shape to the top of our sun.
Row 1: Bringing the shuttle from right to left under the warp yarns, begin weaving on the 15th warp yarn (making sure to leave a tail to weave in at the end), coming up over the 15th warp
Rows 2 – 3: Tabby Weave over the 15th and 14th warps.
Row 4: Tabby Weave over the 15th, 14th and 13th warps.
Row 5: Tabby Weave over the 13th – 16th warps.
Row 6: Tabby Weave over the 16th – 13th warps.
Row 7: Tabby Weave over the 13th – 17th warps.
Rows 8 – 9: Tabby Weave over the 17th – 12th warps.
Row 10: Tabby Weave over the 17th – 11th warps.
Row 11: Tabby Weave over the 11th – 18th warps.
Row 12: Tabby Weave over the 18th – 10th warps.
Row 13: Tabby Weave over the 10th – 19th warps.
Row 14: Tabby Weave over the 19th – 9th warps.
Row 15: Tabby Weave over the 9th – 20th warps.
Row 16: Tabby Weave over the 20th – 9th warps.
Row 17: Tabby Weave over the 9th – 21st warps.
Row 18: Tabby Weave over the 21st – 8th warps.
Row 19: Tabby Weave over the 8th – 22nd warps.
Row 20: Tabby Weave over the 22nd – 7th warps.
Row 21: Tabby Weave over the 7th – 23rd warps.
Rows 22 – 24: Tabby Weave over the 6th – 23rd warps.
Row 25: Tabby Weave over the 6th – 22nd warps.
Row 26: Tabby Weave over the 22nd – 7th warps.
Row 27: Tabby Weave over the 7th – 21st warps.
Row 28: Tabby Weave over the 21st – 8th warps.
Row 28: Tabby Weave over the 8th – 20th warps.
Row 29: Tabby Weave over the 20th – 9th warps.
Row 30: Tabby Weave over the 9th – 19th warps.
Row 31: Tabby Weave over the 19th – 10th warps.
Row 32: Tabby Weave over the 10th – 18th warps.
Row 33: Tabby Weave over the 18th – 12th warps.
Row 34: Tabby Weave over the 12th – 17th warps.
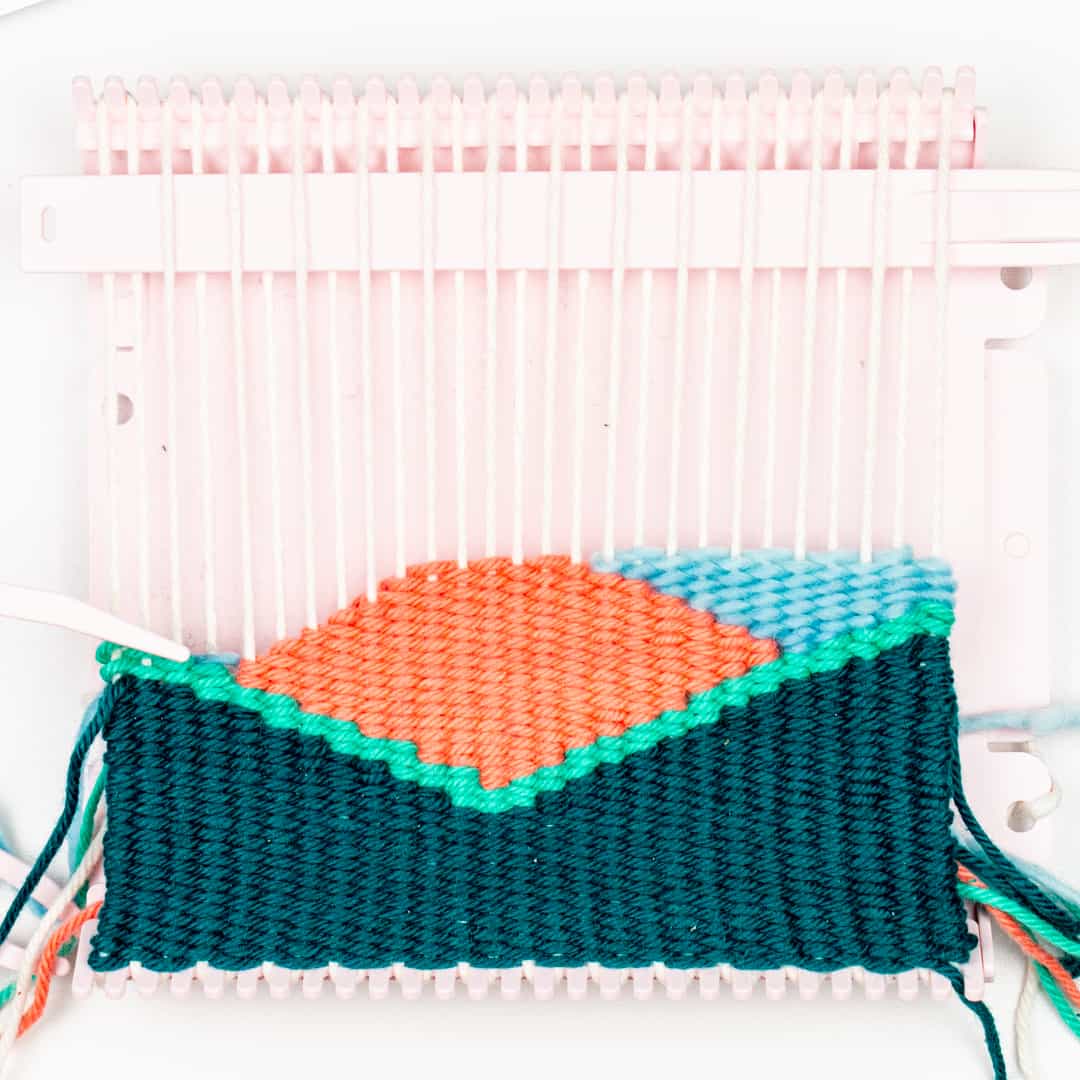
Weaving Section 6 – Sky: In this section, we are going to fill in the rest of the loom with the We Crochet Preciosa Tonal Yarn in Summer Sky to make our sky. This yarn is pretty and the tonal variations simulate wispy clouds the sky. Wind your weft with We Crochet Preciosa Tonal. We’ll start by filling in the right section of the loom to the top of the sun in Part 1 and then fill in the left side of the loom with Part 2. In Part 3, we’ll be filling in the rest of the loom and finishing off.
Sky Part 1: Row 1: Bringing the shuttle from right to left under the warp yarns, begin weaving on the 5th warp yarn (making sure to leave a tail to weave in at the end), coming up over the 15th warp
Row 2: Tabby Weave over the 5th and 4th warps.
Row 3: Tabby Weave over the 4th, 5th and 6th warps.
Row 4: Tabby Weave over the 6th – 3rd warps.
Row 5: Tabby Weave over the 3rd – 7th warps.
Row 6: Tabby Weave over the 7th – 2nd warps.
Row 7: Tabby Weave over the 2nd – 8th warps.
Row 8: Tabby Weave over the 8th – 1st warps.
Rows 9 – 10: Tabby Weave over the 1st – 9th warps.
Rows 11 – 12: Tabby Weave over the 1st – 10th warps.
Rows 12 – 13: Tabby Weave over the 1st – 11th warps.
FO leaving a tail to weave in later.
Sky Part 2: Row 1: Bringing the shuttle from right to under the warp yarns, begin weaving on the 24th warp yarn (making sure to leave a tail to weave in at the end), coming up over the 24th warp
Row 2: Tabby Weave over the 24th and 23rd warps.
Rows 3 – 4: Tabby Weave over the 23rd, 24th and 25th warps.
Row 5: Tabby Weave over the 23rd – 26th warps.
Row 6: Tabby Weave over the 26th – 22nd warps.
Row 7: Tabby Weave over the 22nd – 27th warps.
Rows 8 – 9: Tabby Weave over the 27th – 21stwarps.
Rows 10 – 11: Tabby Weave over the 27th – 20th warps.
Rows 12 – 13: Tabby Weave over the 27th – 19th warps.
Rows 14 – 15: Tabby Weave over the 27th – 18th warps.
Rows 16 – 17: Tabby Weave over the 27th – 19th warps.
Rows 18 – 19: Tabby Weave over the 27th – 20th warps.
Rows 20 – 21: Tabby Weave over the 27th – 21st warps.
Rows 22 – 23: Tabby Weave over the 27th – 22nd warps.
Rows 24 – 25: Tabby Weave over the 27th – 23rd warps.
Rows 26 – 27: Tabby Weave over the 27th – 24th warps.
Rows 28 – 29: Tabby Weave over the 27th – 25th warps.
Rows 30 – 31: Tabby Weave over the 27th – 26th warps.
Row 32: Wrap yarn around 27th warp.
FO leaving a tail to weave in later.

Sky Part 3: Row 1: Bringing the shuttle from right to under the warp yarns, begin weaving on the 12th warp yarn (making sure to leave a tail to weave in at the end), coming up over the 12th warp, tabby weave over the 12 – 17th warps.
Row 2: Tabby Weave over the 17th to 1st warps
Rows 3 – 4: Tabby Weave over 1st to 18th warps
Rows 5 – 6: Tabby Weave over 1st to 19th warps
Rows 7 – 8: Tabby Weave over 1st to 20th warps
Rows 9 – 10: Tabby Weave over 1st to 21st warps
Rows 11 – 12: Tabby Weave over 1st to 22nd warps
Rows 13 – 14: Tabby Weave over 1st to 23rd warps
Rows 15 – 16: Tabby Weave over 1st to 24thwarps
Rows 17 – 18: Tabby Weave over 1st to 25thwarps
Rows 19 – 20: Tabby Weave over 1st to 26thwarps
Rows 21 – End: Tabby Weave over 1st to 27thwarps
Tip: when weaving with the shuttle/weft becomes too difficult, switch to using the needle provided in the kit.
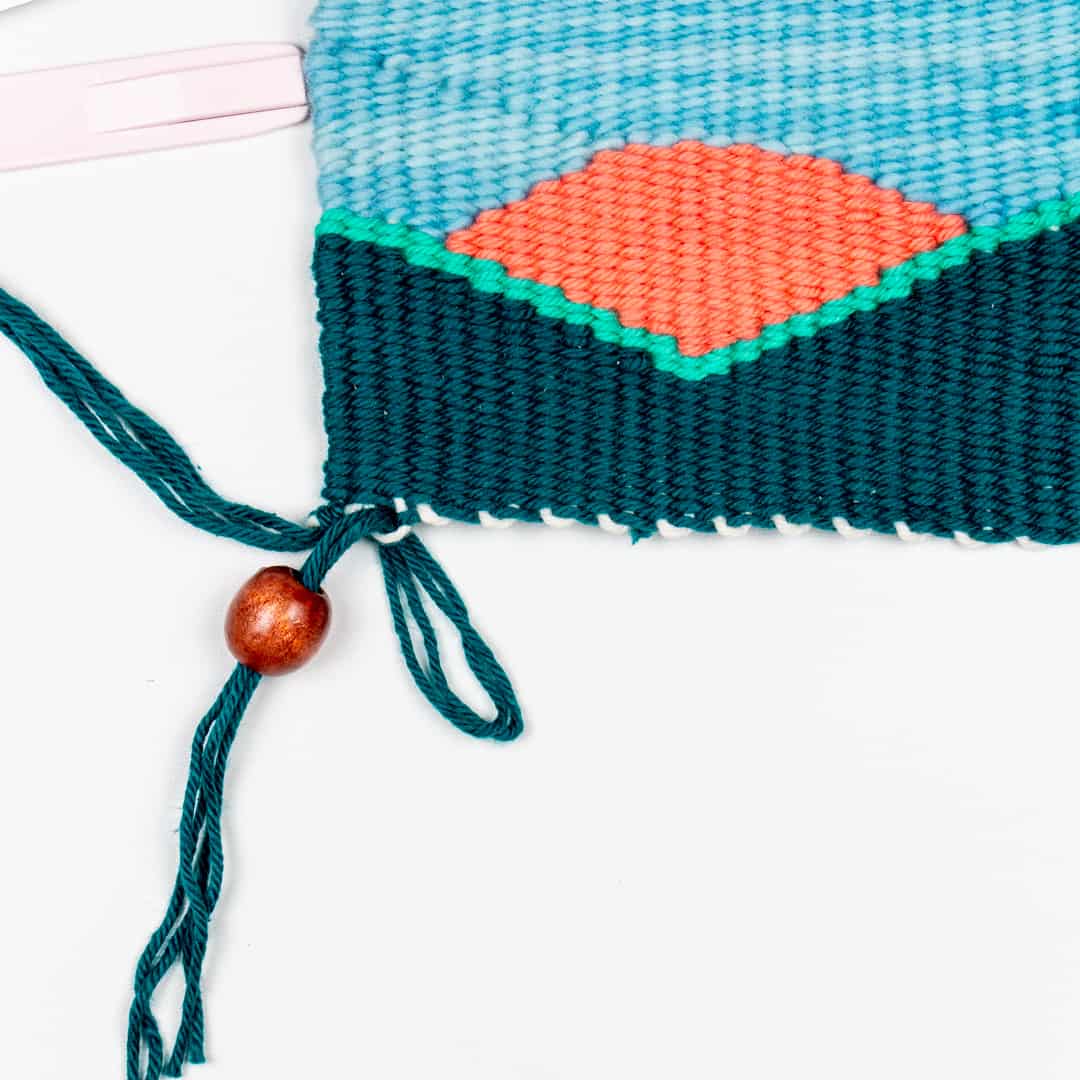
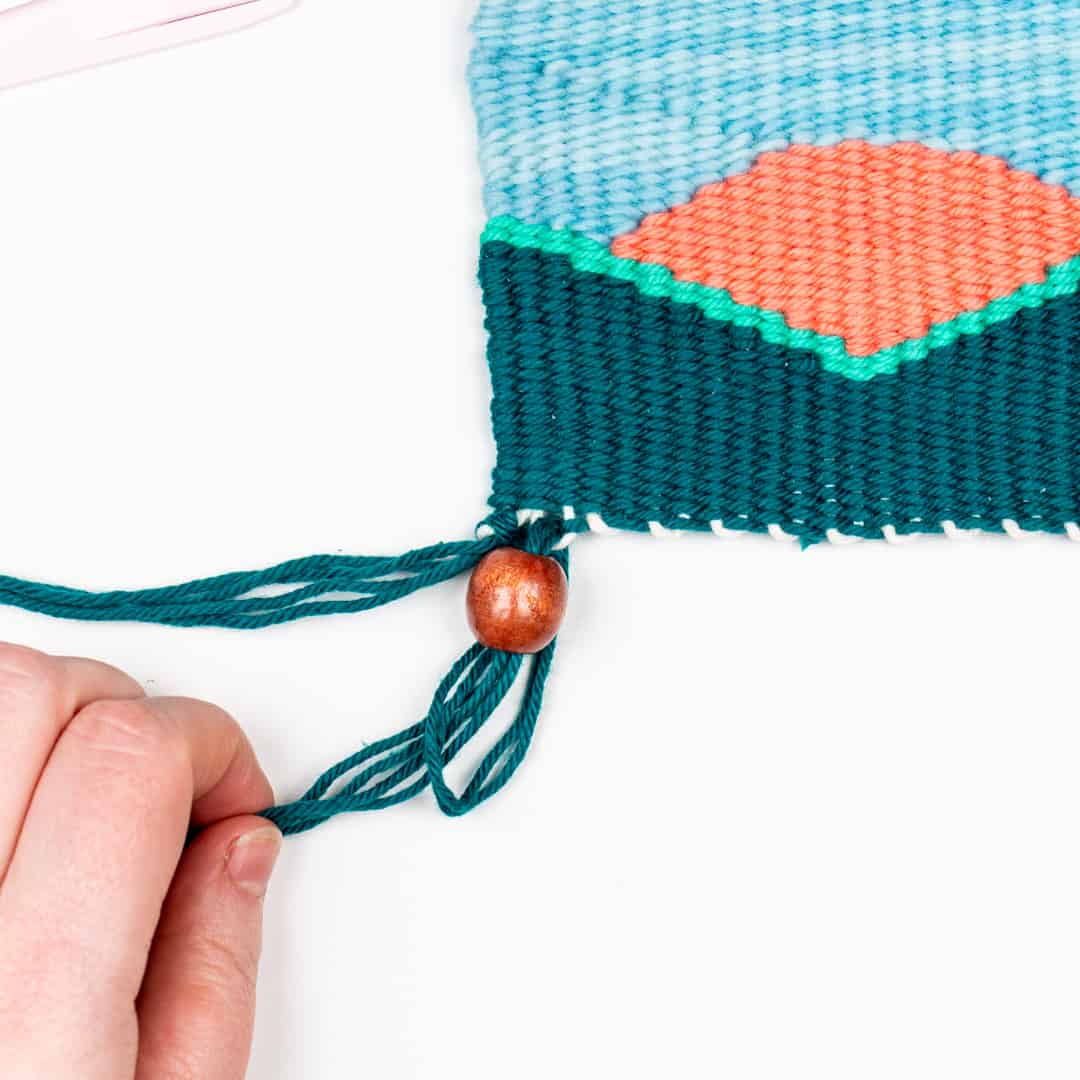
Remove piece from the loom. Using tapestry needle, weave in ends in on the back of the piece. Cut 28 13” pieces of yarn in the Dishie in Kenai to use as fringe. Using two pieces of the yarn at a time, attach them to the bottom loops of the piece as fringe. I alternated pieces of fringe with pieces with beads along the bottom. To attach the beads to the fringe, holding two pieces of fringe together, fold them in half and thread a bead over both strands. Feed the loop of your fringe from front to back through a loop in the bottom of your piece. Feed the tails of your fringe through the loop of your fringe and pull taught so the loops sit up against the bottom of the bead, holding it in place.

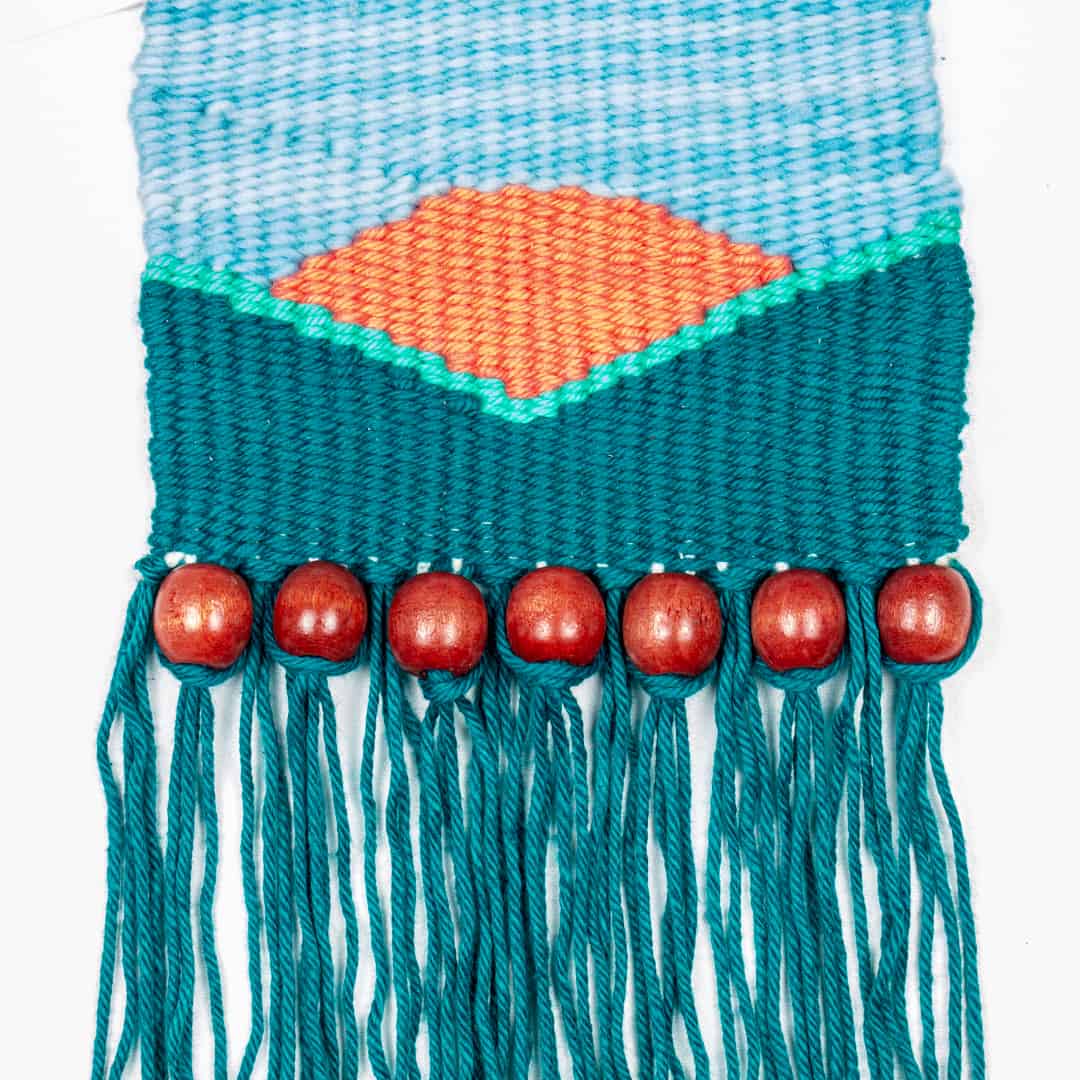
When finished attaching fringe, trim the ends up so they’re all even. Using tapestry needle and long piece of yarn, whip stitch your piece to the dowel and hang. Tie a long piece of Dishie in Swan to each end of the dowel to create a hanger. That’s it! I hope you enjoyed making your Sunset Wall Hanging.

Find me on social media and check out my free crochet patterns on my Blog | YouTube | Instagram | Facebook | Pinterest
Stay connected with Clover on Facebook | Twitter | Instagram | Pinterest | YouTube | Ravelry
[mc4wp_form id=”11289″]