No-Hassle Triangles Gauge – 3 Easy Projects
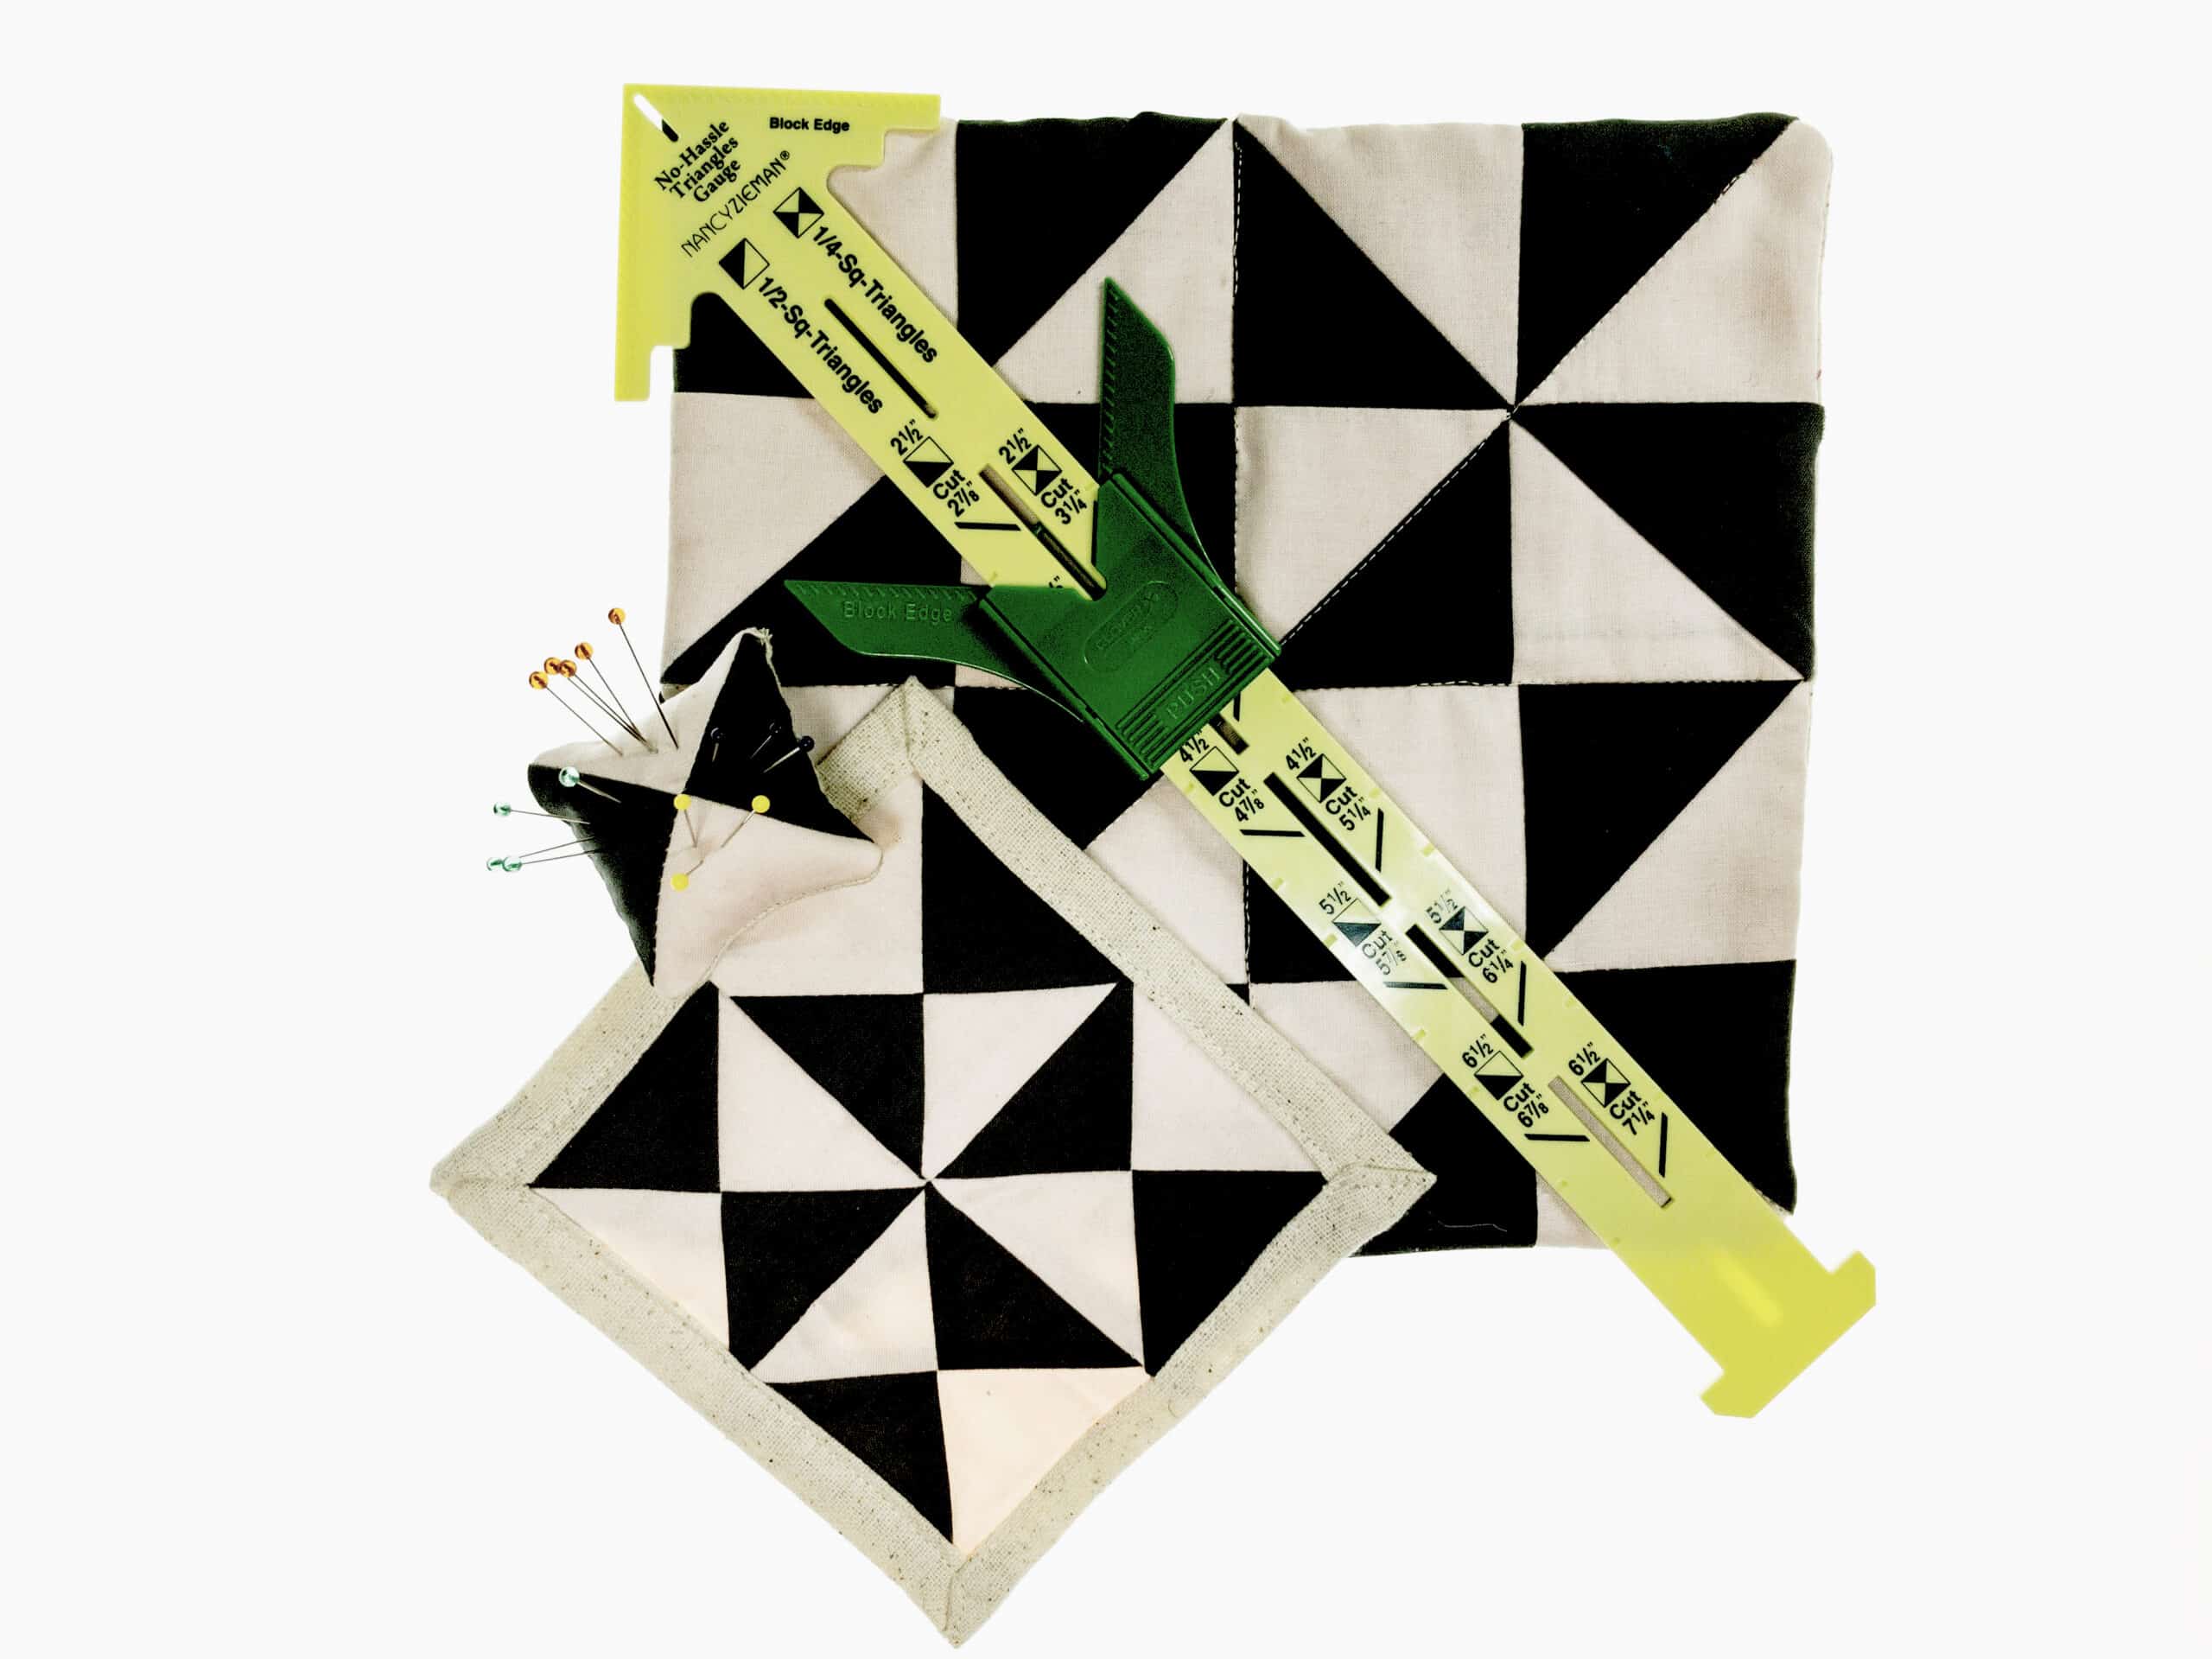
The No-Hassle Triangles Gauge is one of those tools we looked at and thought “what on earth are we going to do with that?” Like always, as soon as we put it to the test, we discovered just how useful it was and couldn’t put it down. No, really… that’s how y’all ended up with three projects for this particular tool. We just kept making half and quarter triangle squares and turned them into projects.
Particularly if you are a new quilter or have never made quilt blocks before, you’re going to love the No-Hassle Triangles Gauge. When we talk to new quilters or folks who want to make quilt blocks but haven’t, we find that they are mostly intimidated by all of those little pieces and making them fit together perfectly so all of those little pieces and their associated points meet up perfectly. GAH!!
Yes, even for experienced folks, the pressure of making perfect points can be a bit stressful. Also, what size of fabric do I need to cut? Wait… if I want a finished block that is 4 1/2” square how big do I need to cut all of the little pieces with 1/4” seem allowances so they add up to 4 1/2” when it’s all sewn together? Again… GAH!!
Happily, the No-Hassle Triangles Gauge takes out all of that guesswork. Just follow the cutting guide right on the tool and you’ll have perfect cuts every time. Then, watch our video for these three projects and you’ll look like you’ve known what you are doing all along! Bottom line, take your time, follow the instructions, and trust the process. You can do this… just grab your tools and materials and STITCH ON!
What we’ll be making
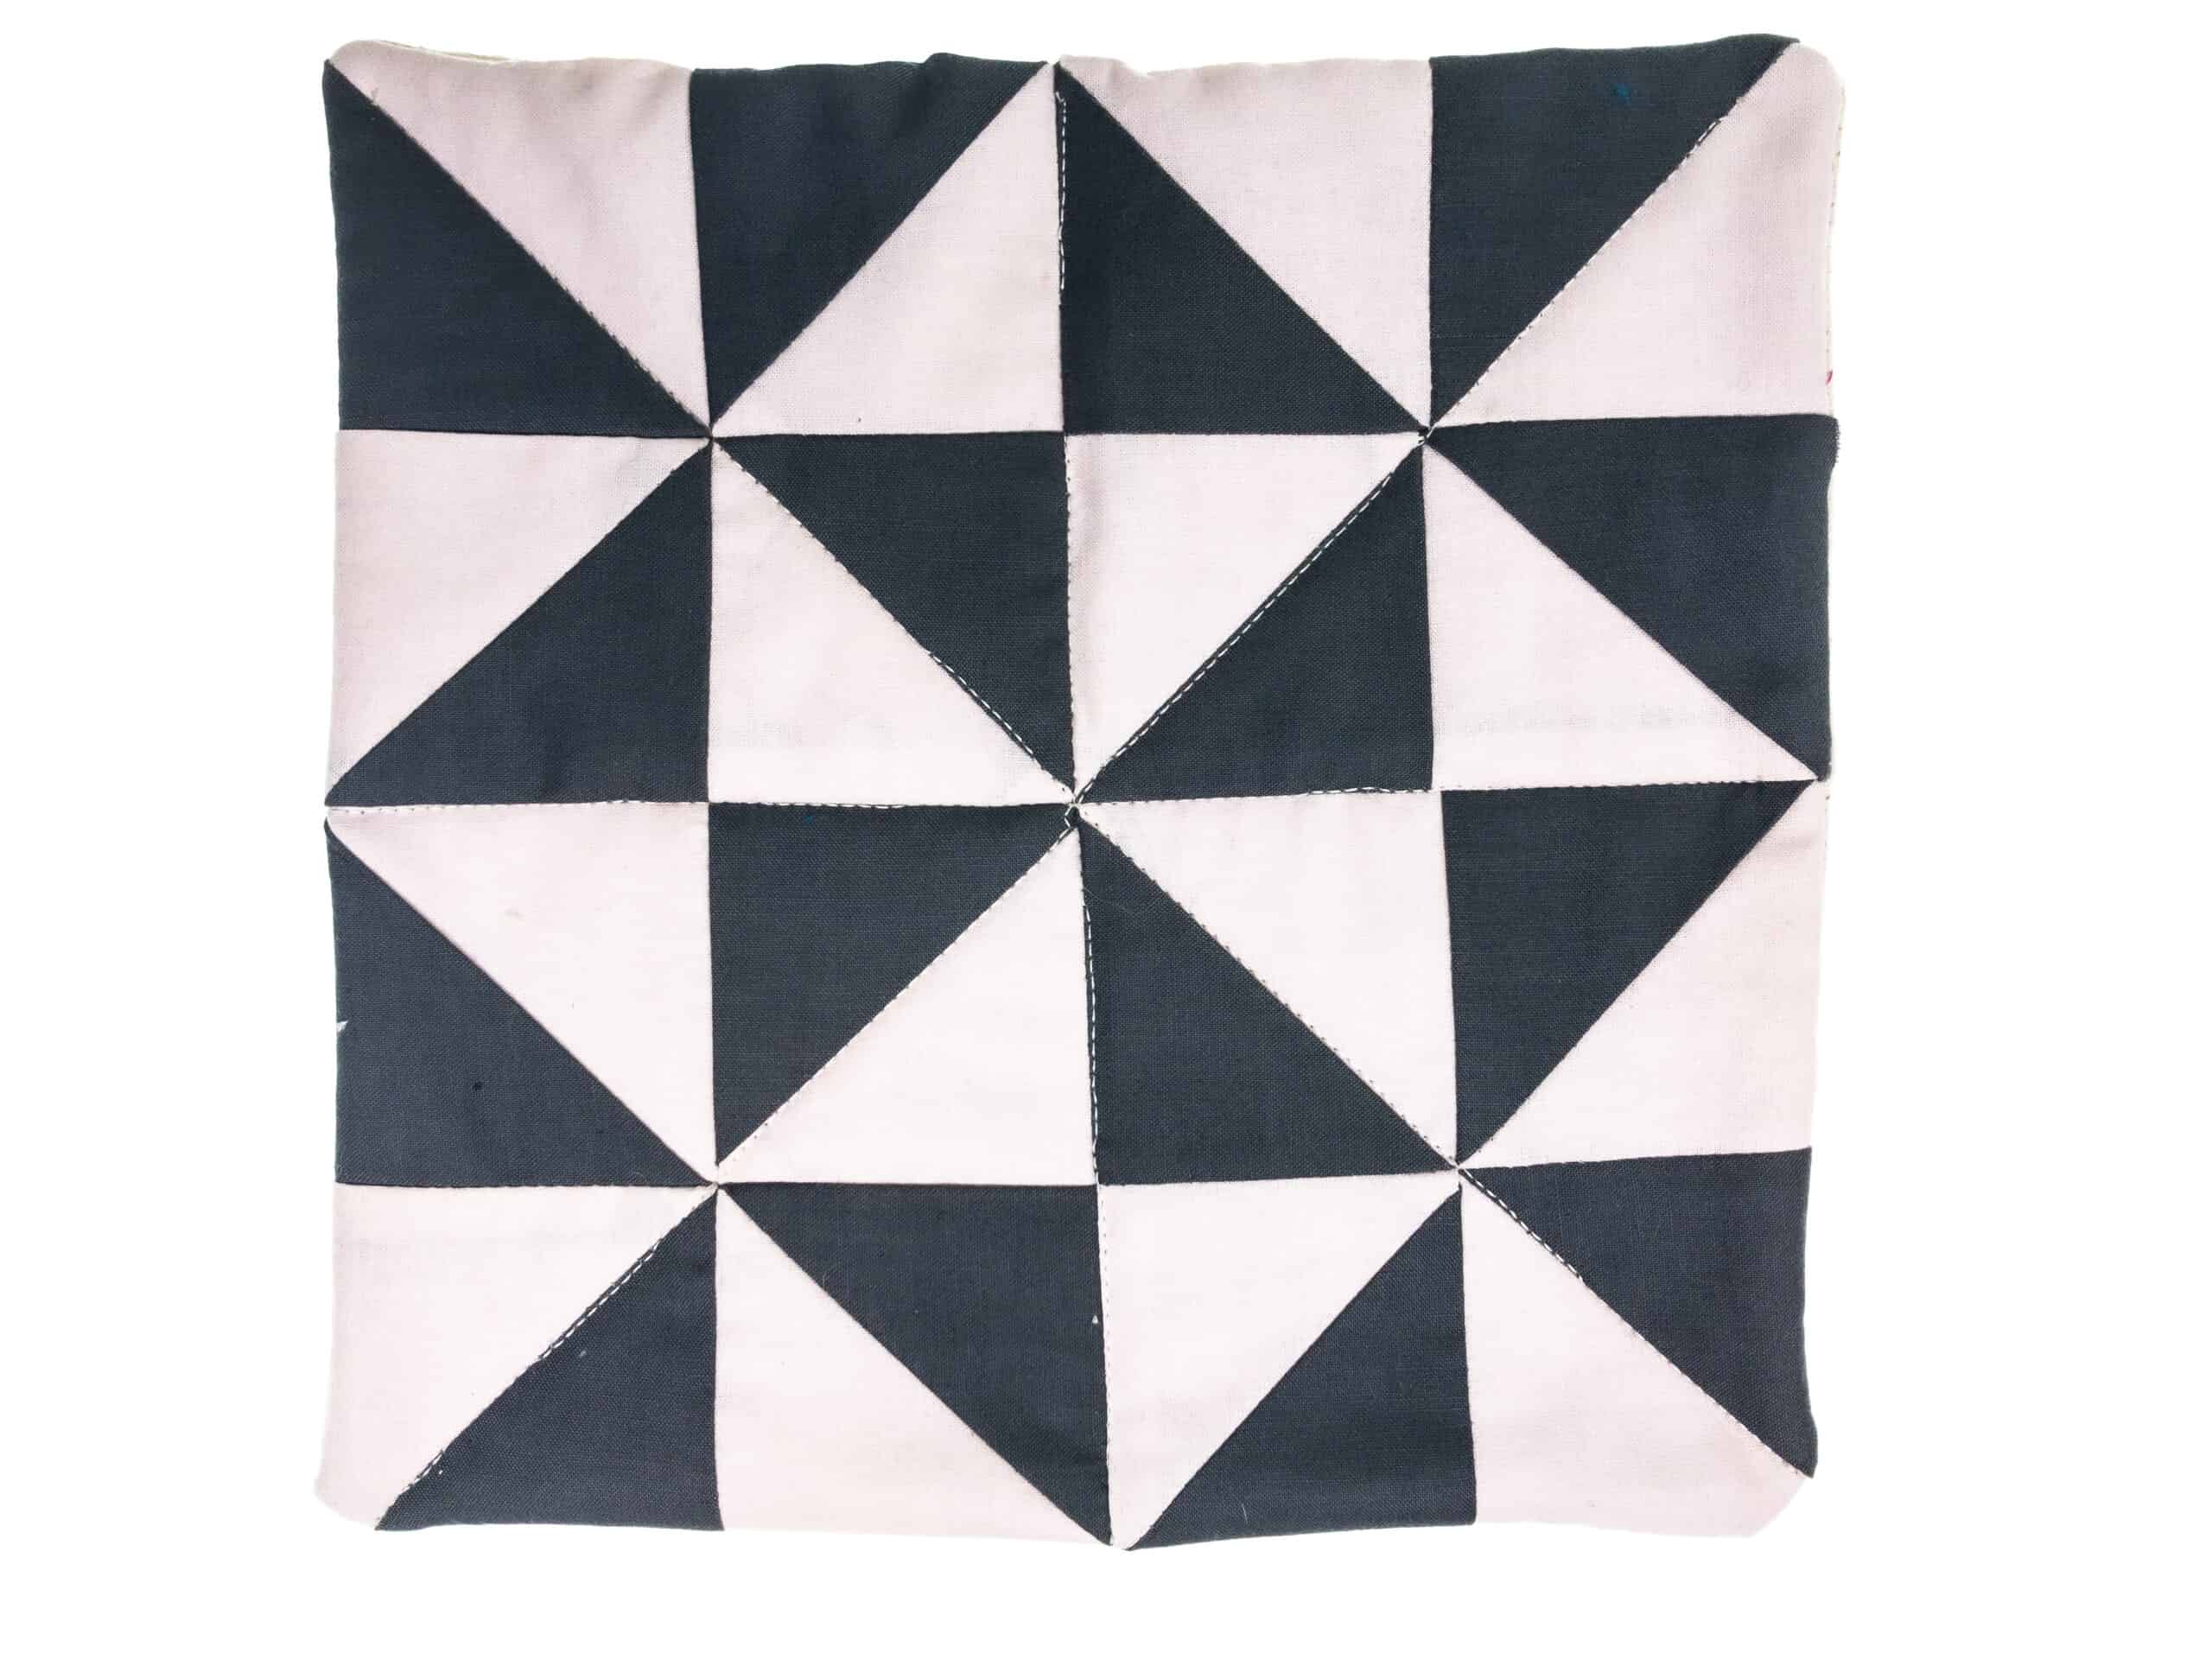
Project #1: Hot Pad/Trivet
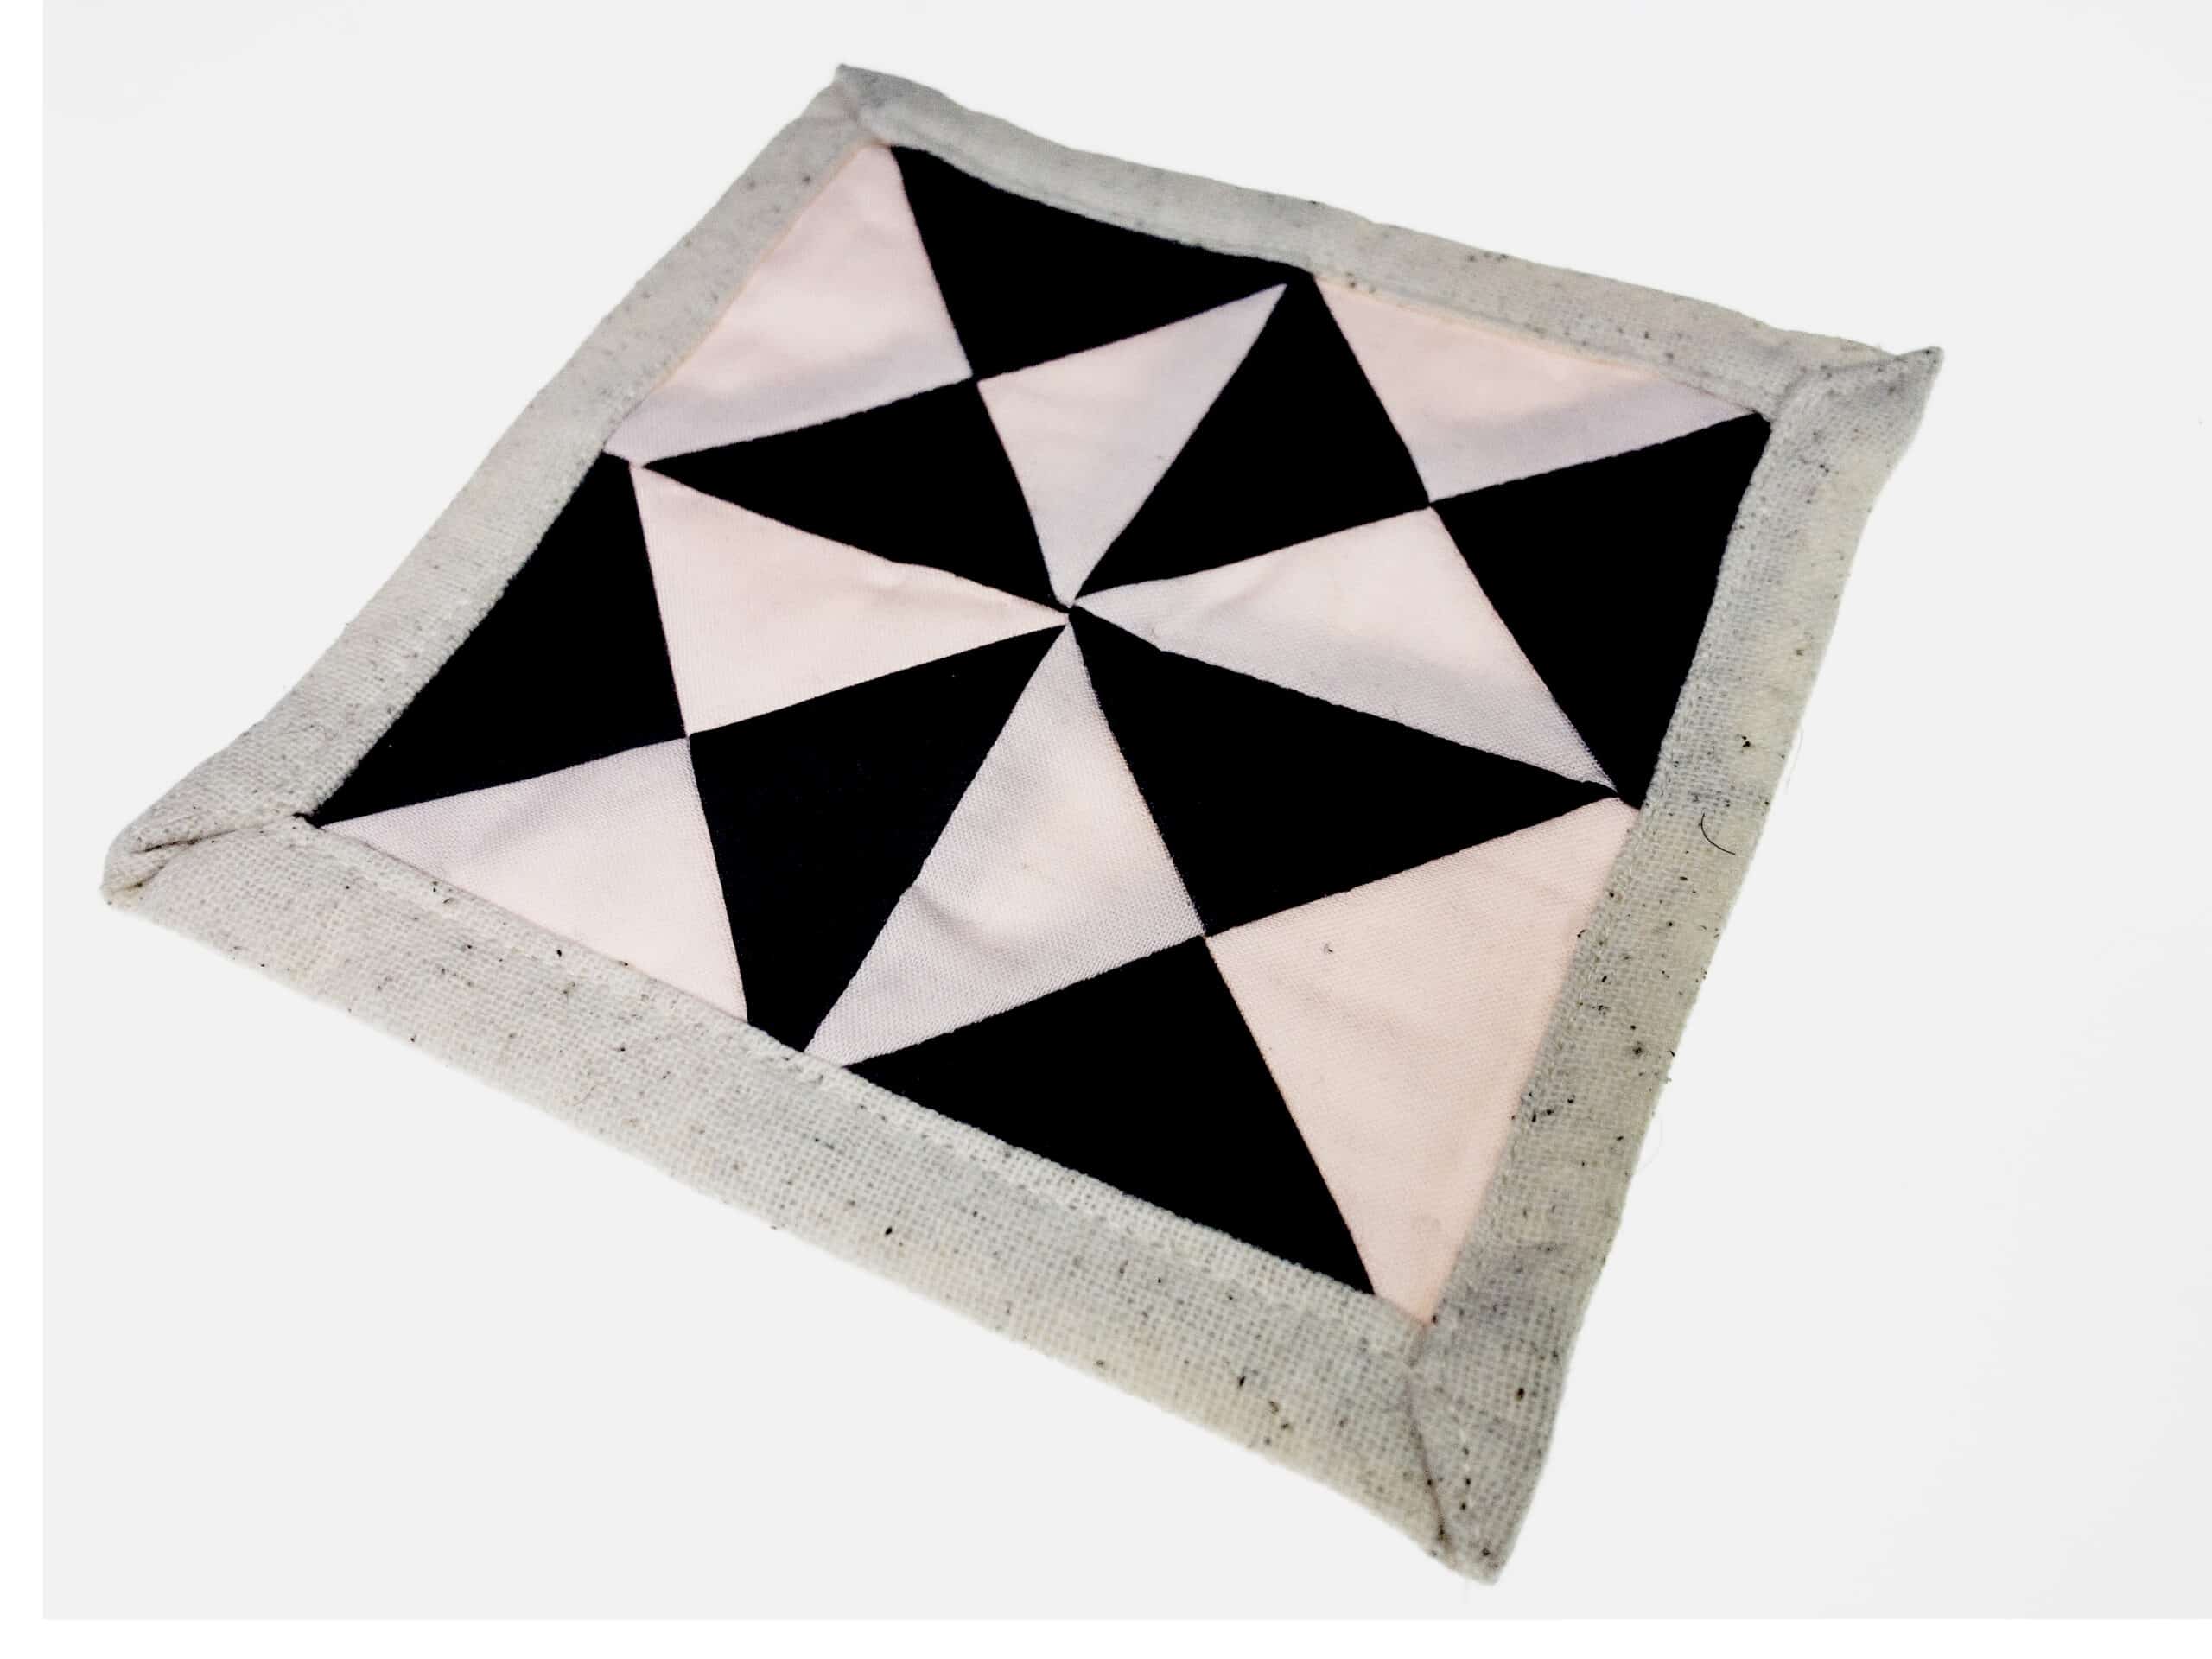
Project #2: Mug Rug
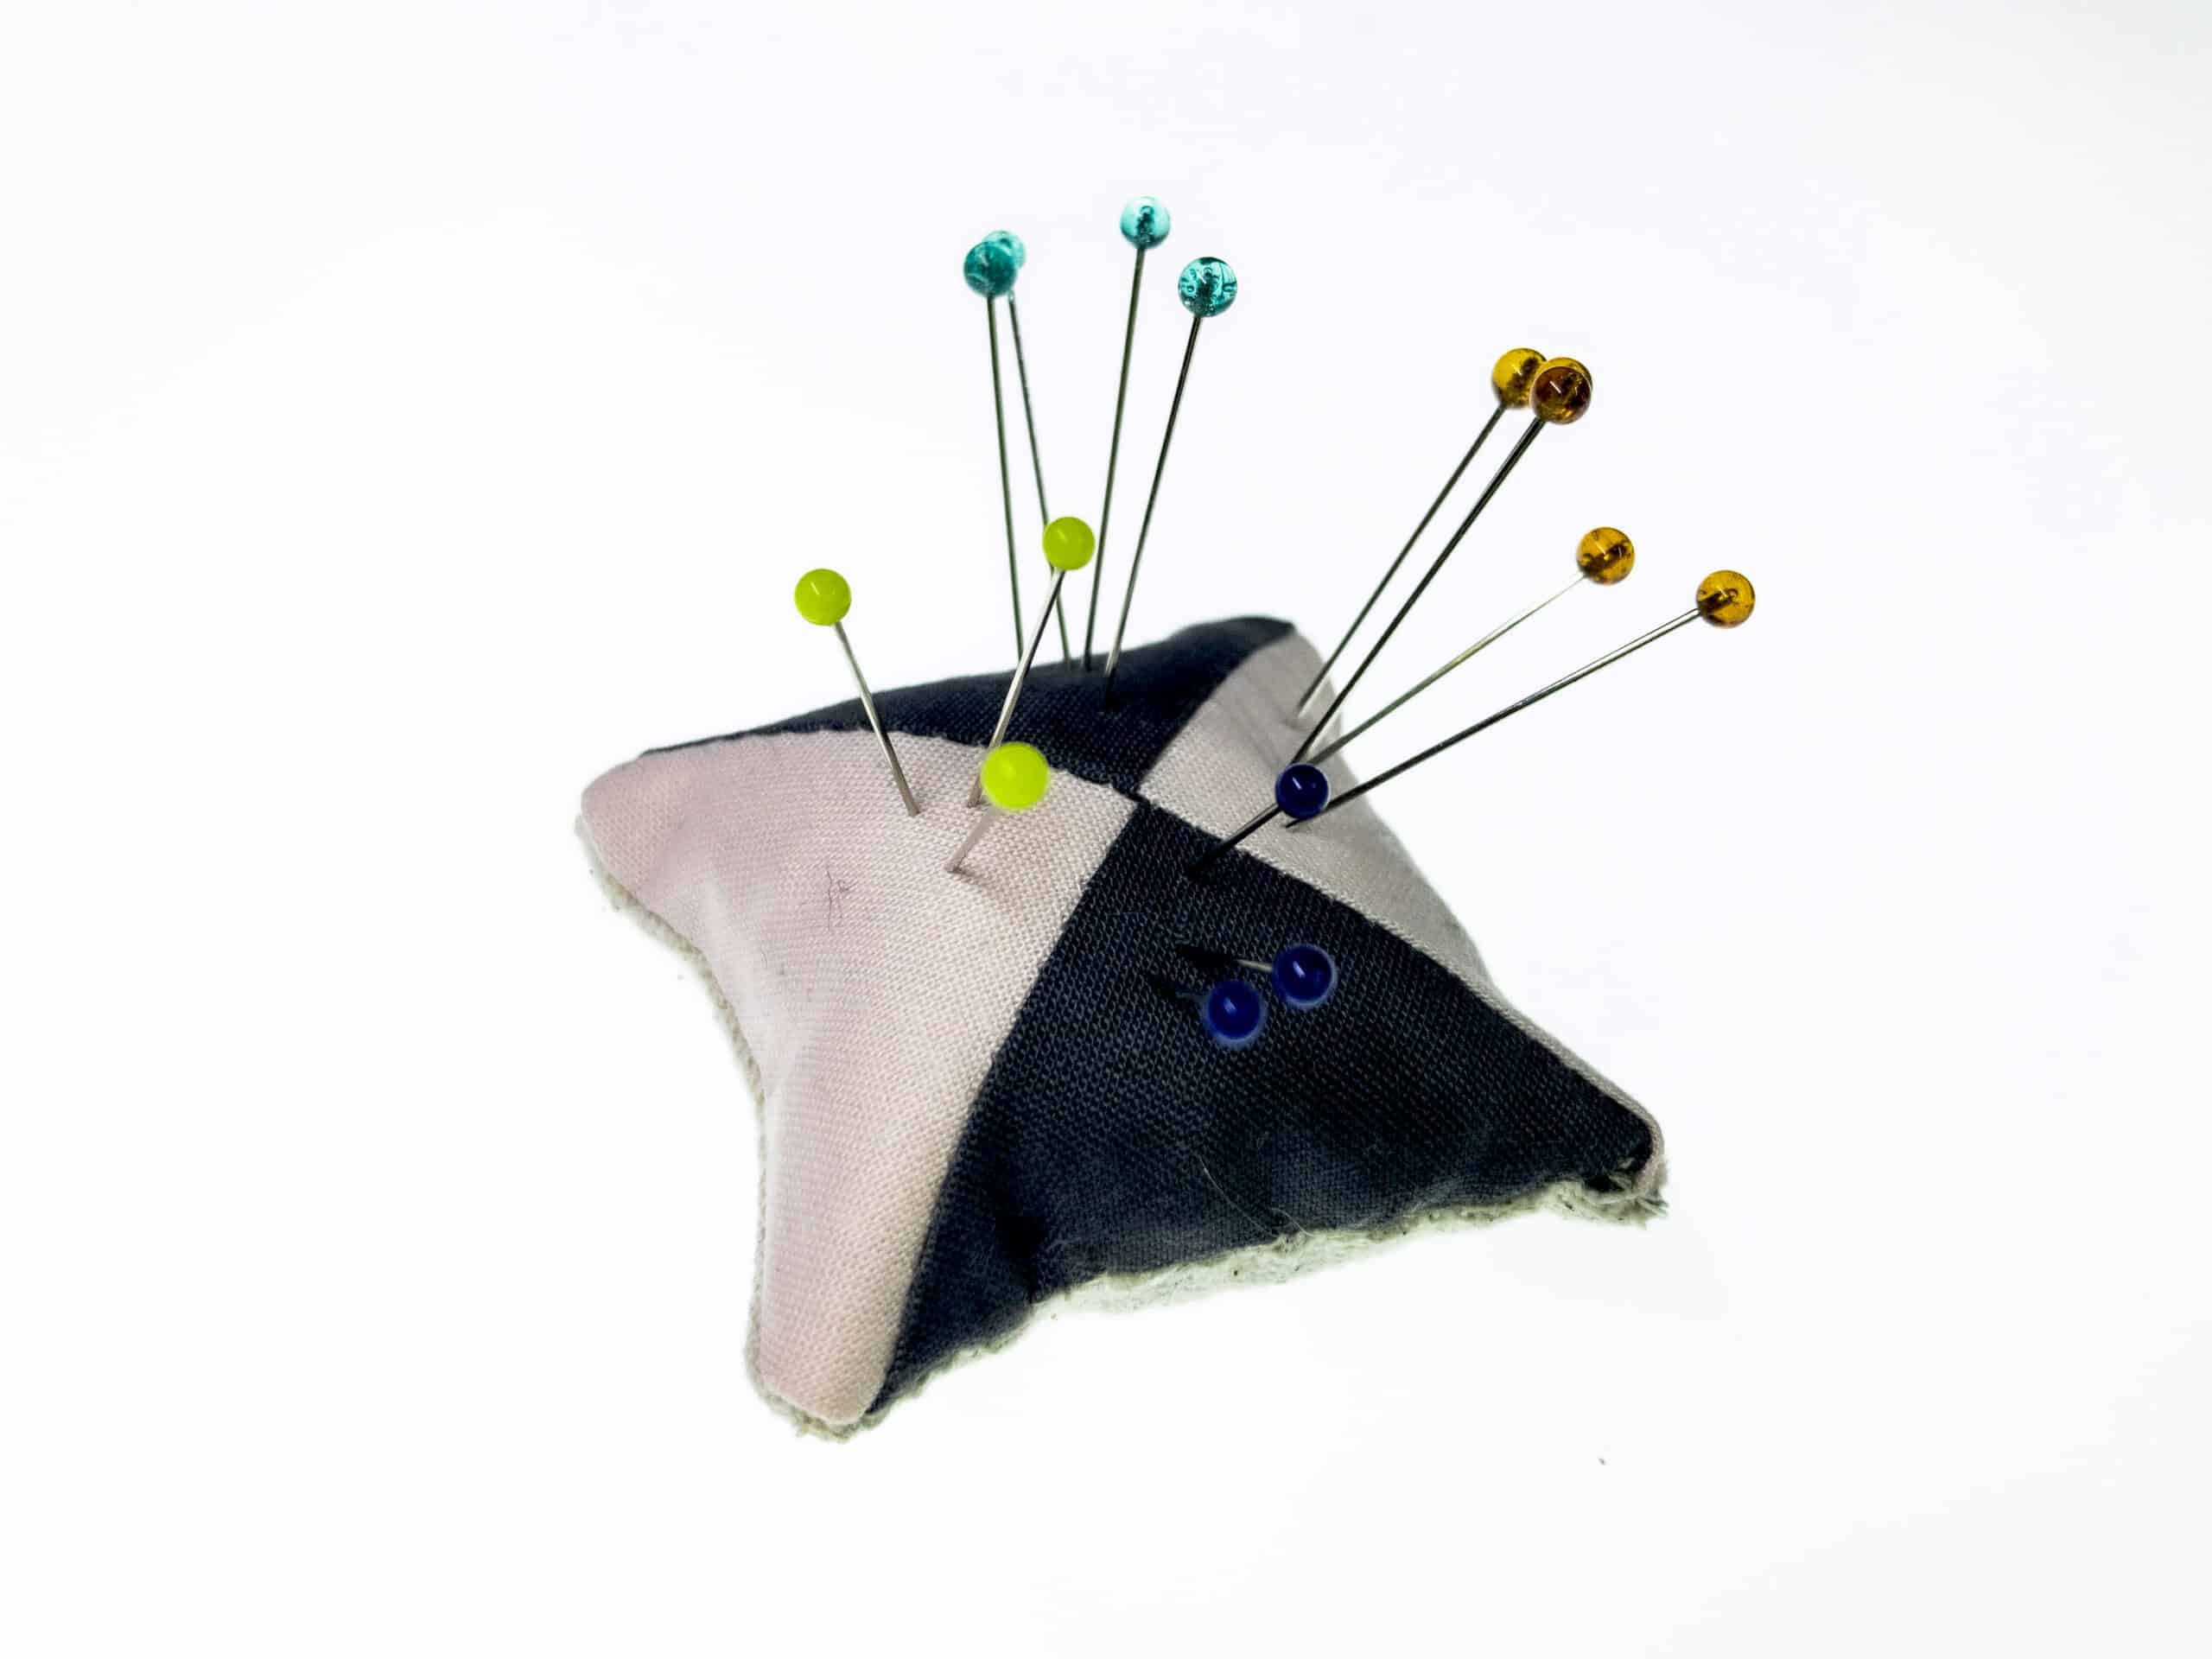
Project #3: Pin Cushion/sachet

What you’ll need
Tools
- No-Hassle Triangles Gauge (Art. No 9579) – purchase on Clover Website or Amazon
- Black Gold Needles – Applique/Sharps No. 10 (Art. No 4971) – purchase on Clover Website or Amazon
- Rotary Cutter 45mm (Art. No 7500) – purchase on Clover Website or Amazon
- Bordeaux Ultimate Scissors 130 (Art. No 4940) – purchase on Clover Website or Amazon
- Iron
- Sewing machine
Materials
- Fabric
- Front panels and lining
- 2 fat quarters in contrasting colors: we used Michael Miller Cotton Couture in colors – Blossom and Pewter. Lining color is Blossom.
- Backing fabric (We used a mid-weight cotton muslin)
- Hot pad/trivet fill (Wool felt)
- Thread: for both the machine and hand sewing, we used Aurifil 50wt thread in Pewter, color #6711 from the Shibaguyz Mighty Ten Hand Sewing Essentials thread collection
Cuts
Hot Pad/Trivet
16, 2 7/8” half triangles squares
1, 8 1/2” square cotton lining fabric
1, 8 1/2” square wool felt lining fabric
1, 8 1/2” square muslin or canvas backing fabric
Mug Rug
4, 3 1/4” quarter triangles squares
1, 4 1/2” square cotton lining fabric
1, 6 1/2” square muslin or canvas backing fabric
Pin cushion/sachet
1, 3 1/4” quarter triangles square
1, 2 1/2” square cotton lining fabric
1, 2 1/2” square muslin or canvas backing fabric
Instructions
Project #1: Hot Pad/Trivet
Make the Top
- Make 16, 2 7/8” half triangles squares
- Sew the half triangle squares together into 8 sets of 2 squares
- Sew those 8 sets together into 4 sets of 4 pinwheel blocks
- Sew those 4 pinwheel blocks together into 2 sets of 2 pinwheel blocks
- Sew those 2 sets together into one large pinwheel block
The top of your hot pad/trivet is finished!
Now, cut the backing fabric, the wool felt, and the cotton lining as shown in the “Cut Fabric” section of the video tutorial below.
Layer your fabric squares with the wool on the bottom, then the cotton lining, then the pinwheel block on top right side up.
Place the backing square on top of the stack with the right side of the pinwheel block facing the right side of the backing fabric.
Note: If you are watching the video, our backing fabric does not have a right side.
Pin baste the layers together.
Sew the layers together leaving a 1/4” seam allowance. Be sure to leave an opening for turning your project right side out. You will hand sew this together.
Trim the corners being careful not to cut the stitching. This makes your corners sharper when you turn the project right side out.
Turn the project right side out.
*Pro Tip: The Hold It Precision Stiletto (Art. No 7807) is the perfect tool for turning sharp corners.
Turn in that seam you left open and press it into place.
Using a neutral thread (see our recommendation in the Materials section), hand sew the seam closed.
Press entire piece to even out edges.
To keep the internal layers from shifting, quilt the layers together by hand or by machine using the seams as a guide. Fancy quilting term: stitch in the ditch.
Project #2: The Mug Rug
Make 4, quarter triangle squares
Sew together in a pinwheel block as shown.
The top of your Mug Rug is finished!
Now, cut the backing fabric and the cotton lining as shown in the “Cut Fabric” section of the video tutorial below.
Press a 1/2” seam along all sides of the backing fabric. We used the Hot Ruler (Art. No 7811) to turn and press our seam.
Center the top of the project and the lining fabric on the backing fabric.
Begin folding the backing fabric over the edges of the top and lining by first folding in the corners to make a mitered corner.
Then, fold the backing fabric over the fold at the pressed line…
and fold again to cover the edge of the two layers of fabric and the folded corner.
Pin the mitered corner first, then pin the rest of the backing fabric into place.
Top stitch by machine or by hand all the way around the binding leaving 1/8” allowance from the folded edge.
Press all edges and you’re finished!
Project #3: Pin Cushion/Sachet
Make 1 quarter triangle square
Cut lining and backing fabrics as shown in “Cut Fabric” section of the video tutorial below.
Layer your fabric squares with the cotton lining on the bottom then the quarter triangle square on top right side up.
Place the backing square on top of the stack with the right side of the quarter triangle square facing the right side of the backing fabric.
Note: If you are watching the video, our backing fabric does not have a right side.
Sew 3 around three sides leaving a 1/4” seam allowance.
Trim the corners as before with the Hot Pad/Trivet
Turn the project right side out and stuff tightly with batting.
Hand sew the remaining seam closed.
We like to add a drop or two of our favorite scent to the pin cushion or just toss it into a drawer, project bag, or storage box with lavender or cedar oil to keep away pests.
Watch the video tutorial here:
Find the Shibaguyz on Facebook | Twitter | Instagram | Pinterest
Stay connected with Clover on Facebook | Twitter | Instagram | Pinterest | YouTube | Ravelry
[mc4wp_form id=”11289″]