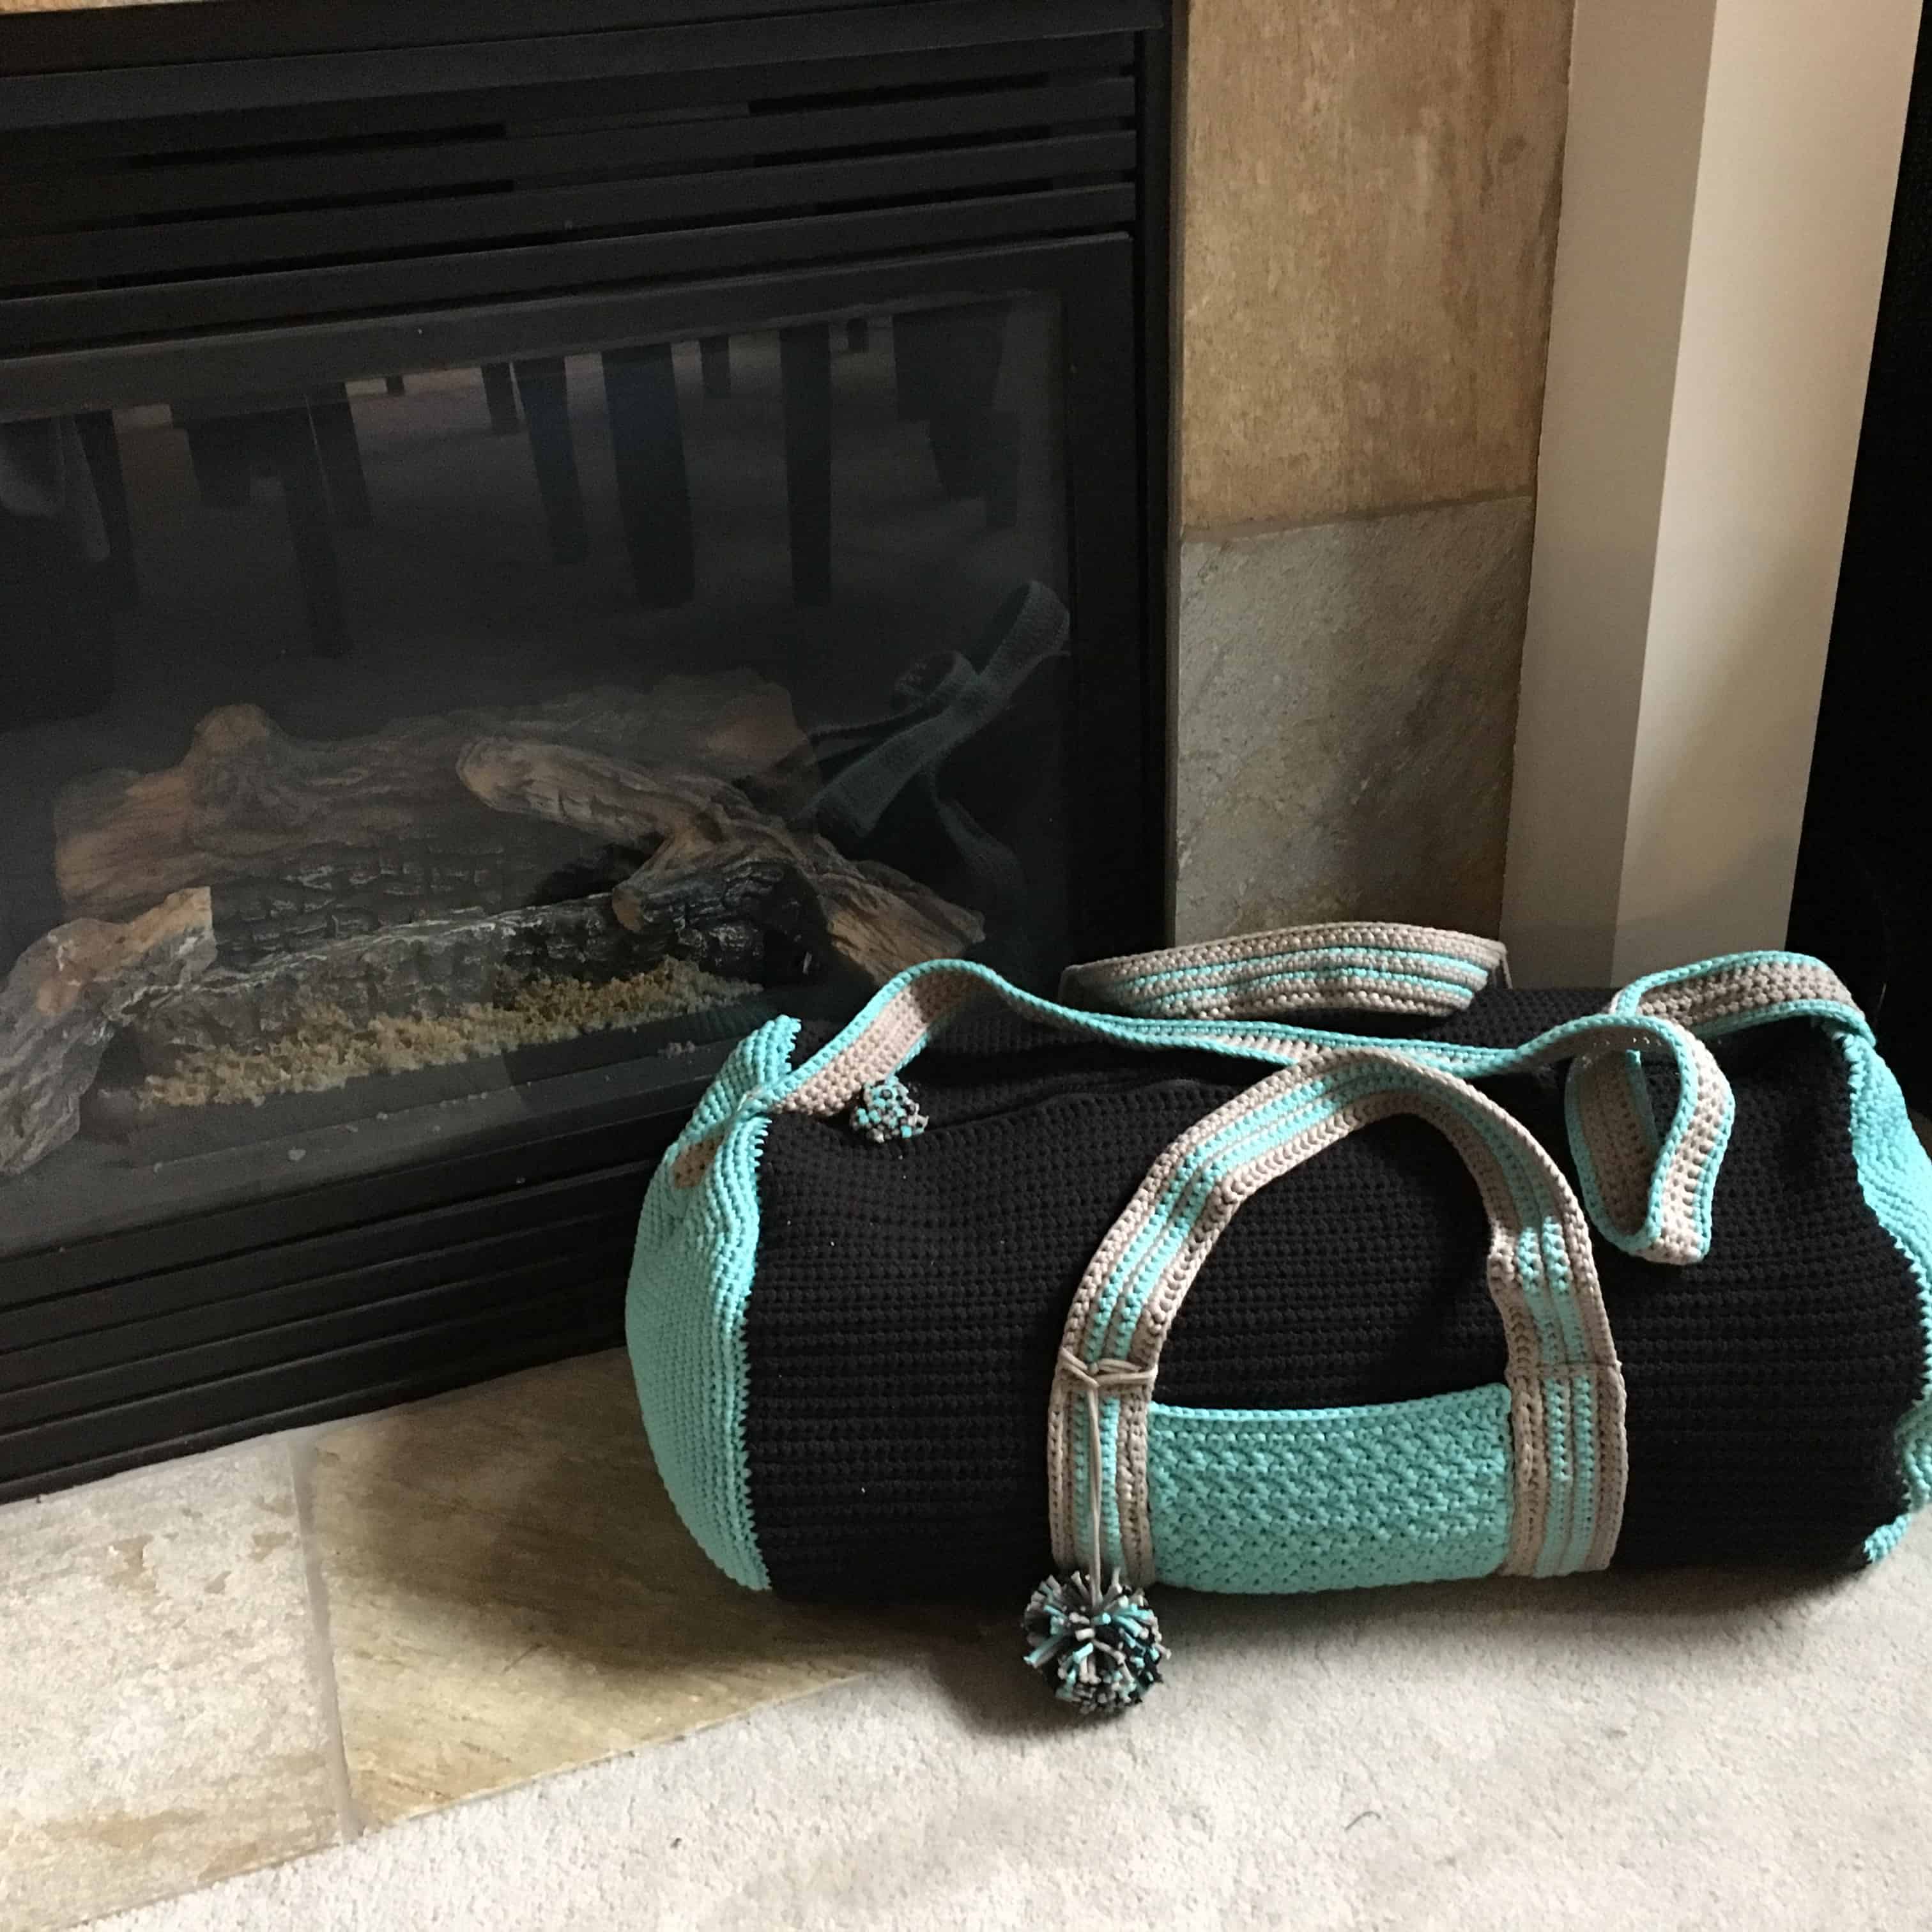
Crochet Weekender Bag – Crochet Pattern
Hi everybody! My name is Sarah, and I’m the maker behind Sarah’s Yarn. By day I work in the corporate world, but I unwind each night and on the weekends by picking up yarn. You’ll find both knit and crochet items on my page, but almost all of my maker tools come from Clover, and I am thrilled to team up with my friends there to bring you a pattern for a weekender duffle bag.
With that said, let’s dive into the pattern. This is a beginner-friendly project, but it may be time consuming just due to its size. I promise it’ll be worth it in the end though, and I’d love to see your projects! If you share them on Instagram, please tag me with @SarahsYarn, #sarahsyarn, or #sarahsweekender.
Sarah’s Weekender Duffle
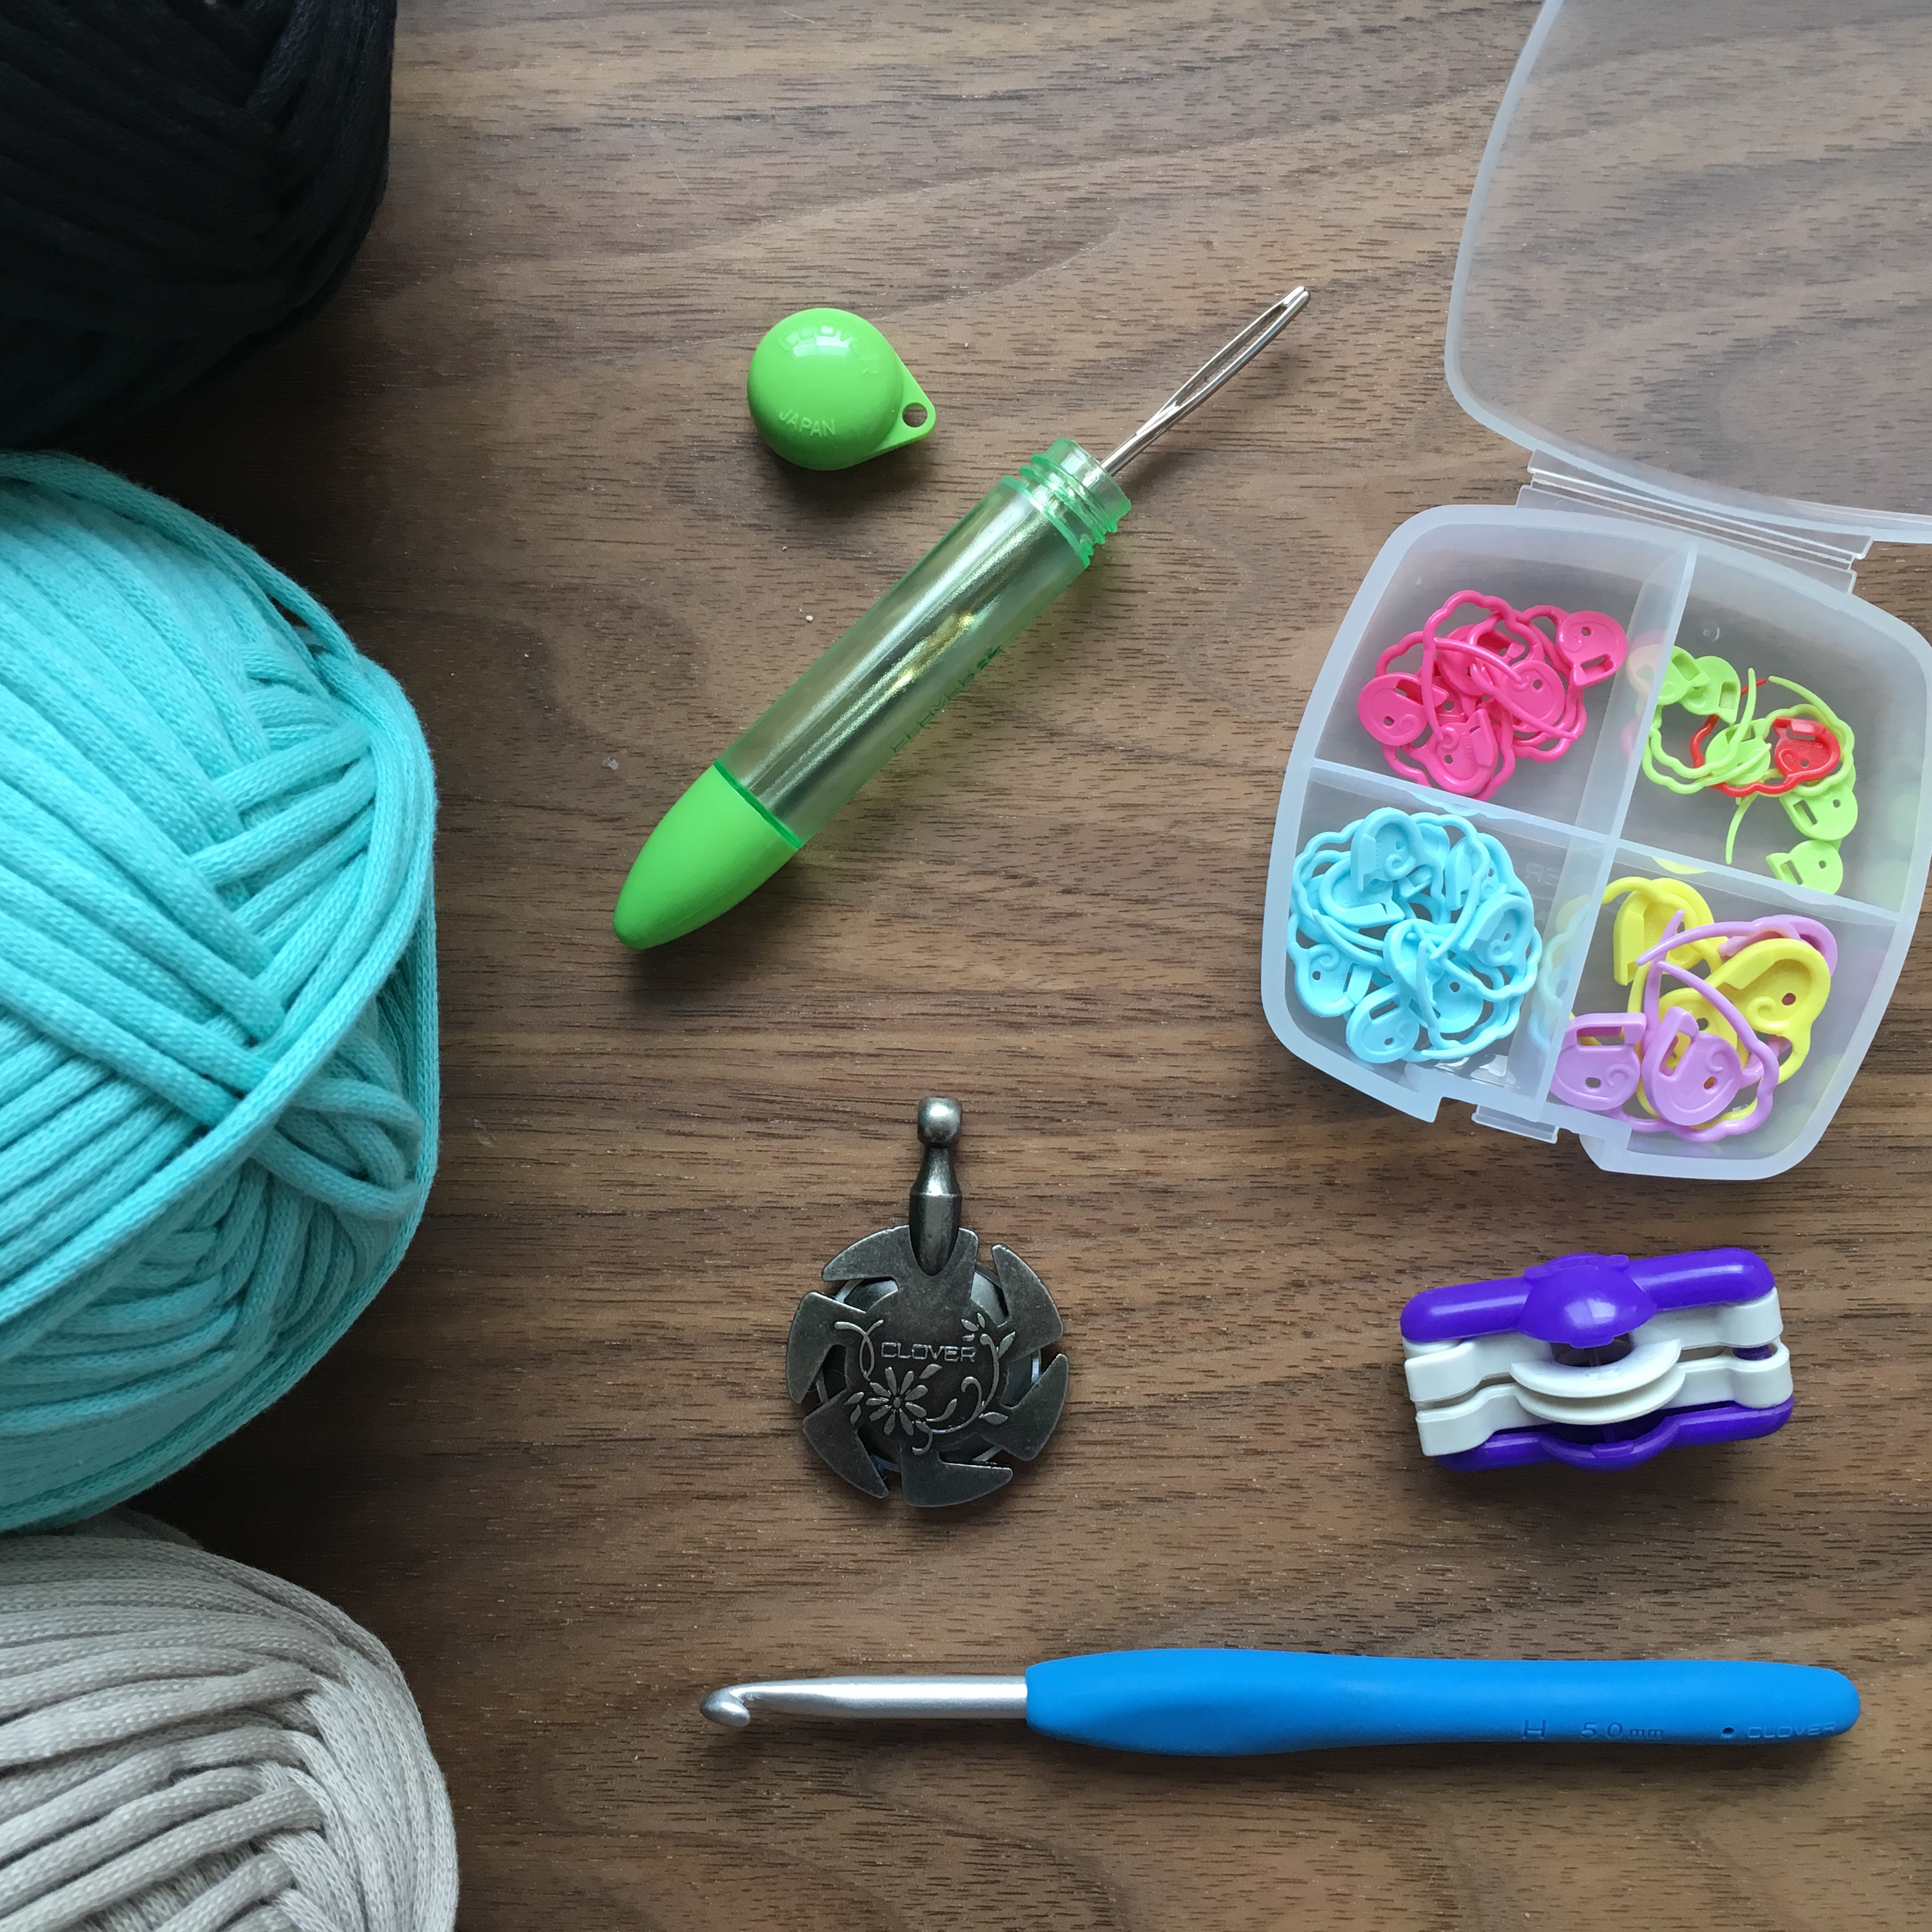
Materials and tools:
-
- Bernat Maker Home Dec in three colors:
- 5 skeins accent color 1: bag ends & pocket (I used Aqua)
- 5 skein accent color 2: bottom & handles (I used Clay)
- 2 skeins main color: bag body (I used Black)
- Amour Crochet Hook H-5mm (Art No 1047/H)
- Quick Locking Stitch Marker Set (Art. No 3033)
- Darning Needle Set (Art. No 339)
- Scissors
- 24” Zipper – I used a Coats & Clark Separating Sport Zipper
- Needle & thread (to sew in zipper)
- Pom-Pom Makers (1” for zipper pull; 2.5” for handle)
- Bernat Maker Home Dec in three colors:
Stitches & Abbreviations Used:
- SC – single crochet
- DC – double crochet
- Inc – increase (do 2 sc in same stitch)
- Sl St – slip stitch
- Ch – chain
- MR – magic ring
- FSC – foundation single crochet
- Surface slip stitch
Gauge:
8 rounds of SC (starting with MR) = 4” diameter
16 st x 16 rows = 4” square in SC
Finished Size:
14” tall x 14” deep x 20” long
Notes:
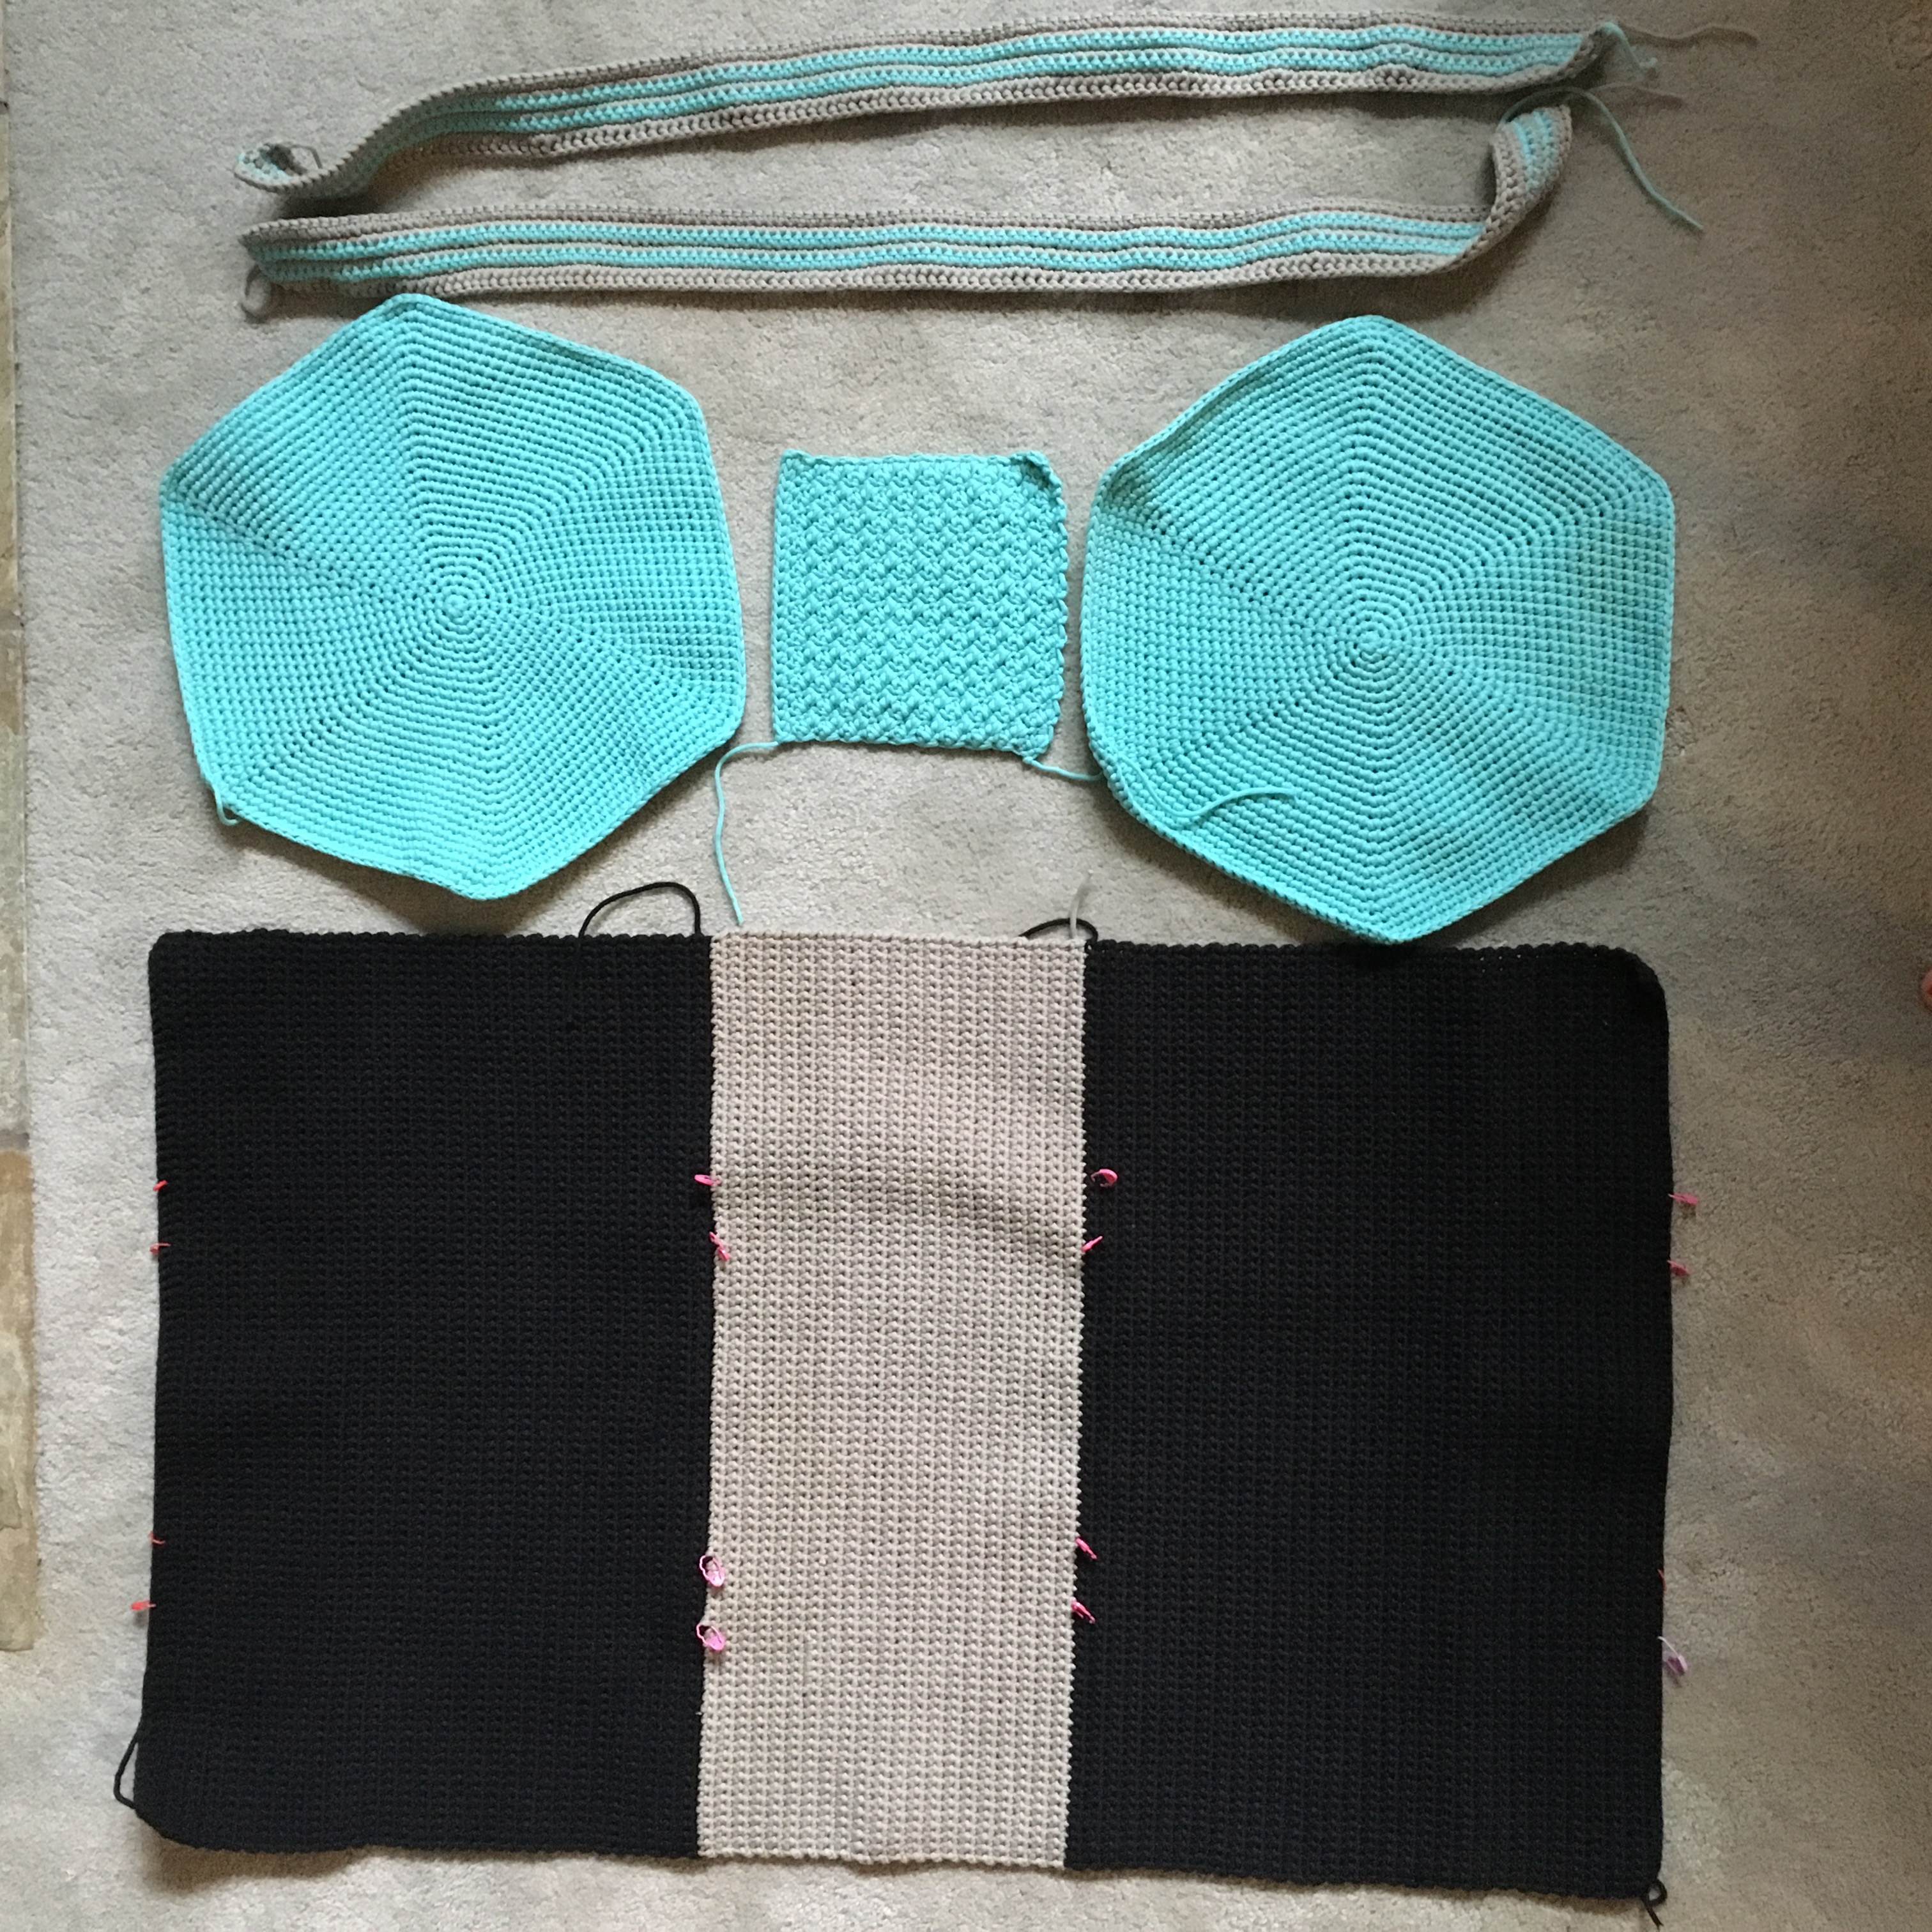
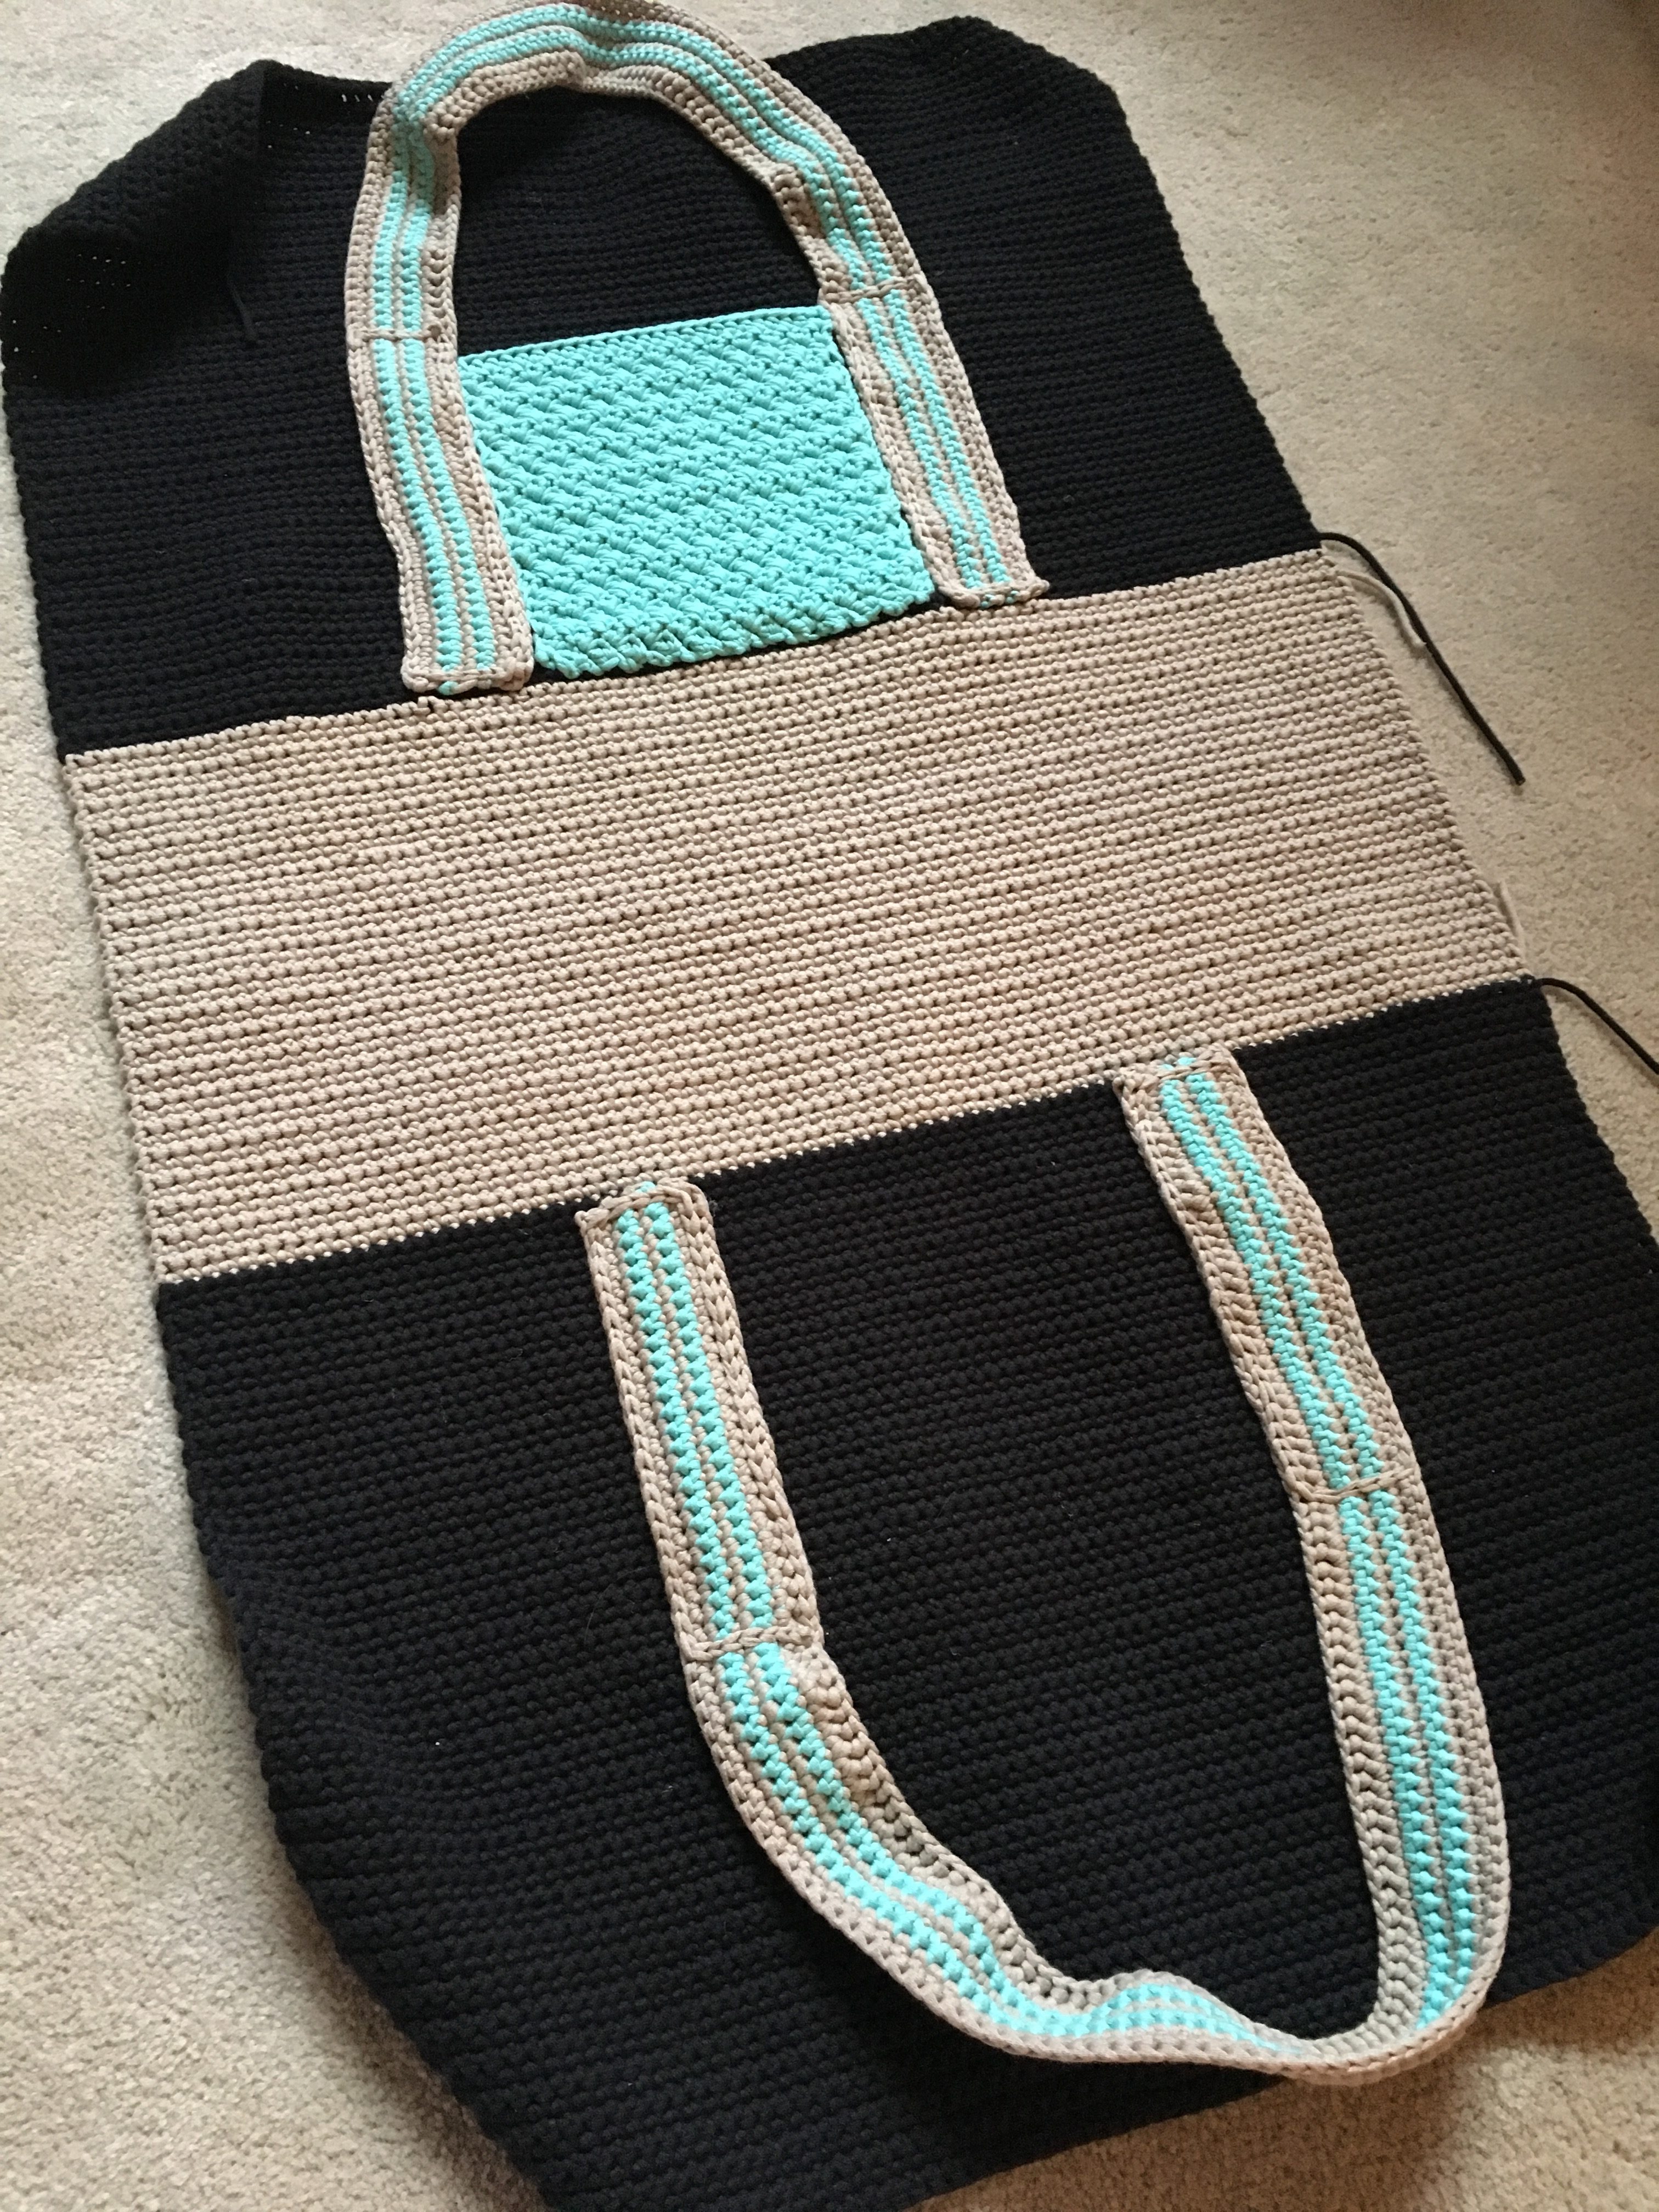
- Bag is constructed in 7 pieces: 2 end pieces, 1 body piece, 1 pocket, 2 handles, and 1 shoulder strap (optional)
- Gauge is not particularly important, except in how it impacts the overall size of your bag. If you don’t mind a larger or smaller weekender, gauge is unimportant.
- Ends of the bag are worked in unjoined rounds. Use a stitch marker to keep track of the start of your rounds.
- Body of the bag is worked in rows, turning at the end of each row.
- The number of rows in your body piece should be equal to the number of stitches in the final round of your end pieces.
- Directions within *asterisks* should be repeated until end of round
- Numbers in parentheses represent total stitch count for that row/round
- Adjusting the size: If you would like your bag to be narrower end to end, reduce the number of FSC in row 1 of body. If you would like your bag to be shorter or less deep front to back, reduce the number of rounds in your end pieces, and reduce rows in body accordingly (remember, the number of rows in your body piece should be equal to the number of stitches in the final round of your end pieces).
Pattern:
End Pieces (make 2):
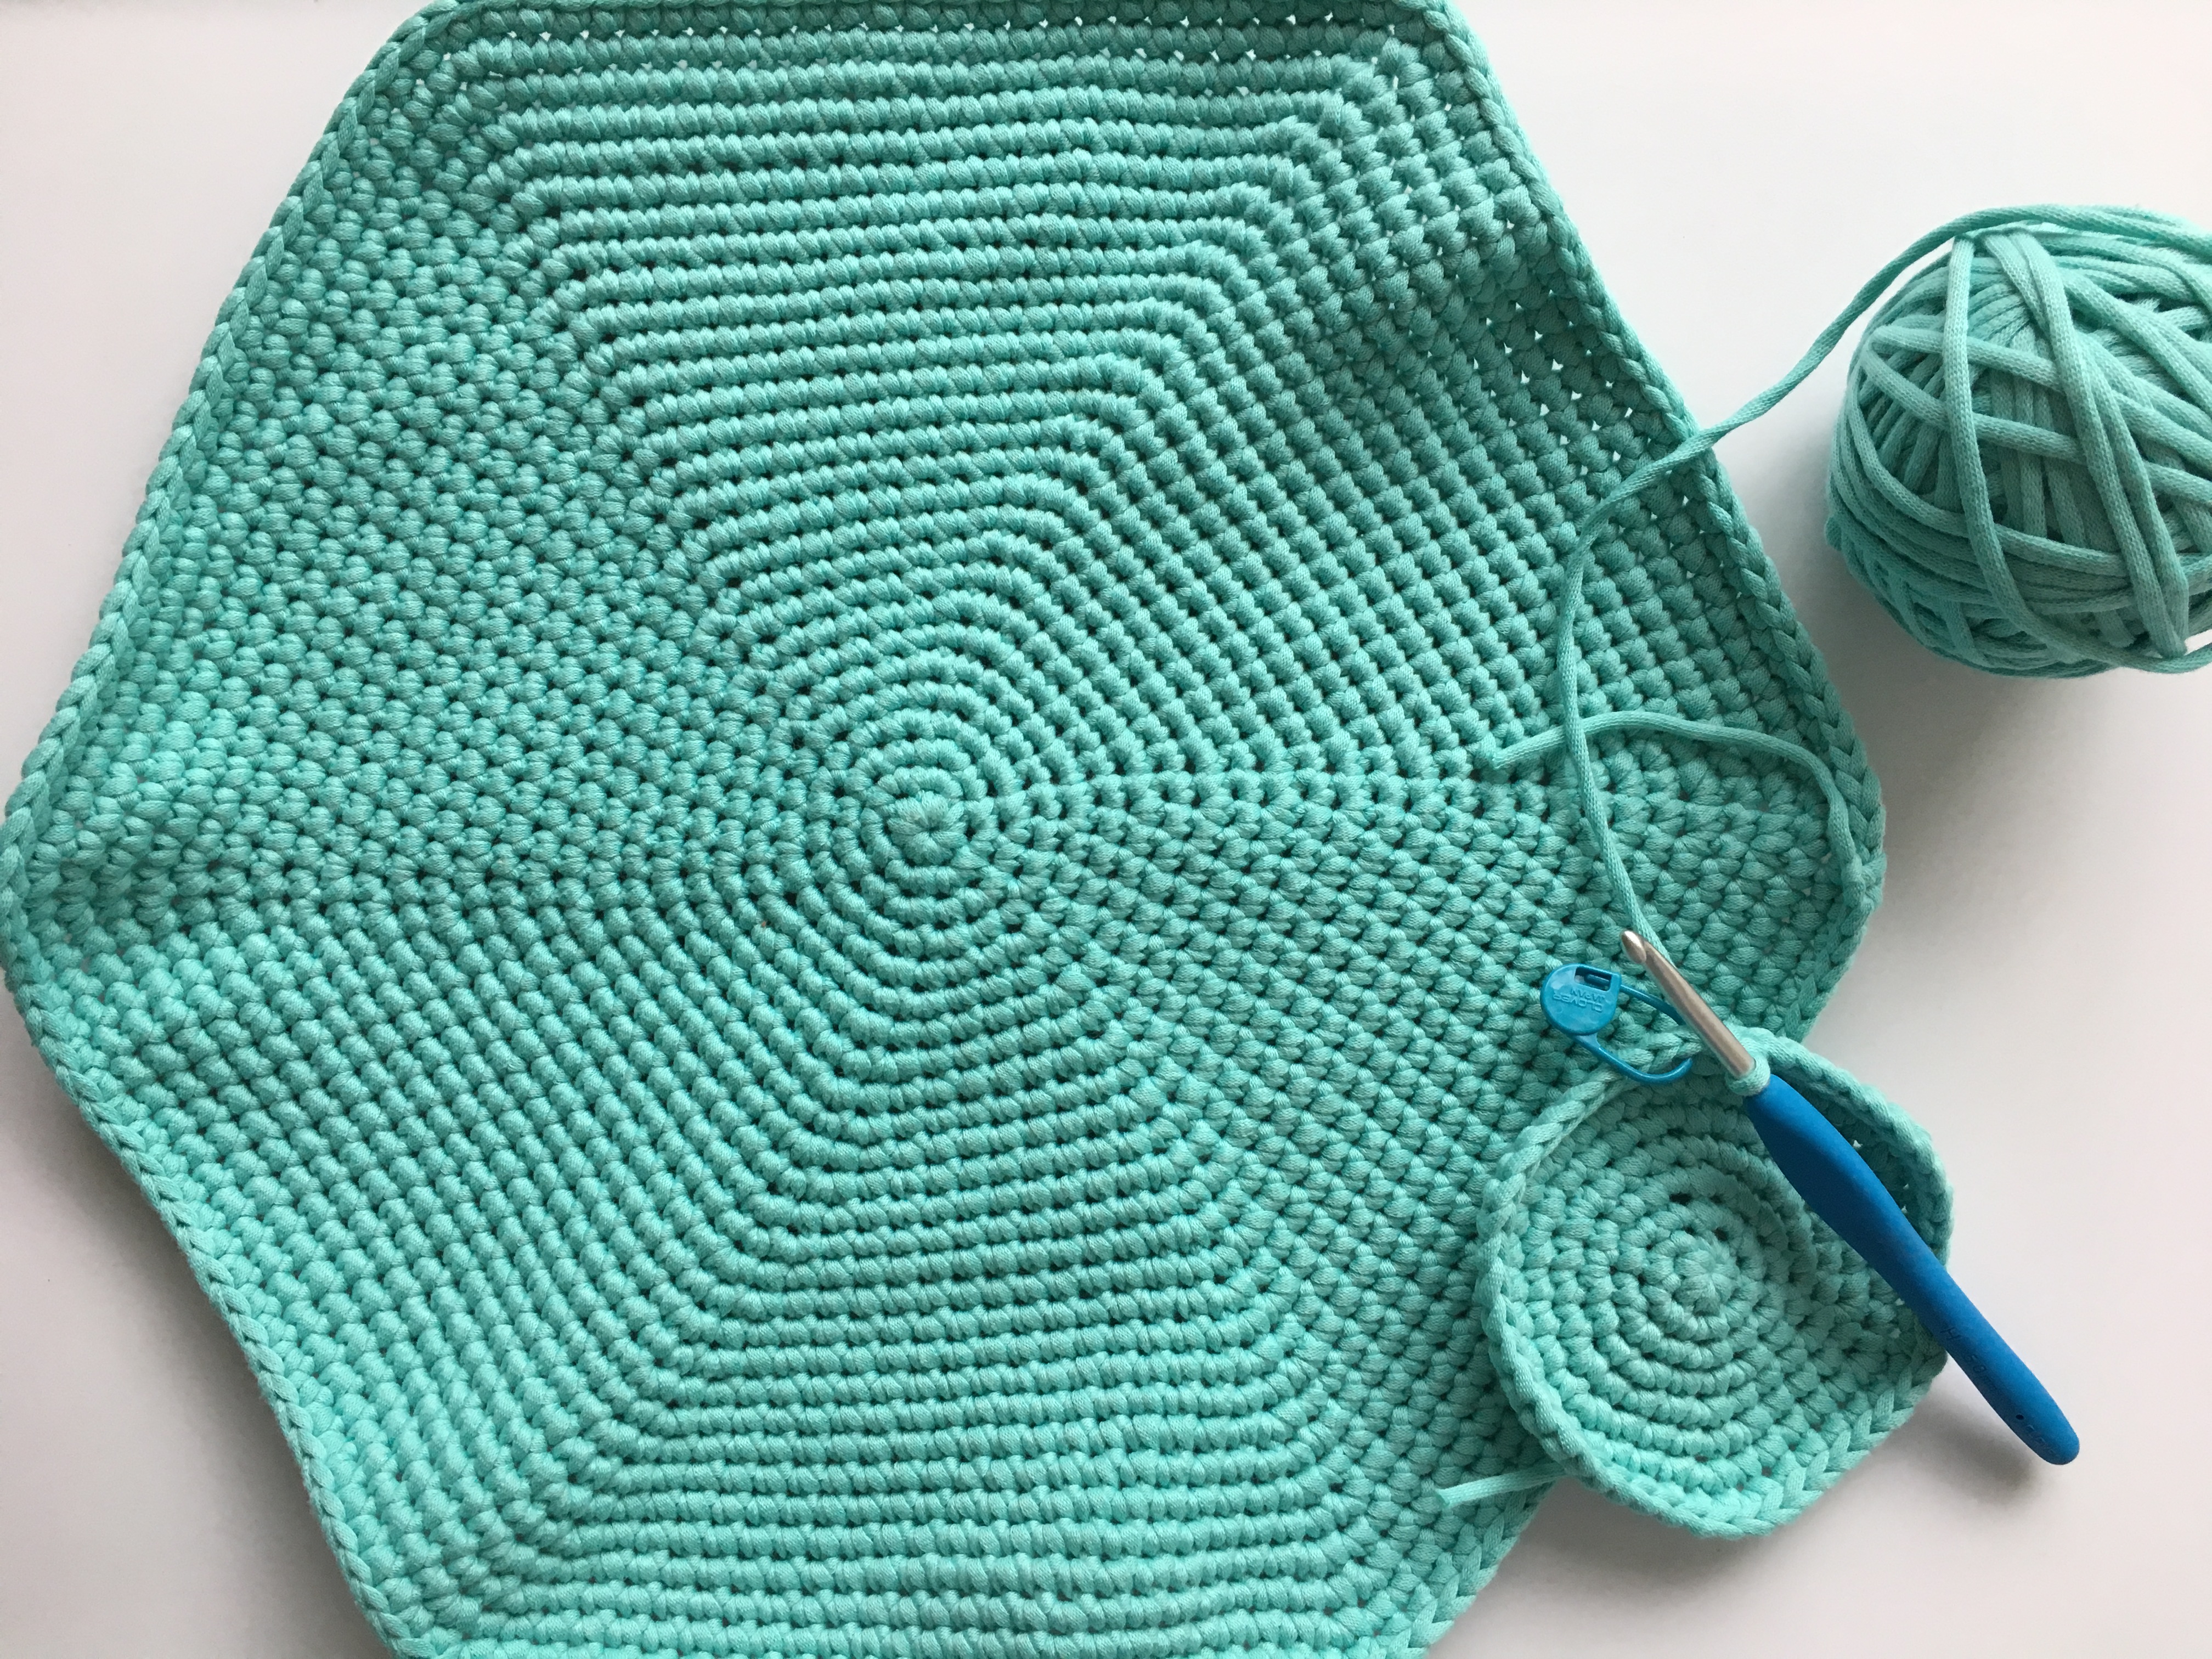
*Using accent color 1
Round 1: Create a magic circle, ch 1, and sc 6 into the ring (6)
Round 2: Inc in each stitch around (12)
Round 3: *Sc, inc* around (18)
Round 4: *Inc, sc 2* around (24)
Round 5: *Sc 3, inc* around (30)
Round 6: *Inc, sc 4* around (36)
Round 7: *Sc 5, inc* around (42)
Round 8: *Inc, sc 6* around (48) at this point, the diameter of your end should be 4” across.
Round 9: *Sc 7, inc* around (54)
Round 10: *Inc, sc 8* around (60)
Round 11: *Sc 9, inc* around (66)
Round 12: *Inc, sc 10* around (72)
Round 13: *Sc 11, inc* around (78)
Round 14: *Inc, sc 12* around (84)
Round 15: *Sc 13, inc* around (90)
Round 16: *Inc, sc 14* around (96)
Round 17: *Sc 15, inc* around (102)
Round 18: *Inc, sc 16* around (108)
Round 19: *Sc 17, inc* around (114)
Round 20: *Inc, sc 18* around (120)
Round 21: *Sc 19, inc* around (126)
Round 22: *Inc, sc 20* around (132)
Round 23: *Sc 21, inc* around (138)
Round 24: *Inc, sc 22* around (144)
Round 25: *Sc 23, inc* around (150)
Round 26: *Inc, sc 24* around (156)
Round 27: *Sc 25, inc* around (162)
Round 28: *Inc, sc 26* around (168)
Fasten off.
Body of bag:
*Starting in main color
Row 1: FSC 84 (if you prefer, you may ch 85 and then sc across starting in 2nd ch from hook).
Row 2: Ch 1, sc across, turn.
Row 3 – 62: Repeat row 2.
Row 63: Ch 1, sc across, placing stitch markers at stitches 22, 28, 56, and 62 – this is where you will attach handles later. Switch to accent color 2.
Row 64-105: Repeat row 2 in accent color 2, then switch back to main color.
Row 106: Ch 1, sc across, placing stitch markers at stitches 22, 28, 56, and 62 – this is where you will attach handles later.
Row 107 – 167: Repeat row 2 in main color.
Row 168: Ch 1, sc across. Fasten off.
Pocket (grit stitch):
*In accent color 1
Your pocket should measure roughly 6.5” across and 6.75” tall. You will attach to your bag between the handles.
Foundation row: Ch 27
Row 1: Skip first two chains (counts as stitch), dc in next chain. *Sk next ch, sc and dc in next*, repeat from * to * until 2 ch remain. Sk next ch and sc in last. Turn.
Row 2: Ch 1 (counts as stitch), dc in first stitch. *sk next dc, sc and dc in next sc*. Repeat until two stitches remain. Skip last dc, sc in turning ch. Turn.
Row 3-18: Repeat row 2.
Row 19: Ch 2, hdc across.
Fasten off and weave in ends.
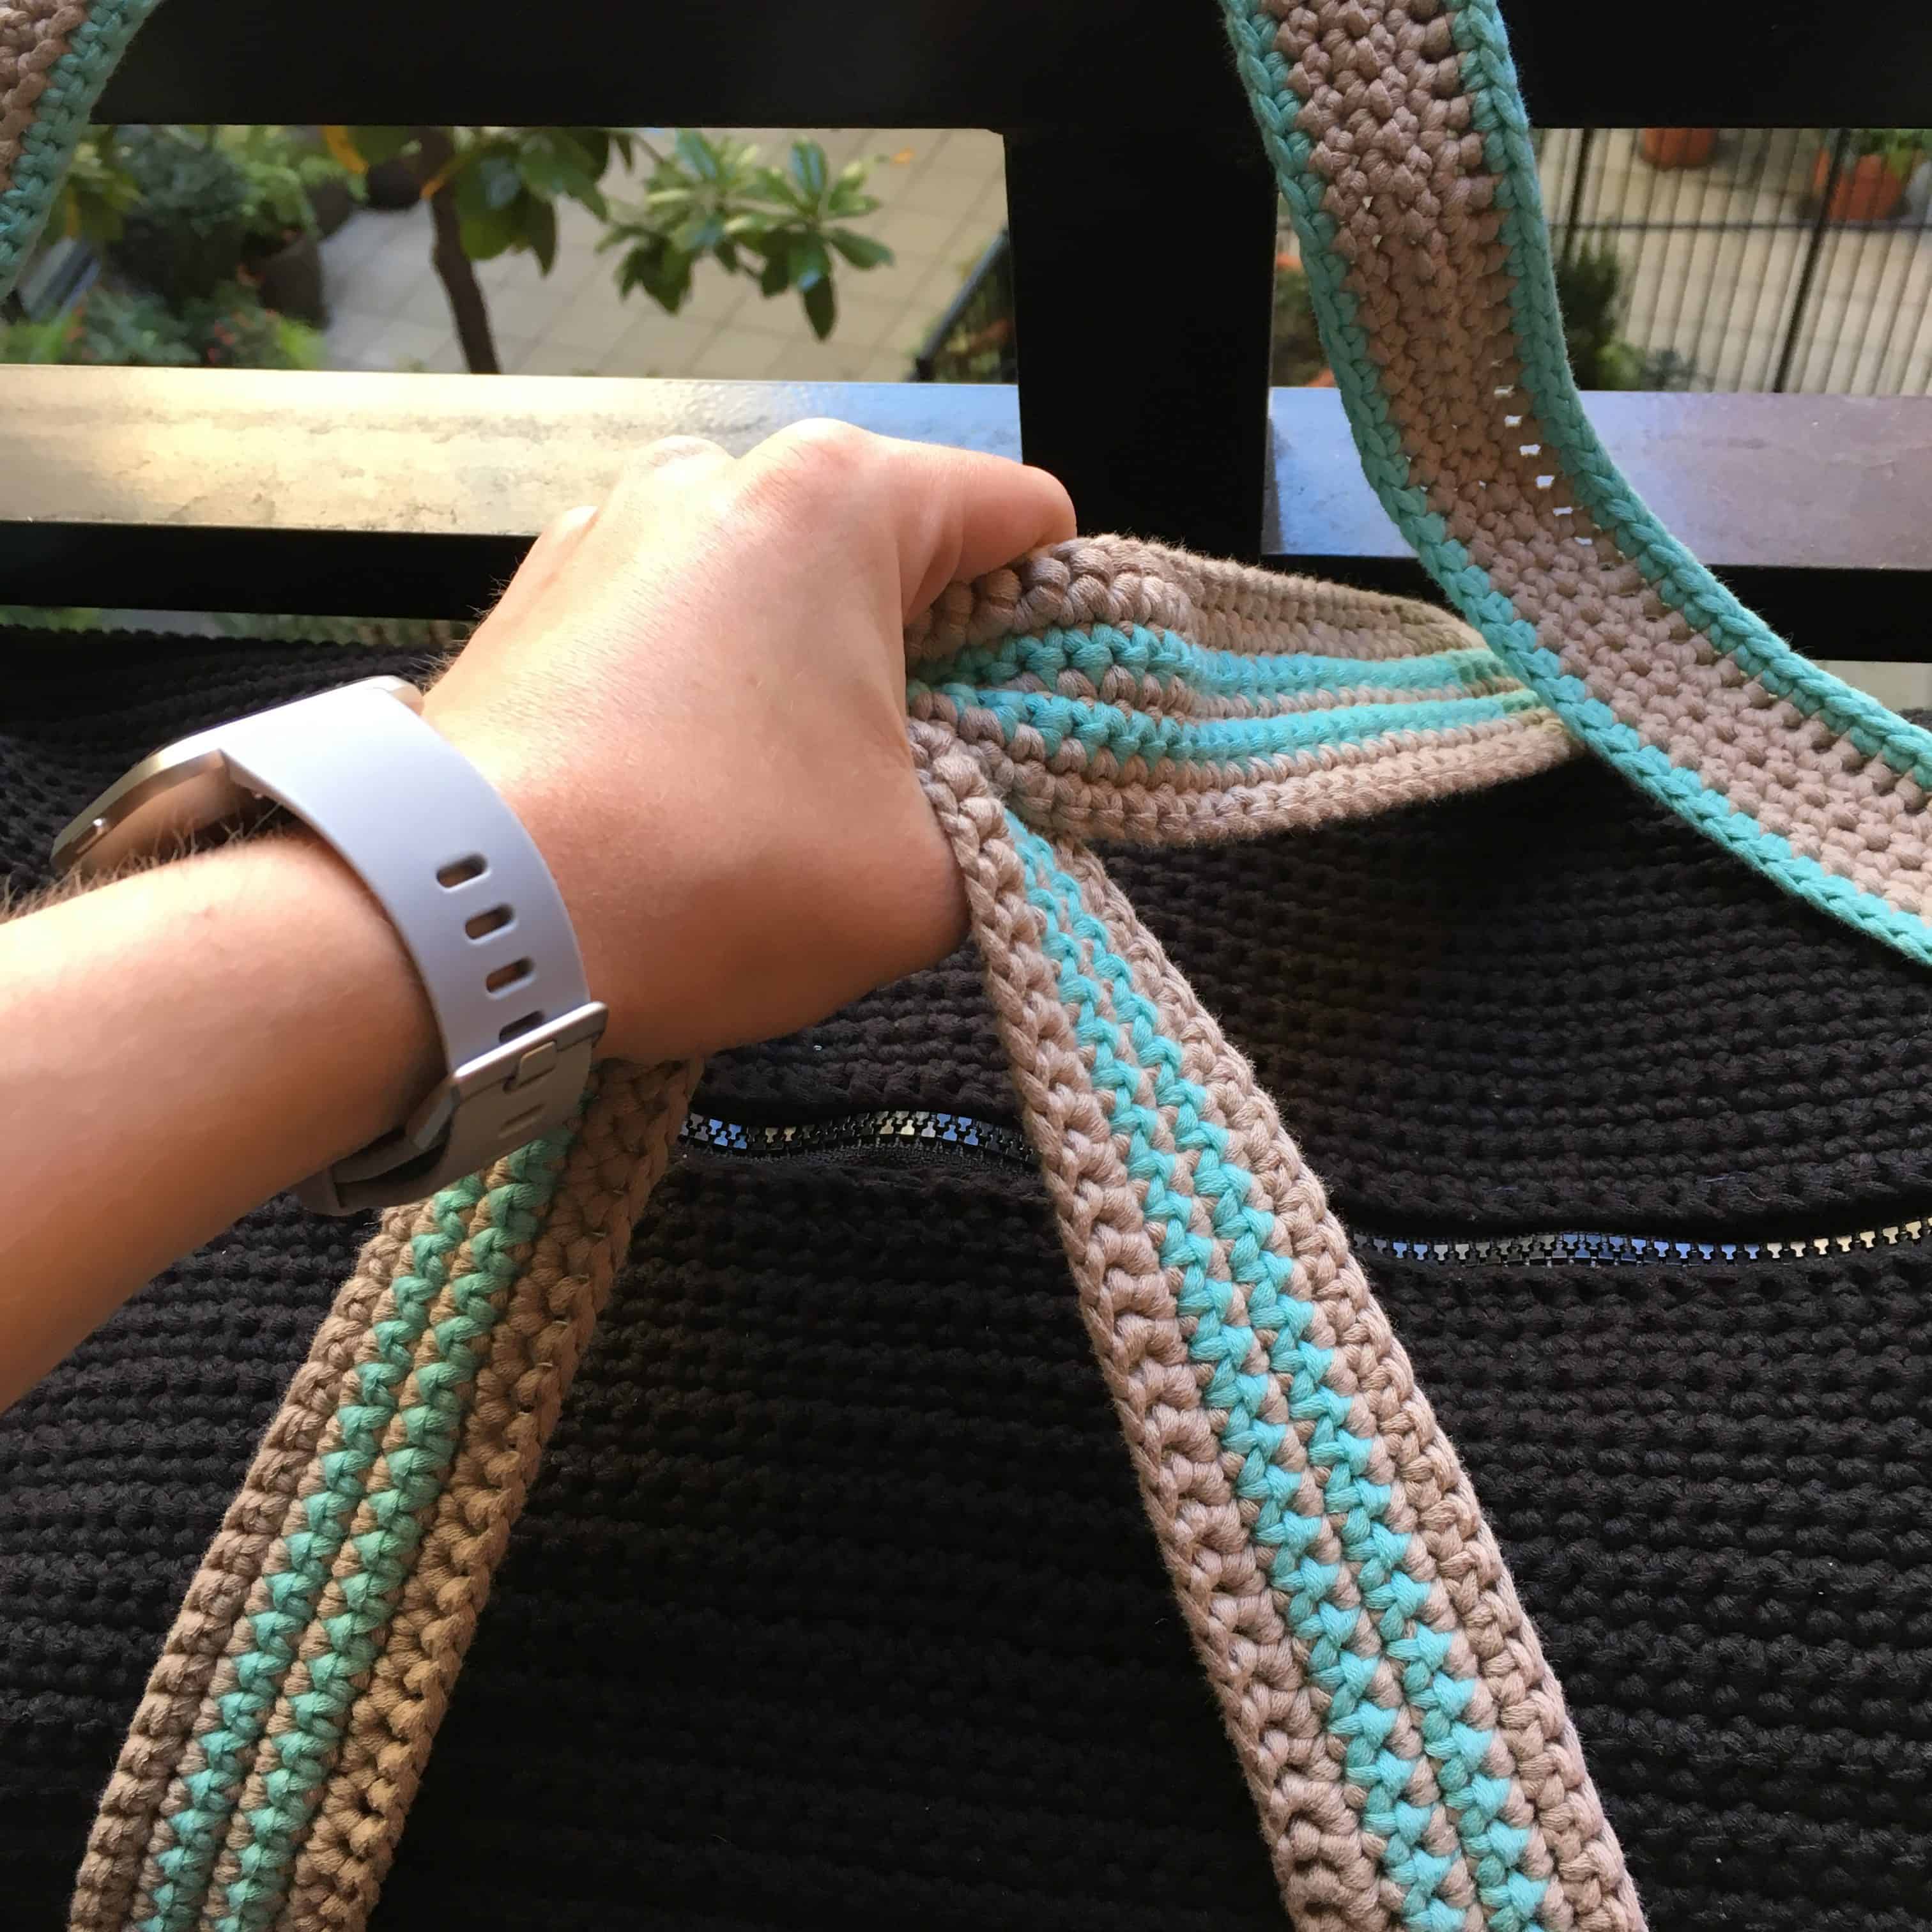
Handles (make 2):
Row 1: FSC 130 in accent color 2, turn.
Row 2: (Begin carrying accent color 1) ch 1, sc across, turn (130).
Row 3: Switch to accent color 1, ch 1, sc across, turn (130).
Row 4: Switch to accent color 2, ch 1, sc across, turn (130).
Row 5: Repeat row 3
Row 6: Repeat row 4
Row 7: (Stop carrying accent color 1) ch 1, sc across. Fasten off (130)
Shoulder Strap (Optional)
Your shoulder strap will be about 42” long. To increase length, add stitches to each row.
Starting with accent color 2
Row 1: FSC 166, turn (166).
Row 2: Ch 1, sc across, turn (166).
Row 3-5: Repeat row 2.
Fasten off.
Attach accent color 1
Sc around entire strap, placing 3 stitches in each corner.
Assembly:
Body:

- Pocket: Position your pocket at the edge of accent color two between the inner two stitch markers and sew around sides and bottom, using method of your choice.
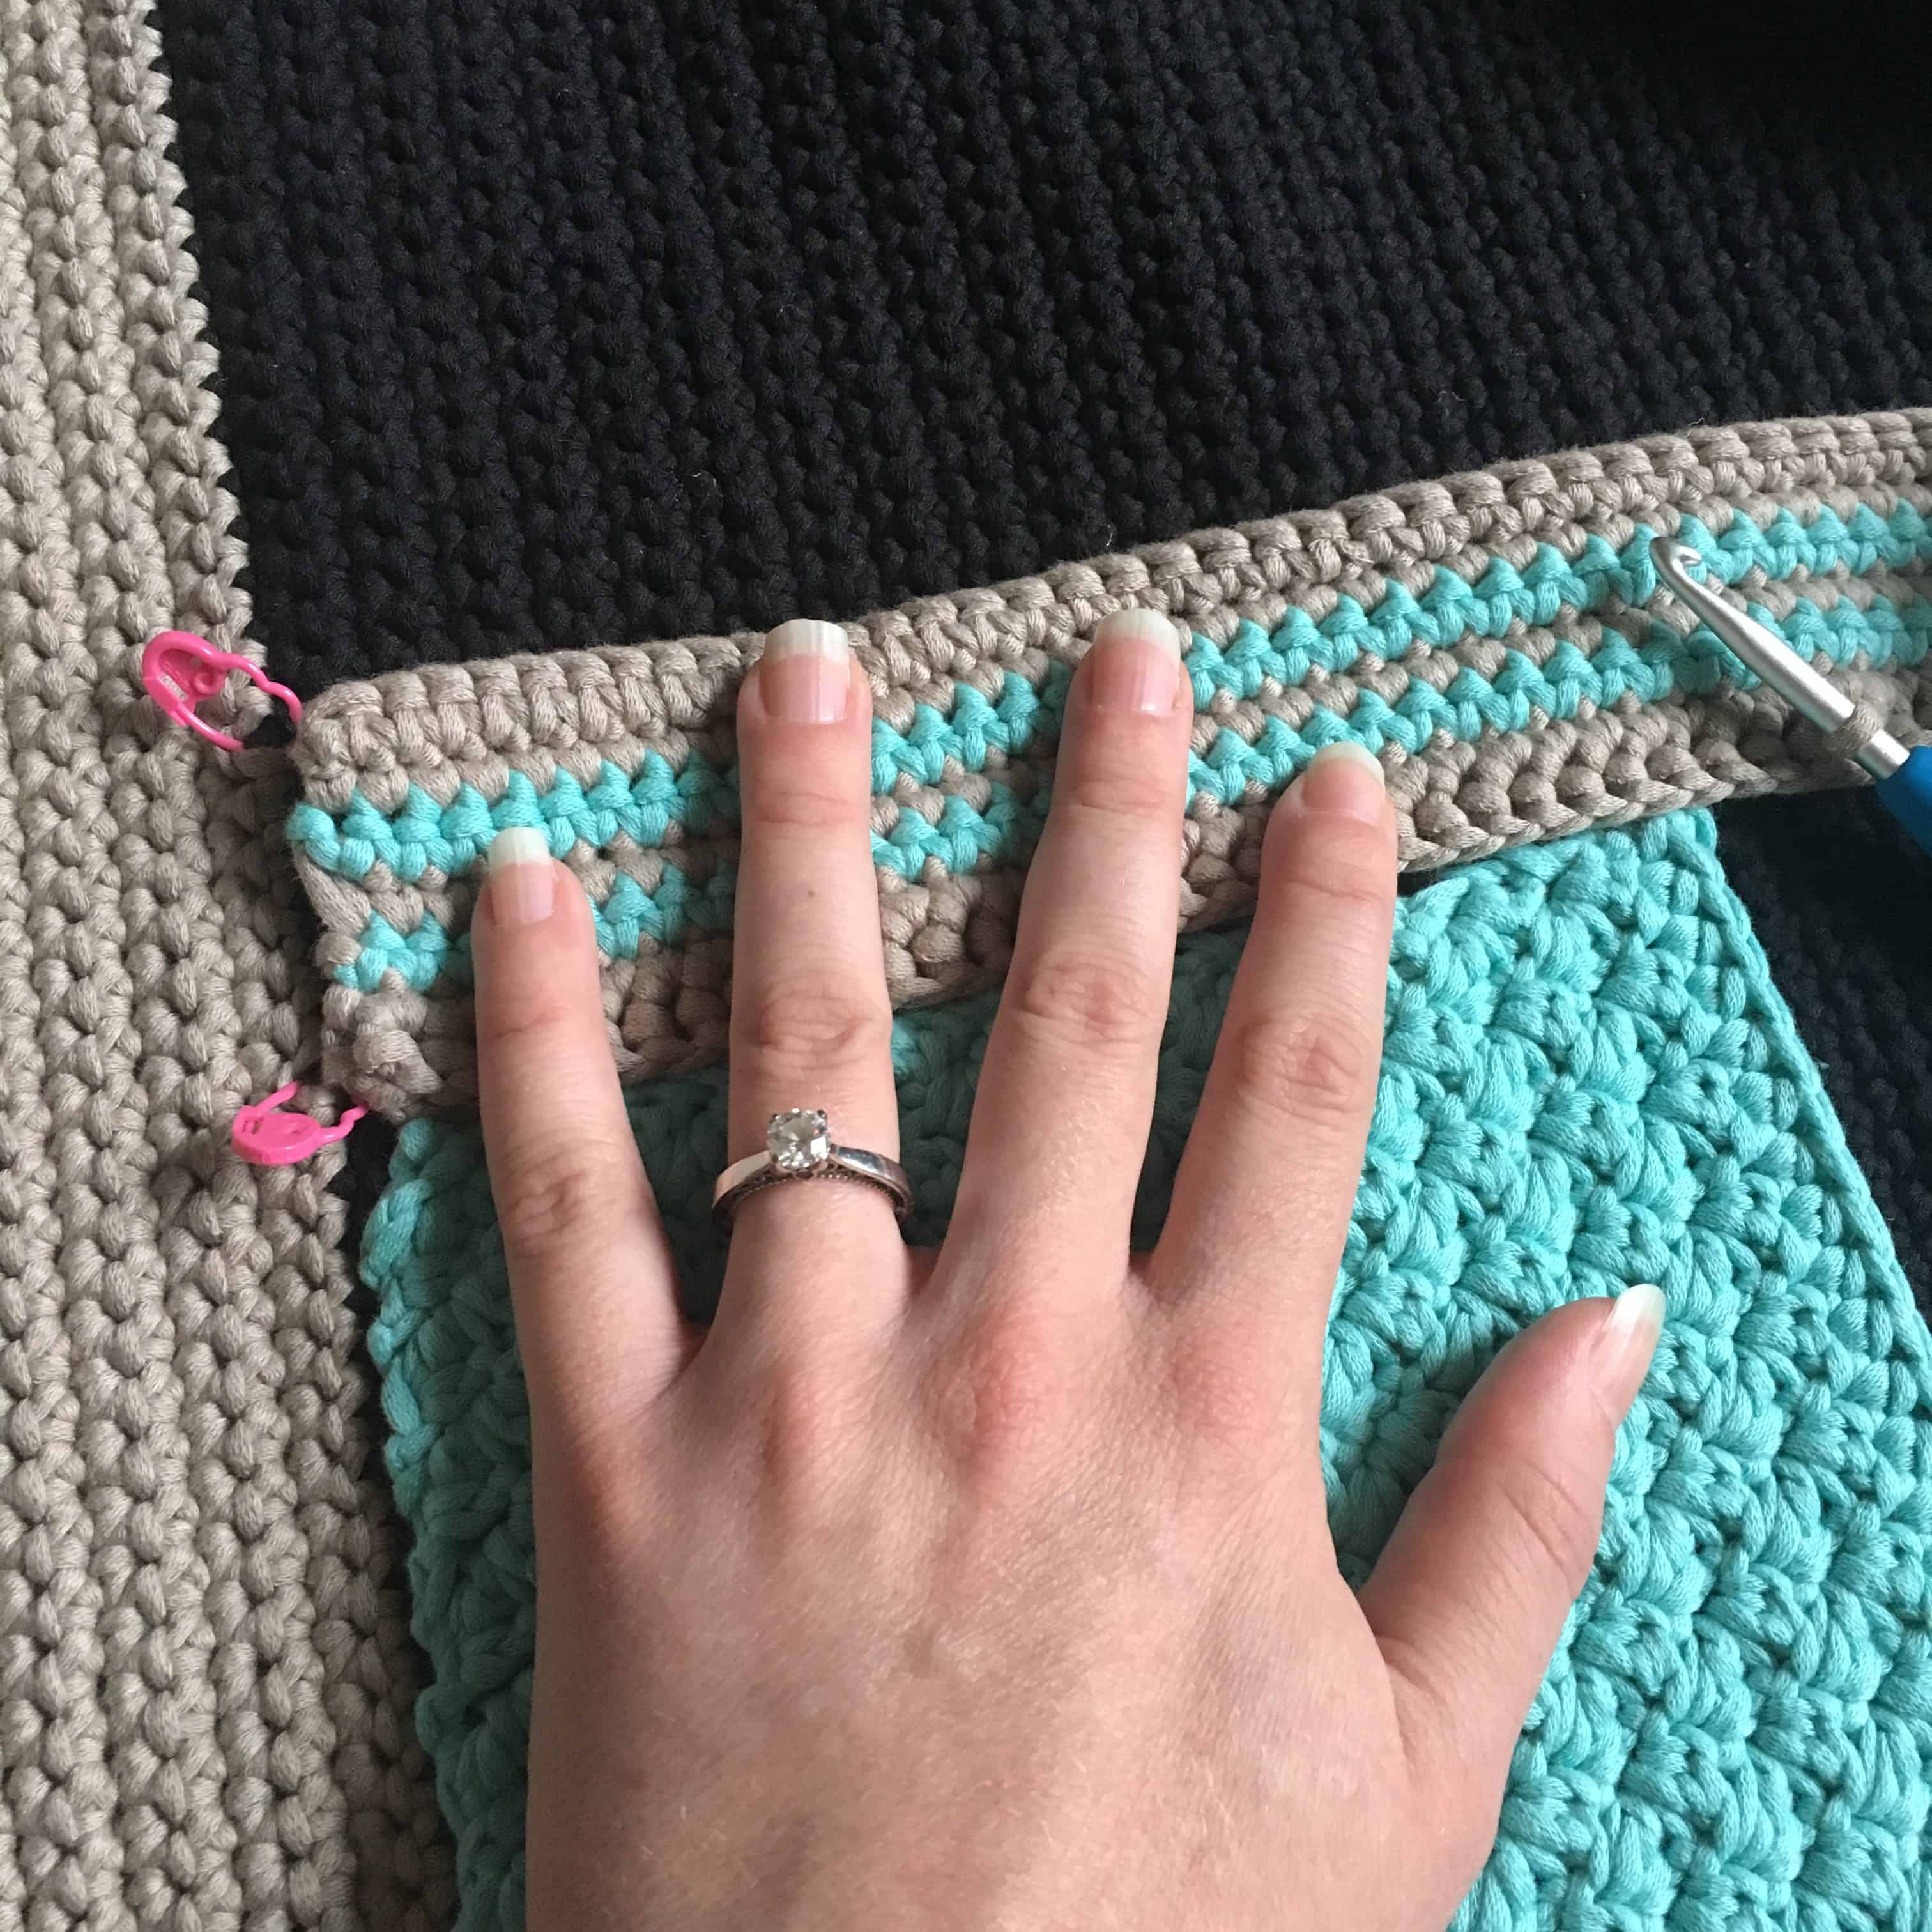
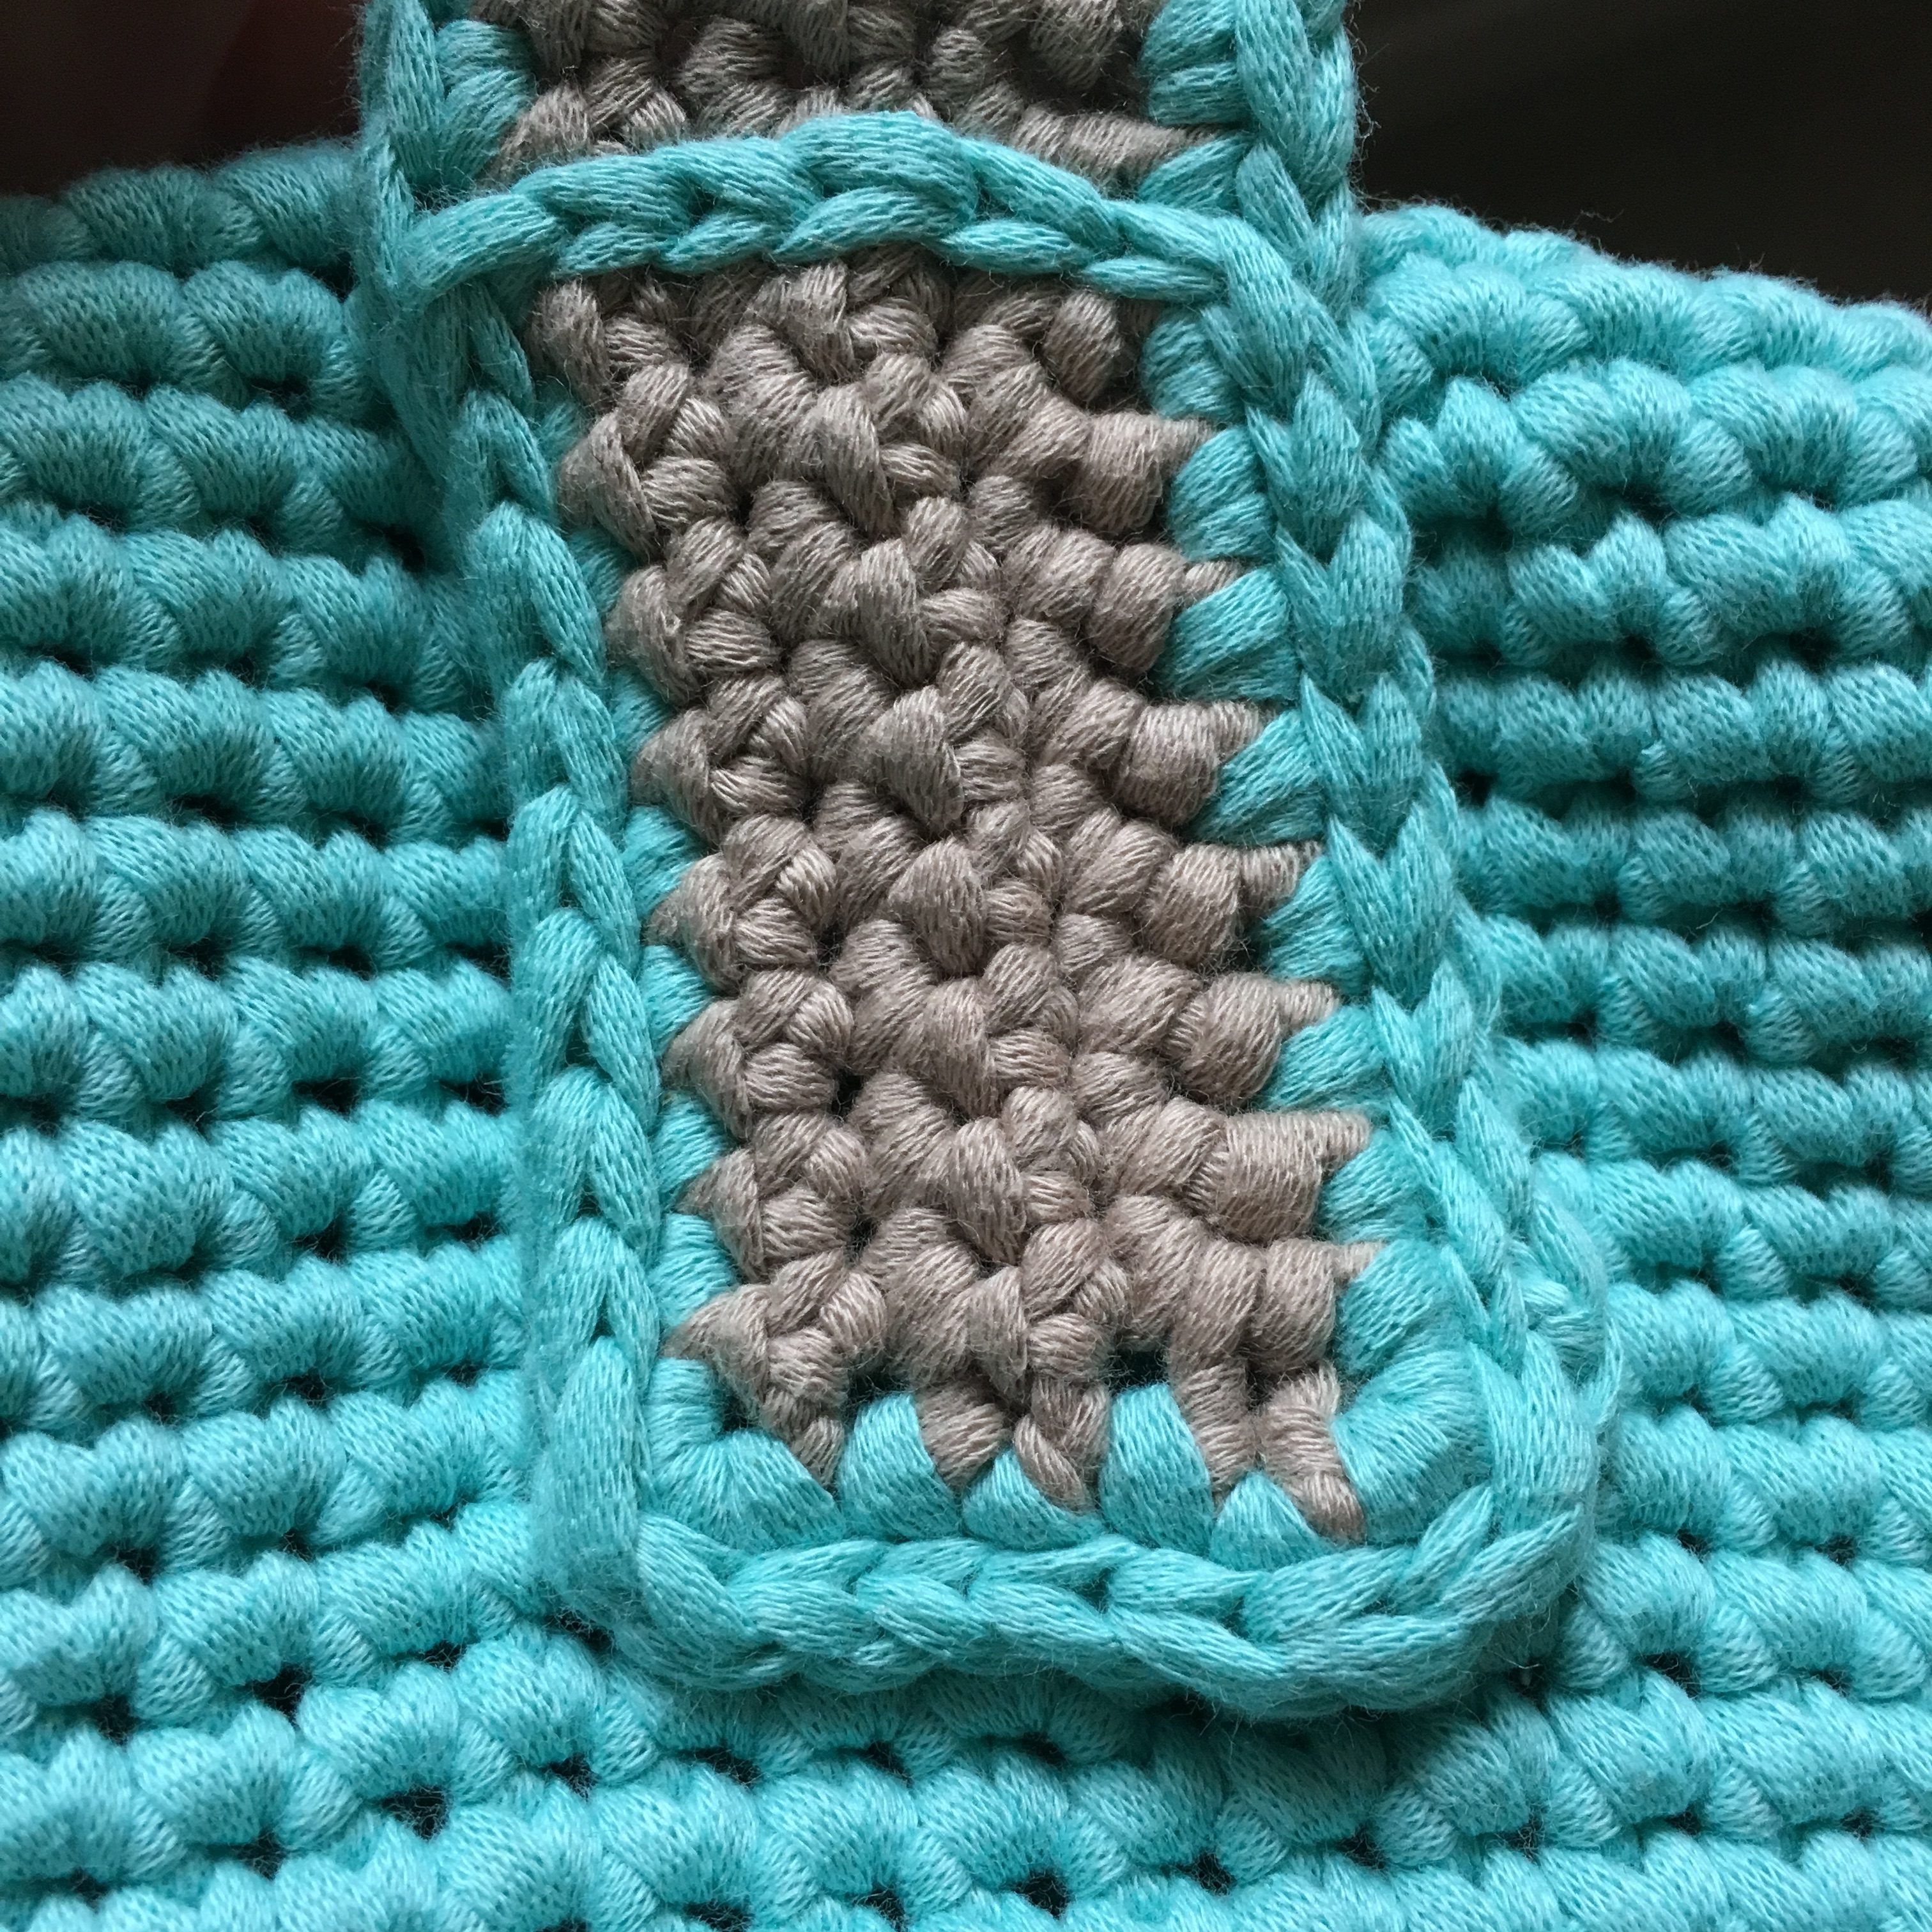
- Handles: pin handles to marked stitches at edge of accent color 2. Insert hook on one edge roughly 2 rows above top of pocket and surface slip stitch down to accent color 2, across handle, back up to 2 rows above top of pocket, and back across. See photo below for reference.Repeat on the other side.
- End Pieces: To attach end pieces, pay bag with right sides facing in and line up one edge of your bag with the middle of one side of your end piece. Bag will be seamed inside out until after you attach the zipper. Sc around to seam the body around the first end piece, with each row lining up with a stitch in the final round of your end piece.Seam body around second end piece, again with each row lining up with a stitch in the final round of your end piece.
Zipper:
Leave bag inside out. Your zipper will be longer than the opening of the bag – line up the zipper so that the excess is at one end, the end that does not open. Pin in place and sew in zipper using needle and thread. Flip bag right side out.
Shoulder strap (optional):
Line up row 4 of shoulder strap with zipper and bring about 2” of your strap over to end piece. With accent color 1, use surface slip stitches to attach on end piece in similar fashion as handles on side.
Repeat on the other side.

Pom pom flair!
Use your 1” pom maker to make a small pom (or two depending on your zipper). Tie this to the zipper pull(s).
Use your 2.5” pom maker to make a second pom pom, leaving yourself a long tail. Tie the ends of the tail together and loop around handle.

Weave in all your ends, and you’re done!
Congrats on making your weekender bag! If you share it on instagram, please tag me @sarahsyarn or using #sarahsweekender or #sarahsyarn.
*****
This pattern is an original design by Sarah’s Yarn and is for personal use only. Please do not redistribute, sell, or edit this pattern. You may sell items made from this pattern, but please credit @SarahsYarn as the original pattern creator.
You can find me on the internet through Instagram, Ravelry, Pinterest, or my blog!
Stay connected with Clover on Facebook | Twitter | Instagram | Pinterest | YouTube | Ravelry
[mc4wp_form id=”11289″]